Showing posts with label weekend sketch challenge. Show all posts

Sunday, May 18, 2008

For my Son

Using Beate's Weekend Sketch Challenge 48, I created this special card for my son. Well the card itself is not anything earth-shattering, but the sentiment behind it is the important part. This is a card for my son from his soon to be born baby sister. The inside (didn't take a picture because it really is nothing beautiful) says "Thank you for being my BIG BROTHER!".
We are having Baby Girl give her Big Brother a gift (Lightning McQueen Car...something he wanted) and this card. Knowing that she will be getting a lot of gifts, we wanted to make sure that he doesn't feel left out. It is a big moment in his life too afterall!


Anyway regarding the card, I stamped the crocodile and flower in Craft White ink and then rubbed pastels over top...think this is called the chalkboard technique. I think it probably would have looked better on darker cardstock, but my son will still like it. Gave the croc a heart (from the Happy Heart Day set) and popped it up on dimensionals and made it sparkle. Not much else...everything I think it pretty self-explanatory.

No consistent contractions yet! Just some Braxton-Hicks contractions sporadically. My girlfriends and I went and had pedicures (they are both pregnant too), so now I have pretty feet all ready to go! Just waiting for Baby girl to decide it is time!
The Engineering Details
Stamps - Wild About You, Happy Heart Day, Crosshatch (retired); Paper - Handsome Hunter, Mellow Moss, Barely Banana, Ruby Red, Kraft; Ink - Handsome Hunter, Ruby Red, Basic Black, Craft White; Accessories - Stampin' Pastels, Q-Tips, Scissors, Diamond Stickles, So Saffron Brads, 1/16" Hole Punch, Dimensionals

Tuesday, February 19, 2008

Card Transformations & a Recipe

My Stamp-a-Stack over the weekend went great, but as always I did not budget the time correctly for the cards! I felt so bad that we went over the time I set...not for me, but for all of my attendees that tell their husbands what time they will be home! I promise, I swear, to make sure I stay within the times that I say. This probably means I have to make the projects a second time after I have designed them to see how long they truly take...a step that I very rarely take! So to all of my SAS attendees, please accept my apologies for running long and know that I will work to budget my time better in the future!

After resting on Saturday night...the Stamp-a-Stack wore me out...I started to do a little stamping on Sunday (when I probably should have been doing laundry or ironing!) and realized that I had a pile of extra cut cardstock sitting out. When I prepare for a workshop I always have extras leftover from the make-and-takes...don't want to not have enough for everyone. Usually I just throw it in my scrap pile, but this time I decided let see what else I can make with the pieces. So the first card is what I had at a workshop. Simple, but utilized the Poppin' Pastels technique and gave them a chance to try the Crop-a-Dile for setting the eyelet.
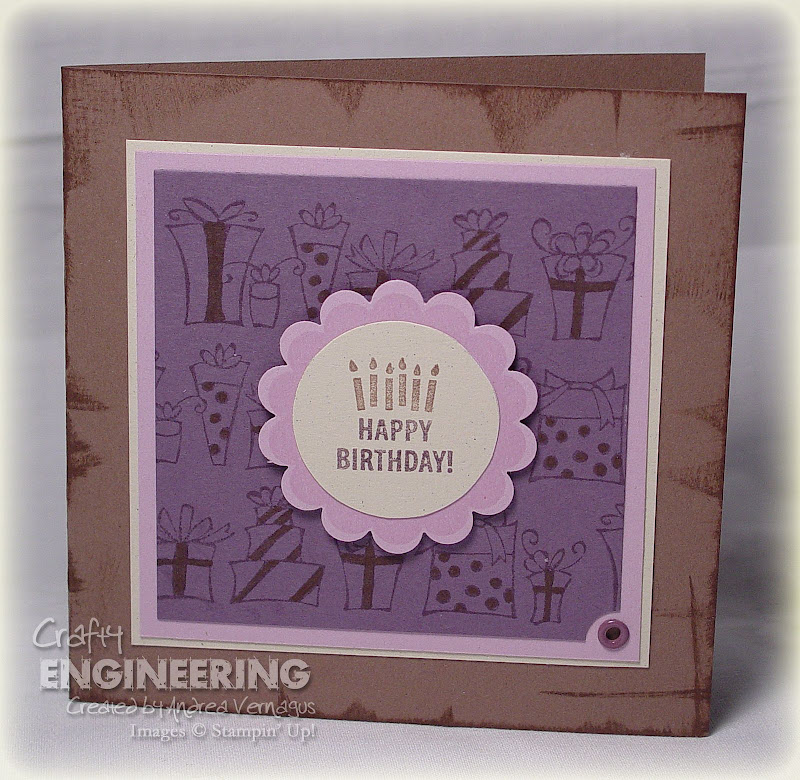


I just recently got a big order (mostly for SAS supplies), but it had some fun stuff for me as well, including my Sale-A-Bration stamp sets! So I broke out the So Many Scallops stamp set and my scallop circle punch and went to town! The Happy Birthday card was not a huge transformation from the original card...I kept most of the same elements and sizes, just added the scallop circle focal point. I utilized the presents stamp from the retired Something to Celebrate set for the background and then added some Close to Cocoa highlights on the presents.
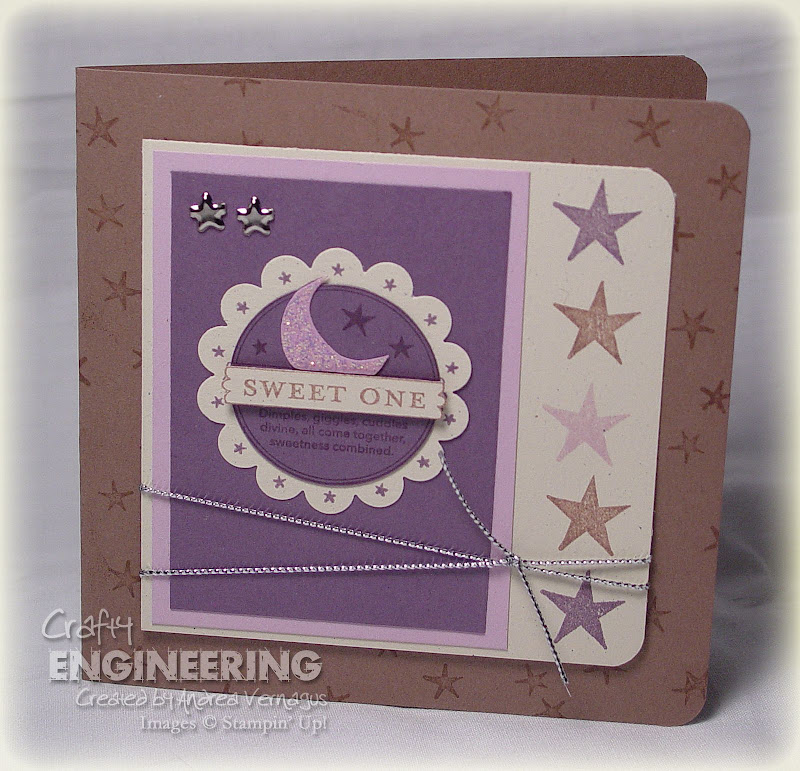


The Sweet One card turned out to be my favorite. I utilized Beate's Weekend Sketch Challenge 35 for the layout...of course I have a square card and I turned the two little accents, but I think it still counts. The Sweet One stamp from So many Scallops was stamped three times and then paper pieced together and Diamond Stickles was added to the moon. I remembered the star in the set Wondrous Gift is a very good match to the stars in the stamp, so I broke it out and stamp the large star in the three colors on the side and the small stars in Close to Cocoa on the background. I decided on some silver cord (retired from SU!) tied around the bottom...mostly because I didn't have a color ribbon that I felt coordinated right...and then added two star brads from Oriental Trading as my two accents (shown in the sketch). We just found out friends of ours had their baby boy, so now I want to repeat this card with blues for them!

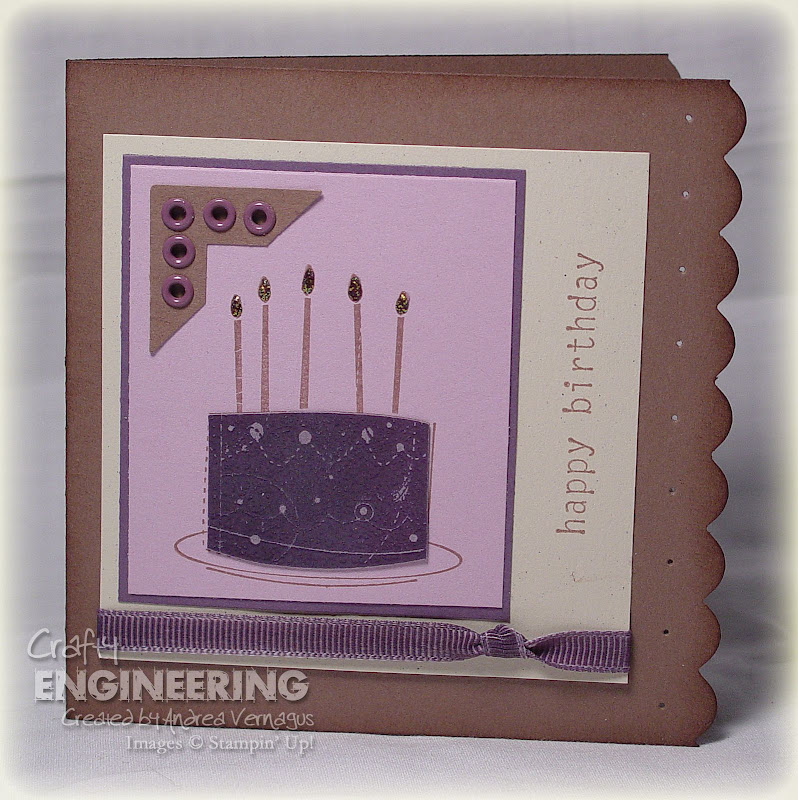
One last one...I wanted to try Beate's sketch one more time...maybe sticking to it a little closer. I broke out my other new Sale-A-Bration stamp set, Birthday Whimsy. Stamped the cake twice, once in Versamark on Perfect Plum and once in Close to Cocoa on Pale Plum. The versamark one was embossed with Crystal Clear embossing powder and then I rubbed Vanilla craft ink over the top to try and highlight the detail on the cake that I felt was getting lost...obviously rubbed off the extra. Layered everything and added a photo corner with eyelets in the corner and a dyed Perfect Plum ribbon with a knot at the bottom. Scalloped the edge of the card using the corner rounder punch...when I did this, I had the card upside down in the punch and it left these little dot impressions on the front of the card, so I paper pierced in those spots. Every mistake has a silver lining...or a piece of cardstock covering it up!

Lastly, the ladies at my Stamp-A-Stack asked me to share the recipe for the soup I served for lunch, so here you go:

Broccoli Wild Rice Soup

1 package (6 oz) Uncle Ben's Chicken & Wild Rice mix
5 cups water
1 package (10 oz) frozen chopped broccoli, thawed
1 medium carrot, shredded
2 tsps dried minced onion (I used onion powder though)
1 can (10.75 oz) condensed cream of chicken soup, undiluted
1 pakage (8 oz) cream cheese, cubed


In a large saucepan, combine rice, contents of seasoning packet, and water; bring to a boil. Reduce heat; cover and simmer for 10 minutes, stirring once. Stir in the broccoli, carrot, and onion. Cover and simmer for 5 minutes. Stir in soup and cream cheese. Cook and stir until cheese is melted. Yields 8 servings (about 2 quarts)


The Engineering Details - Thanks So Much Card
Stamps - Heartfelt Thanks, So Many Sayings (Retired); Cardstock - Close to Cocoa, Vanilla Naturals, Pale Plum, Perfect Plum; Ink - Versamark, Close to Cocoa; Accessories - Stampin' Pastels, blender pen, ticket corner punch, Perfect Plum eyelet; Supplies - Crop-a-Dile, dimensionals


The Engineering Details - Happy Birthday Card
Stamps - So Many Scallops, Something to Celebrate (retired); Cardstock - Close to Cocoa, Vanilla Naturals, Pale Plum, Perfect Plum; Ink - Pale Plum, Perfect Plum, Close to Cocoa, Perfect Plum Marker, Close to Cocoa Marker; Accessories - scallop circle punch, 1-3/8" circle punch, ticket corner punch, Perfect Plum eyelet; Supplies - dimensionals


The Engineering Details - Sweet One Card
Stamps - So Many Scallops, Wondrous Gift; Cardstock - Close to Cocoa, Vanilla Naturals, Pale Plum, Perfect Plum; Ink - Pale Plum, Perfect Plum, Close to Cocoa; Accessories - scallop circle punch, 1-3/8" circle punch, 3/16" corner rounder punch, Diamond Stickles, Silver Cord (retired SU!), silver star brads (Oriental Trading), 1/16" circle punch; Supplies - dimensionals, scissors


The Engineering Details - Birthday Whimsy Card
Stamps - Birthday Whimsy; Cardstock - Close to Cocoa, Vanilla Naturals, Pale Plum, Perfect Plum; Ink - Close to Cocoa, Versamark, Perfect Plum Marker; Accessories - Photo Corner punch, Perfect Plum eyelets, 3/16" corner rounder punch, crystal clear embossing powder, Diamond Stickles; Supplies - heat gun, Crop-a-Dile, paper piercer, Mat pack

Monday, February 11, 2008

Weekend Sketch Challenge

I finished my card last night for Beate's Weekend Sketch Challenge 34. It took much longer than I had anticipated! I had an idea in my head that I was having trouble getting to turn out. So for what it is worth, here is my interpretation of her sketch.

I knew that I wanted to layer the large flower from Time Well Spent. I used Stampin' pastels and a blender pen to color it in. I really like how the shading/highlighting turned out! Kind of impressed with myself on that one. So I may try that aspect of the card again sometime. The large flower is in three layers: the inner circle on a dimensional, the main part which I rotated and put on a couple pieces of cardstock (I didn't want the full thickness of a dimensional), and the base which ends up being mostly just the outer Taken with Teal line. The leaves beneath the flower were stamped and colored and then embossed in clear embossing powder to give them a little shine. I randomly stamped a bunch of the other flowers and leaves on Whisper White in all of the colors of my card and then overlaid that with vellum to tone it down just a little. This is where the trouble began. I couldn't decide how I wanted to attach the vellum...so I sewed the edges, but it came out a little too crooked...then I added the eyelets...then I decided that I needed a greeting or something up by the eyelets...then I couldn't decide if I liked it anymore. Oh well! I also think my background stamping behind my large flower might be a little too much...maybe if I would have just stuck with the leaves. Ahh, I can see I need to try this card again now that my brain is a little more refreshed.

I will be busy preparing for my Stamp-A-Stack on Saturday the rest of the week...lots of cardstock to cut! So I apologize in advance for my silence! Have a great week!!!

The Engineering Details
Stamps - Time Well Spent, Happy Everything; Cardstock - Old Olive, Pumpkin Pie, Taken with Teal, Whisper White, Vellum Cardstock; Ink - Old Olive, Pumpkin Pie, Taken with Teal, Rose Red, Basic Black, Versamark; Accessories - Black embossing powder, Crystal Clear embossing powder, Ice Rhinestone brad, Silver Eyelets, Moss Gingham Ribbon, sewing machine; Supplies - dimensionals

Tuesday, February 5, 2008

Weekend Sketch Challenge in the Nick of Time!


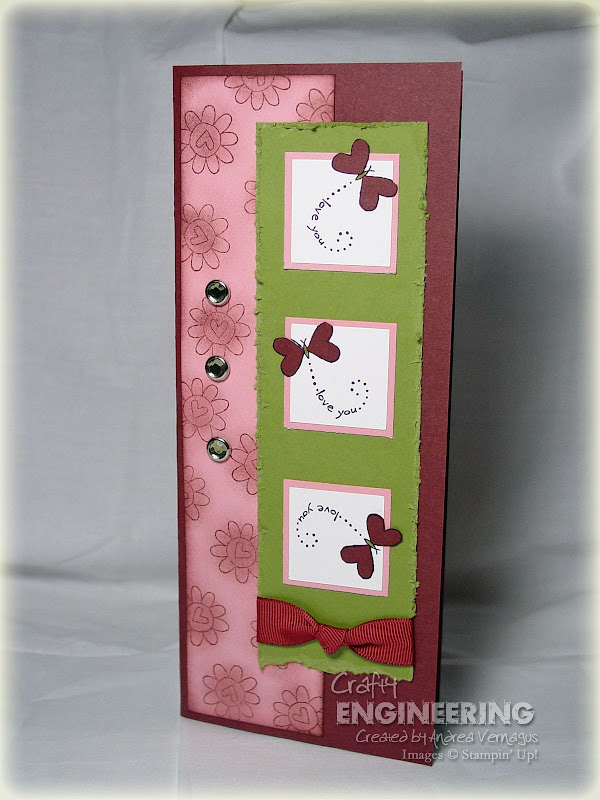
I am always running late on getting Beate's Weekend Sketch Challenges done in time...not sure why, but I always am. Almost did not get this one done in time too even though I had the idea in my head as soon as I saw the sketch, but due to my son and husband being sick today, I stayed home to care for everyone and got it done during nap time. It is looking like I may be home again tomorrow...they weren't looking too good as they fell asleep tonight!


Anyway, I love this sketch even though tall cards are a little out of my comfort zone. I also decided to incorporate the SCS Color Challenge color combo too...woohoo double challenge! I have been playing a lot with the Happy Heart Day stamp set (as you will see on my blog) and thought about the butterflies flying around the squares as soon as I saw the sketch. The are stamped in black and then I paper pieced the wings in Baroque Burgundy. The Old Olive background piece was distressed on the edges and torn at the bottom. I added the 5/8" Baroque Burgundy grosgrain ribbon with a knot at the bottom, but decided against adding the tag...just wasn't feeling what I would put on it. The side Pretty in Pink piece was stamped with Baroque Burgundy ink and sponged with the same ink. I didn't have any patterned paper that would work so it was my attempt at making it myself. Thought it turned out pretty good. I like the addition of the Rhinstone brads...although it took a little convincing of myself to part with 3 of them on one card! Not much complicated here, but I am pleased.

The Engineering Details
Stamps - Happy Heart Day; Ink - Baroque Burgundy, Basic Black, Old Olive Marker; Cardstock - Baroque Burgundy, Pretty in Pink, Old Olive, Whisper White; Accessories - Ice Rhinestone Brads, 5/8" Baroque Burgundy grosgrain ribbon; Supplies - sponge, scissors

Monday, January 28, 2008

So Kind

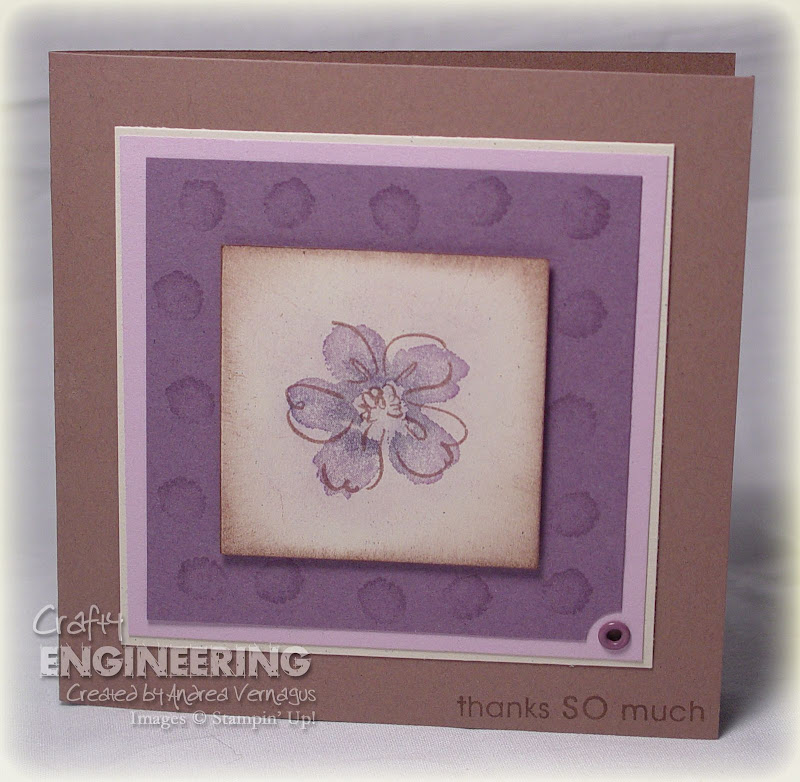
This is a detailed peek at one of the Stamp-A-Stack cards: Thank You card. I love the versatility of the Priceless stamp set, with all of its individual images (heart, flower, butterfly, etc). Plus the swirls are so fun! I used Beate Johns’ Weekend Sketch Challenge #32 for the layout of the card…love her sketch challenges! I swapped sides though from her sketch once I stamped my swirl and butterflies and realized that there was an empty space on the left side instead of the right. I think it still counts in following the sketch!

I probably could have added a lot more bling, pizzazz, etc. to this card, but I was trying to keep it a little simpler since it was for a Stamp-A-Stack. Although, I am guessing this is the one that gets complained about due to the cutting out of the butterflies…there is always one card every year that gets some grumbling because of the time consuming aspect of it…I just tell them to suck it up for the beauty of the card! Hehe! The swirl and butterflies were stamped in Sahara Sand and then the butterflies were stamped in the three colors and the wings were cut out and popped up. I really like how that part turned out. Then to keep it simple, I just stamped the little flower in the background and added the “So Kind” greeting. Hopefully it won’t be too bad. I have a hard time judging how long a card will take to make because I am designing it at the same time as making it, so it naturally takes longer!

The Engineering Details
Stamps – Priceless; Ink – Sahara Sand, Not Quite Navy, Elegant Eggplant, Pink Passion; Cardstock – Sahara Sand, Elegant Eggplant, Not Quite Navy, Pink Passion, Whisper White; Accessories – Dimensionals; Supplies – scissors

Wednesday, January 23, 2008

Weekend Sketch Challenge…well sort of

Well I was all pumped up to get back into some stamping this last weekend, although I will admit I was nervous too because it had been so long! I was feeling a bit under the weather, so I kept putting it off as my list of to-dos got ever longer. I started working on some samples for my upcoming annual Stamp-A-Stack or as my good friend like to call it, Stamp-Attack and thought I would garner some inspiration from the amazing Beate Johns Weekend Sketch Challenge. I swear I did look at the sketch, but for some reason it translated a little different in my brain. Anyway, this card which will be the Anniversary card in my Stamp-Attack, was the result. Comparing back to the actual Sketch that Beate created, I don’t think I did a very good job…but I liked the card nonetheless (plus I didn’t submit it to Beate in time for her challenge, but oh well…maybe next week).

I finally got to ink up the FREE (yes, free to demonstrators…so great sometimes to be a demonstrator) hostess set that I got awhile ago. I really like the set…it has a lot of pieces to make it very versatile. You can earn it by hosting a workshop that totals $500 or more, which could be fairly easy to reach with Sale-A-Bration coming in February!

My only problem with the card is that I used a non-Stampin’ Up! product on it which I hate to do for my Stampin’ Up! events. I needed to add some sparkle to the card…it was literally screaming at me to add sparkle! So I added some Diamond Stickles to the purple parts of the images…just added that extra something. Granted I probably could have done this with some of SU! Products (dazzling diamonds and Crystal Effects), but it would be much more time consuming and messier. So I hope I can be forgiven for that! Due to the coloring this may be a time consuming one, so I better try and keep some of the other ones a little simpler. Keep a look out for my other Stamp-Attack (this name is growing on me!) samples to come…I should have them all, along with an evite invitation, by the end of the weekend!


The Engineering Details
Stamps – Time Well Spent (Hostess Level 3); Ink – Basic Black, Close to Cocoa Marker; Cardstock – Perfect Plum, Rose Red, Regal Rose, Close to Cocoa, Shimmery White; Accessories – Stampin’ Pastels, Blender Pen, Diamond Stickles; Supplies – Paper Piercer, Post-it Note for masking

Sunday, September 16, 2007

Weekend Sketch Challenge #19 (and #18)

Well I actually completed one of Beate's Weekend Sketch Challenges over the weekend! I know, I am kind of impressed myself! I didn't do anything too crazy with the card. I did cheat a little though....after seeing one of Beate's examples, I stole the idea for the ribbon and the hodgepodge hardware (hope that is o.k. Beate!). For some reason the pictures that I took today don't look the greatest...actually as I typed that I realized what it was. When I saved the picture after putting my name on it, I have it on compressing the file a lot...blah! Oh well, no time right now to fix. Updated: I reposted the picture...so mch better! Anyway, only "special" thing done here was masking of the flowers as I stamped the bouquet of them. Oh and I used my scissors to distress the edges of the Elegant Eggplant cardstock.


The Engineering Details

Stamps: Heartfelt Thanks, Word by Word, Canvas
Inks: Ruby Red, Really Rust, Elegant Eggplant, Apricot Appeal, Old Olive
Cardstock: Old Olive, Elegant Eggplant, Really Rust, Ruby Red, Naturals Ivory
Accessories: Apricot Appeal Grosgrain ribbon, Hodgepdoge Hardware - Pewter, Hemp Twine, dimensionals


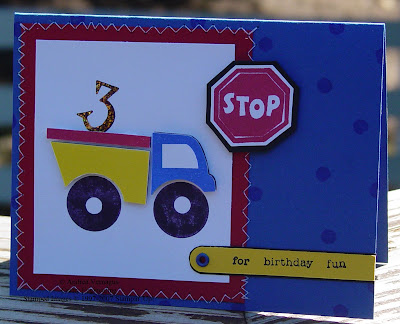
I did this for last weekend's sketch challenge (#18), but I just finished it this morning! Oh well, better late than never? Obviously it is for a wonderful little boy turning 3! Again I made a mistake in compressing the file too much, so the picture is sucky...sorry about that! Updated: I reposted this one as well...ahhh, much better! Not sure you can tell from the picture, but the sections of the truck are popped up....makes the truck stand out a bit. I actually used an eraser to "stamp" the blue polka dots on the background. My finishing touches are sewing around the edges and adding a little sparkle to the #3.


The Engineering Details

Stamps: By Land, Everyday Flexible Phrases, Quirky Numbers (Retired)
Inks: Basic Black, Real Red, Brilliant Blue, Yoyo Yellow
Cardstock: Brilliant Blue, Real Red, Yoyo Yellow, Basic Black, Whisper White
Acceories: Brilliant Blue Eyelet, dimensionals, Word Window Punch, Sewing Machine, Icicle Stickles, Eraser

Sunday, September 2, 2007

Weekend Sketch Challenge #17

Here is another of Beate's Weekend Sketch Challenges. She did a circle again...which I tend not to do well with. But I think I managed this time better than last time.
I combined this sketch challenge with a technique challenge on Splitcoast Stampers. The technique challenge was to do a double resist or basically combined Emboss Resist and Versamark Resist.

Emboss Resist: stamp with versamark on glossy paper and emboss with clear embossing powder. When you apply the ink with a sponge or brayer, the embossed images with resist the ink. I always rub a tissue over top to get any ink left on the embossed images.

Versamark Resist: stamp with versamark on glossy paper. Then using a sponge or brayer, apply ink to the paper. The versamarked images will resist the ink and leave a faint image. This technique has also been called 'ghosting'.

To combine the two techniques, you stamp the images you want to clear emboss and emboss. Then stamp the images you want to be 'softer' in versamark before you brayer on any ink! Then brayer on the ink. You have to do the clear embossed images FIRST. If you try to do the other images first (the ones for versamark resist), when you sprinkle on the embossing powder for the emboss resist images, your embossing powder will stick to ALL the images.

Oh I guess I got a hat trick on this one...this also falls in line for the Color Challenge on splitcoaststampers as well!

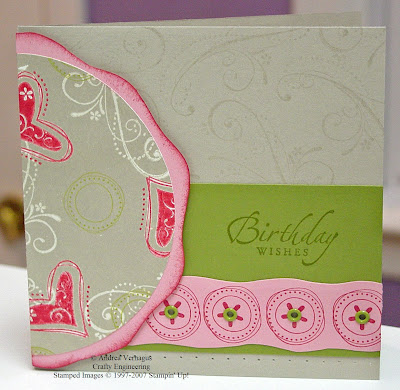
Anyway, since Priceless is one of my new favorites, I used it. I embossed the heart image with Rose Red ink (cheater way...yup, again...don't have the color craft ink...what a surprise!) on Glossy white cardstock. Then I versamarked the Swirly pattern and brayered Sahara Sand over top. I then added the Old Olive circles. I cut around the Pretty in Pink Circle freehand, along with the strip of Pretty in Pink. I knew I wanted something on the base Sahara Sand cardstock, so I stamped the swirly after stamping off first....made it more faded and subtle. The rest of the card is pretty self-explanatory, but if there are any questions, let me know!

The Engineering Details
Stamps: Priceless, Sincere Salutations
Inks: Sahara Sand, Old Olive, Rose Red, Versamark
Paper: Sahara Sand, Old Olive, Pretty in Pink
Accessories: Brayer, Paper Piercer, Crystal Clear Embossing Powder, Sponge, Old Olive Eyelets, Crop-A-Dile (to set the eyelets...oh so silently!), Scissors

Tuesday, August 28, 2007

Weekend Sketch Challenge (#16)


I finally got to try out Beate's Weekend Sketch Challenge. I missed last week...kind of bummed too because it looked like a good one. I needed a Baby Shower card for a friend of mine, so I knew which set I wanted to use....so sad it retired (and yes I think it has been over a year). But the image of the Mom and baby just hits me right in the heart, you know. So what better image for a Mom-to-be?

The one technique that I love, love, LOVE, to do with these sketches type of sets is bleaching. Just emboss the image with Versamark and Crystal Clear Embossing powder and then dip a synthetic paintbrush in bleach and sweep it in the desired areas. The more bleach the whiter it gets or the more color is removed. I tend to only dip once and do a different area at a time so that the resulting color varies some throughout the image.

This sketch challenge was a tough one for me. Not really sure what it is, but I am not overly pleased with the card...its missing some layers or something. But alas it was getting late last night and the 5:20 am wake-up was looming a little too close for comfort, so I stopped and called it quits. I think the circles were throwing me off. I don't do much with circles....the engineer in me likes straight edges or something. Plus, since I don' have the cool scallop circle punch that is all of the rage right now (which makes me want one!), I tried to make do with a pair of scallop scissors. Well these scissors are the really cheap ones...I mean really cheap. In fact, so cheap they barely cut the cardstock! So I kind went with it and let the scallops look a little distressed. Sort of worked. Oh well, lots of excuses on this one. Maybe next time!

The Engineering Details

Stamps: Sketches (Retired), Priceless (the little flower), Wonderful Words

Inks: Versamark, Very Vanilla Craft, Elegant Eggplant

Cardstock: Certainly Celery, Elegant Eggplant, Very Vanilla

Other: Crystal Clear Embossing Powder, Sponge, Bleach, Synthetic Brush, Scallop Scissors (non SU! - brand unknown), Certainly Celery Grosgrain Ribbon

Tuesday, August 14, 2007

Weekend Sketch Challenge


This is my first time doing a sketch challenge. I decided to do a Beate Sketch Challenge...she, Beate Johns (an amazing artist and stamper)posts the sketches on her blog on Fridays. Beate is a Stampin' Up! Demonstrator too, so she always has great samples using SU! supplies. She always has some cool sketches, so I decided to give it a shot. This is Beate's Weekend Sketch Challenge #14.

I needed a wedding card, so I tried to go somewhat elegant. I, again, didn't have a Bravo Burgundy Craft Ink pad (pretty typical since I only have a few), so I did it the cheater way. First ink your stamp in Versamark and then without stamping the image, ink it with desired Classic ink color. Then stamp the image and emboss like normal. Works pretty well. I had a hard time figuring out what to do with the Hodgepodge Hardware squiggly clip, but I finally managed to tie a bow around it. I knew I wanted something else there besides just the bow and I like how it turned out. I realized though that I need the next circle punch up from what I have...I had to cut the Bravo Burgundy circle by hand. What do ya think! Only problem is the card is going to my co-worker, a boy...not many girls in engineering, so he probably will look right past the beauty of my creation. Oh well!!

The Engineering Details

Stamp Sets: Heartfelt Thanks, Wonderful Words

Inks: Sage Shadow, Bravo Burgundy, Rose Red, Versamark

Cardstock: Sage Shadow, Rose Red, Bravo Burgundy, Whisper White

Accessories: Hodgepodge Hardware - Pewter, Burgundy Grosgrain Ribbon, 1-3/8 Circle Punch, 1/16" Circle Punch, Dimensionals, Glue Dots (to hold ribbon on)

Related Posts with Thumbnails