

Missing in Action....I guess that is what you can say I have been, at least from the blogging and even crafting world! October was just one of those months and I think I am still trying to get things in order from it. It was filled with a HUGE trip for my husband and I, sickness (the kids and me...all right before our trip mind you), more sickness (my daughter after we got home, thank goodness), editing and printing all of those fantastic photos from our trip (over 300), and all of the Halloween activities! Whew! Needless to say, my crafting time and mojo pretty much disappeared and am I just starting to get the itch back. It is kind of being forced back as I have a need for about 5 - 6 cards right now for stuff this week!! Wednesday, November 4, 2009
MIA
Missing in Action....I guess that is what you can say I have been, at least from the blogging and even crafting world! October was just one of those months and I think I am still trying to get things in order from it. It was filled with a HUGE trip for my husband and I, sickness (the kids and me...all right before our trip mind you), more sickness (my daughter after we got home, thank goodness), editing and printing all of those fantastic photos from our trip (over 300), and all of the Halloween activities! Whew! Needless to say, my crafting time and mojo pretty much disappeared and am I just starting to get the itch back. It is kind of being forced back as I have a need for about 5 - 6 cards right now for stuff this week!! Thursday, June 18, 2009
Simple Father's Day

My local customers have already seen this as I have a class for it on Friday night! But I thought I would share here as well. It is a simple photo holder that I altered and a matching card. I simply took a photo holder from JoAnns (2 for $5 bins), popped off the embellishments they had glued on, sanded it down, and adhered some DSP to the sides. This is using the To the Nines DSP from Stampin' Up!. Then I used some chipboard and corduroy button (why have I lived so long without these...they are awesome!) to decorate one side of it. Pretty simple, but I think with a pic of the kids, will make a nice decoration on his desk at work (or at home!).
Monday, February 16, 2009
Upcoming Class and Awards
So did everyone have a wonderful Valentine's Day? Mine was perfect! My husband is the best! He and my kids put on a "show" for me...they even created a little program. How cute is that? In our house, it is not uncommon to have "performances" by my son...he loves to do balancing tricks or have some figurines do gymnastics for us. But having it all arranged was too cute for words. The performance included "Interpretive Dance of the Heart by Elijah", "My Juggly Valentine by Kevin" (my husband can juggle...one of his "tricks"), "A Love Song by Elijah" (ended up being Christmas songs for some reason!), and "Extreme Cuteness by Adilane" (oh and was she ever cute!). Anyway, I loved it!
So here are my nominees. I don't have 10 people, but these are some of the people that I appreciate:
This "award is given to a blog that invests and believes in PROXIMITY - nearness in space, time and relationships! These blogs are exceedingly charming. These kind of bloggers aim to find and be friends. They are not interested in prizes or self-aggrandizement. Our hope is that when the ribbons of these prizes are cut, even more friendships are propagated.” The rule of the award is to now pass it on to another 8 people who demonstrate this spirit.Friday, November 14, 2008
Bad Blogger - Trying to Get Back
Yes I am still alive...in case you were wondering! I have just been a very bad blogger! Personal events, holidays, and stamp classes took over my life...and then on top of it, I lost some motivation in there too! Anyway, I think I am back now and will hopefully have some interesting things to share.Saturday, June 14, 2008
My Stamp Nite Out
Since Adilane came 3 weeks early, I had to cancel a Stamp Nite Out that I had planned for May, but I was able to reschedule it for a week ago. It went great and I think all of the ladies had fun. I figured I would show off the projects that I had them do.
I wanted to showcase the Flower Fusion flowers, so I copied and altered an idea I saw on Stampin' Gal Val's blog for a card that really shows them off. It utilizes very little stamping, which obviously draws attention to the flowers. Not knowing which color flowers they would choose to use, I kept the base of the card black and white so that the color was coming from the flowers. Add a little faux stitching and some ribbon and I think we have a beautiful card!The Engineering Details
Stamps - Paint Prints (retired); Paper - Basic Black, Whisper White; Ink - Old Olive, Rose Red marker; Accessories - Flower Fusion Flowers, Old Olive 5/8" Grosgrain Ribbon, Mat Pack, Paper Piercer, Black Brad, Slot Punch, Corner Rounder Punch, Dimensionals, Sponge
I loved this Onesie card idea when I saw it on Lauren Meader’s blog while back (wow is that girl amazing!) and I knew that I wanted to share it with my customers. It is a very easy card to make (assuming you have the two punches you need), but it is so adorable! I made it yellow so that it would not be sex specific. I utilized some shimmery white cardstock for around the neckline, leg openings, and sleeves and then added 3 silver brads at the base to act like the snaps at the bottom of a onesie.The Engineering Details
Stamps - Wild About You, Everyday Flexible Phrases; Paper - Barely Banana, Shimmery White; Ink - Craft White, So Saffron; Accessories - White embossing powder, 1-3/8" Circle Punch, Scallop Circle Punch, Silver Brads, Cutter with scoring blade, scissors, ruler, pencil, heat gun
Alright, so have I told you how much I love Lauren Meader’s ideas (seriously, you need to check out her blog)…well I took another idea from her for Father’s Day…which by the way, totally snuck up on me somehow! Anyway, I loved the little toolbox she made so I took her instructions and made a card to match. I loved the woodgrain look that I got just by dragging Chocolate Chip, Close to Cocoa, and Creamy Caramel across some Kraft cardstock. If there is any interest out there, I could put together a tutorial on how to do this…I didn’t create the idea myself, but I have no idea where I saw it at. Then I added some awesome measuring tape ribbon from Michael’s and the perfect “Man” set was created. Who would of thunk that the set A Beautiful Thing could be used for a guy card?!

The Engineering Details
Stamps - A Beautiful Thing, All Year Cheer II (retired); Paper - Ballet Blue, Kraft, Basic Black, Very Vanilla; Ink - Chocolate Chip, Close to Cocoa, Creamy Caramel, Ballet Blue, Basic Black; Accessories - Tag Corner Punch, Ticket Corner Punch, Pewter Brads, Measuring Tape Ribbon (Michael's), Scissors, Wood Pencil, Glue Dots, Dimensionals, Cutter with Scoring Blade
Monday, January 28, 2008
So Kind
This is a detailed peek at one of the Stamp-A-Stack cards: Thank You card. I love the versatility of the Priceless stamp set, with all of its individual images (heart, flower, butterfly, etc). Plus the swirls are so fun! I used Beate Johns’ Weekend Sketch Challenge #32 for the layout of the card…love her sketch challenges! I swapped sides though from her sketch once I stamped my swirl and butterflies and realized that there was an empty space on the left side instead of the right. I think it still counts in following the sketch!
I probably could have added a lot more bling, pizzazz, etc. to this card, but I was trying to keep it a little simpler since it was for a Stamp-A-Stack. Although, I am guessing this is the one that gets complained about due to the cutting out of the butterflies…there is always one card every year that gets some grumbling because of the time consuming aspect of it…I just tell them to suck it up for the beauty of the card! Hehe! The swirl and butterflies were stamped in Sahara Sand and then the butterflies were stamped in the three colors and the wings were cut out and popped up. I really like how that part turned out. Then to keep it simple, I just stamped the little flower in the background and added the “So Kind” greeting. Hopefully it won’t be too bad. I have a hard time judging how long a card will take to make because I am designing it at the same time as making it, so it naturally takes longer!The Engineering Details
Stamp-Attack
This is more for my customers out there than the general blogging community, but my Stamp-A-Stack (aka Stamp-Attack) is now scheduled for Saturday, February 16, 10 am – 2 pm. To give me time to prepare and for SU! to send me my supplies, I need to get all RSVP’s by Saturday, February 2. The picture shows all of the cards you will be making (5 of each design for a total of 25 cards!) and they include feminine bday, masculine bday, kid bday, thank you, and anniversary. The cost of the class is $30 and includes all supplies, lunch, a gift from me and an entry for a door prize. So contact me or look for the Evite invitation (if you are one of my current customers) to sign-up! Hope that you can make it!!
Wednesday, January 16, 2008
Photo Explosion Box
Back in December, I held a Photo Explosion Box class at my house. These boxes are so cute and I love how many pictures you can fill them with. I tried to keep the colors sort of Christmasy, but not Christmasy at the same time...does that make sense? Basically they were made for Christmas presents, but I wanted them to be out all year long. This was a perfect gift to give to my Mom and Mom-in-Law as they go away for the winter and miss seeing my son during that time. I think they cried a little when they got them.The box consists of the box base, box lid, and the insert so you can add pictures. This box will hold up to 12 pictures...but I only placed 8 in there. I got the quote out of a book of quotes that I got from Jo-Anns a long time ago...just retyped it and formatted it to fit in the area I wanted it. I really love the Black & White photos. It just seems to make them more striking! And I got the Doodle This stamp set mainly to make the pop-up flower on the top of the box...love it!

Anyway, if any of you want the instructions that I wrote out for my attendees, let me know and I can email it to you. Of course, this is not my design...got the idea and basic instructions from SCS.
Edited to Add: I am happy to fulfill the requests to send my instructions that I had at my class to anyone that wants them, but please make sure that I can either get your email from your blog or that you leave me an email! I have gotten a quite a few comments asking me to send them the instructions and I have no way of contacting them. I never get to see nor have access to the "email" that you enter when leaving a comment...you have to actually add it in the comment area. Or just send me an email directly...my email is listed on the left sidebar below the "About Me" section. Thanks!!
The Engineering Details
Stamps - Doodle This; Inks - Always Artichoke, Perfect Plum, Baroque Burgundy; Cardstock - Mellow Moss, Always Artichoke, Perfect Plum, Baroque Burgundy, Vellum paper; Accessories - Burgundy 5/8" Grosgrain ribbon, White 1/4" grosgrain ribbon (dyed Perfect Plum), Ice Circle Rhinestone Brad, eyelets, White Gel pen; Supplies - Dimensionals, Sticky Strip, scissors, cutter with scoring blade, bone folder,
Monday, October 1, 2007
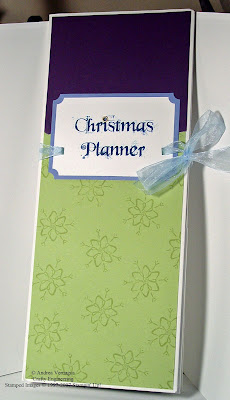
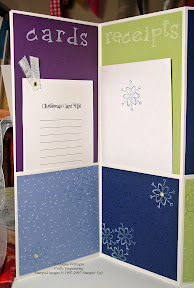
A Christmas Planner
I wanted to show off the gifts that I gave my Stamp Camp attendees. I was pretty proud of them, even though they took a bit longer than I expected!
I wish I could take credit for these great planners, but alas I CASEd the idea from a variety of sources. Deb from Blue Moon Stamping made a planner (I think one of the first ones) for a more general purpose, while Jan from Stamp, Paper, Scissors and Shannon from Stamp Till You Cramp made Holiday ones. I picked up stuff from all and created my version. The titles I used are Cards, Receipts, Gifts, and Misc. Sunday, September 30, 2007
Stamp Camp Fun & Food Recipes
2) Lightly press wide ends together.
3) Combine the remaining ingredients; spoon over wide ends of rolls.
5) Bake at 375 degrees for 20-25 minutes or until golden brown.
*******************************************************


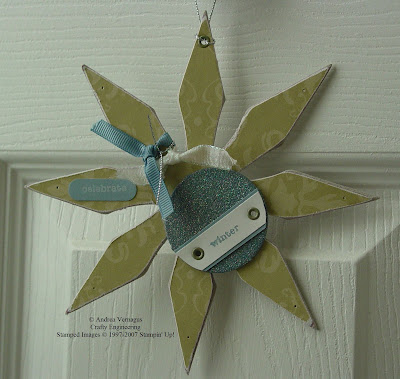
Chipboard Ornament
Sunday, August 26, 2007
Stamp Camp - September '07
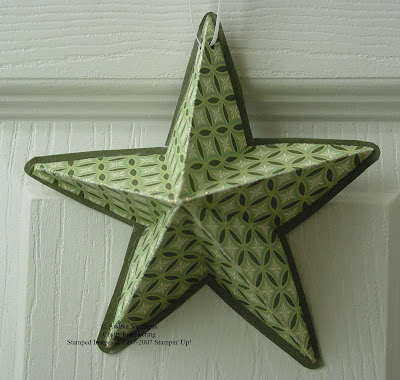
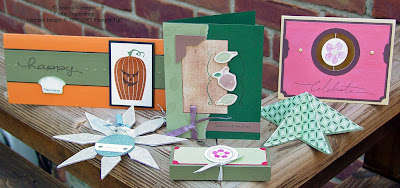
Well I am a couple of days later than I planned on getting this picture out to you! Oh well, I was overcome by actually getting things done this weekend. It was the first weekend in a very long time that my husband and I were both at home. So with babysitters already scheduled, my Mom and Dad, we got an evening out....yeah! Anyway on to the topic at hand. Here are the hopefully considered fabulous stamp camp projects for my Stamp Camp on Saturday, September 29 (10 am - 2 pm). So for anyone in the Southeastern Michigan area, drop me a line to sign up! There are 3 cards: Scratch n' Sniff, Faux Linen, and Suspension Card and 3 other projects: folded star ornament, chipboard snowflake ornament, and a nugget gift box. Once I hold the stamp camp, I will post pictures of each of the projects individually for those unable to make it. Hopefully I got a pretty good variety for ya' all to make (and I didn't make anything too time consuming...sometimes I don't realize how time consuming a project can be as I am in the design process!). Cost, as usual, will be $15 which includes all supplies, lunch, door prize, and a small gift from me! Hope to fill my house with many stampers!
Monday, August 6, 2007
A Photo Book Fit for a Dad
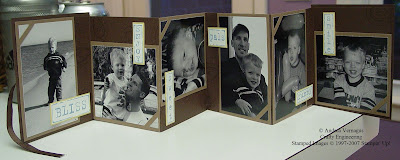
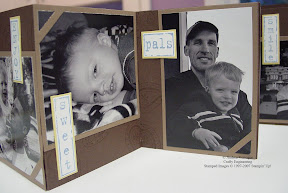
Why is it that stamping something for men is so difficult! I struggled with this one for a long time. I had a few customers that requested that I put together a photo book for a Father's Day Gift. Obviously I am not very timely about showing it, but I just got started with this blogging thing just recently. Anyway, I had many iterations of this photo book and I am pretty happy with the end result. I had a stamp camp in June for people to make this book.
I had originally started the front without the Brocade Blue cardstock on the front, but found once it was added, that it finally felt complete.