Showing posts with label altered art. Show all posts

Wednesday, March 2, 2011

Friends Box

My kid-free, clean house time has now ended...and to be honest I welcome the mess to have my kids and husband back with me! While I definitely enjoyed my "me" time, I missed them and I am so glad to have them back! I didn't quite get my photo albums done, nor all of the stamping I had planned, but I did a good amount...somehow there was more to do than I expected! So now I am working at getting the kids back into their normal routine.

I got a very cool surprise this morning. I made it into the Paper Crafts Designer Blog Roll!! It is very crazy to see my name among some of the "heavy hitters" (you see the whole list HERE), but I am super proud! Make sure to check it out, and maybe find a fantastic new blog to follow!

Speaking of Paper Crafts, this was a project that I submitted for the Stamp It! Techniques special issue that did not get picked up. This was for the paper piecing technique. And let me tell you, this Penelope fairy from Paper Makeup Stamps is paper pieced...down to the little tassels on the circular thing she is holding! It took awhile to cut her out, but I love how it turned out. She was then mounted on a mini pizza box (instructions originally by Jen del Muro).

Still have to show you my last scrapbook page...that will come soon. Then don't forget the new Release Sneak Peeks for Paper Makeup Stamps will be starting March 3 on the PMS Blog. Thanks for checking out my kind of engineering!

The Engineering Details
Stamps - Penelope Fairy, Friends are Angels Quote (Paper Makeup Stamps); Paper - Kitchen Spice and various Dots colors (BoBunny), Chocolate Chip, Whisper White (SU!); Ink - Brilliance Graphite Black (Tsukineko), Oval Nestabilities (Spellbinders), Tag Corner and Corner rounder Punches (SU!), Pumpkin Pie grosgrain ribbon (SU!), dimensionals


Wednesday, December 22, 2010

A Slice of Published Cake

Ok I have to pause in my massive cleaning efforts (Christmas is at my house this year) to gush just a little bit! My latest project that was selected for publication just came out! So be sure to open up the January/February 2011 Issue of Paper Crafts to page 49 and check-out my cake slice box (with my name in print!!). You can download the patterns for the box HERE (follow the link and then scroll down). It looks like the flower on top shifted some in shipping, so my pic above shows how the flower was meant to be. Either way...I am so excited!!!

Hoping to get one last Christmas card related post in before Christmas and then I get to prepare for hosting Christmas...and then a New Year'e Eve party too! Until then, thanks for checking out my kind of engineering!

Friday, October 29, 2010

Trick-or-Treat Makeup Challenge


Well Happy early Halloween to all of you! I hope that everyone has a fantastic weekend filled with way too much candy! My kids are both dressing as birds...I de-feathered two boas and individually glued on each feather to their costumes that my Mom put together. It was a whole lot of feathers and a whole lotta time...don't worry I will share pics after the weekend! My husband and I will be dressing as Trees for our two little birdies. Our costumes are not nearly as cute as my kids, but they should work!

Well to celebrate in Halloween style, the Makeup 4 the Weekend Challenge #48 this week has both a Trick and a Treat. The Trick is to include the color Chocolate into your creation and the Treat is to make a treat holder/box/bag. Well considering I like to give my son's teachers a little gift on Halloween, this was right up my alley. I don't have any true Halloween stamps from Paper Makeup Stamps, so I pulled out the newly released Moody for Chocolate...Halloween is about the candy right?! I stamped her on watercolor paper in Brilliance Graphite Black ink. The I watercolored (with an aquabrush and ink pads) her in Chocolate, Plum, and Orange to give it a Halloween feel...even made her hair purple...kinda diggin' it! Then I paper pieced her sweater with some orange patterned paper from SU's Halloween paper from last year. She was then cut out using the Labels 16 die and framed with some black patterned paper from the same collection. The "Treat Yourself" sentiment is the FREEbie that you get this month if you place an order at Paper Makeup Stamps.

The bag/box that I made was made-up on the spot based on the size I wanted it to be. It is 5" tall, 4" wide, and 1.25" deep. I filled a bag with some of the Hershey Bliss chocolates and tied a plum satin ribbon at the top. Hopefully the teachers like chocolate!

So now it is your turn! Join us in the Makeup 4 the Weekend Challenge #48 and use PMS stamps and you will be entered to win a free single image stamp of your choice! How cool is that?! Have fun getting inky and have a fun and happy Halloween! Thanks for checking out my kind of engineering!

The Engineering Details
Stamps - Moody for Chocolate, Treat Yourself sentiment - freebie (Paper Makeup Stamps); Ink - Brilliance Graphite Black (Tsukineko), Chocolate Chip, Perfect Plum, Pumpkin Pie (SU!); Paper - Chocolate Chip, Perfect Plum, Cast-A-Spell DSP (SU!), watercolor paper; Accessories - Fire Circle Rhinestone Brads (SU!), Labels 14, Labels 16 Nestabilities (Spellbinders), Plum Satin Ribbon (Offray), dimensionals, aquabrush

Tuesday, June 22, 2010

Teacher Gift


My attempts at being productive have not been working out very well lately! See, the kids are visiting their Oma and Opa (my parents) for a few days so it is suppose to be a productive time for me...alone. Yesterday I did my shopping (except groceries which I still need to do)...new running shoes, lawn bags, and shoes for an upcoming wedding I am in. The last one proved to be the hard one and has made me hate shoe shopping! I was told a black pump/peep toe style shoe...doesn't sound that hard right? Wrong! I literally have gone to every store I could looking for something that 1) fit, 2) didn't make me feel in excuriating pain (seriously how do women wear some of these shoes?!), and 3) weren't too expensive! And you know what else I found out...stores that have multiple locations don't carry the exact same selection! Go figure. So now I have 3 pairs of shoes...1 pair that I like they way they look, but I am not sure I could make it 10 minutes in them (or maybe my toes will just go numb so I won't have to worry about it), 1 pair that are not quite as hurtful as the first pair and not quite as nice looking (and a little cheaper), and 1 last pair that look cool to me and are actually comfortable, but I am nervous they won't look right with the dress. They are more of a fun style...not a classic style. Ugh! SO three pairs later and I still am not sure what I am wearing. Anyway, that took literally ALL day yesterday and today I have been cleaning, but it is going slowly as I am not very motivated. Hoping this cup of coffee gets my butt in gear...hate to waste alone time!

Sorry for my lamenting there. I so needed my girlfriends with me on my shopping trip but they all had their kids with them...never quite sure I should trust what the sales people are telling me! So I made this little Post-It note holder for my son's end of the year teacher gift. We donated towards the class gift, but I always want to give something homemade too. Basically you decorate one of those cheap acrylic frames and put a pad of post-it notes on the outside. I started off with some random pattern paper that I had because it had some yellow in it to go with the yellow post-its...note to self to find where you can get cuter post-its if I ever make these again. So I will freely admit my color scheme is a little wonky, but i went with it. Basically just put a quote from the Teacher's Apple set from PaperTrey Ink and stamped and cut-out some apples. The turquoise apple is actually on the outside of the frame to give it a little interest. Finished off with some black grosgrain ribbon and I had a nice little teacher gift.

Exciting things are afoot, but I am not at liberty to discuss them yet....but soon! Until then (or sooner), thanks for checking out my kind of engineering!

The Engineering Details
Stamps - Teacher's Apple (PaperTrey Ink); Paper - Tempting Turquoise, Ruby Red, Barely Banana (SU!), random pattern paper; Ink - Basic Black, Ruby Red, Tempting Turquoise (SU!); Accessories - black grosgrain ribbon (SU!), acrylic frame, post-it notes, scissors

Tuesday, June 15, 2010

A Bridal Shower

So excited to share with you what I put together for my cousin-in-law's bridal shower over the weekend. It was a fun event honoring a very special woman and I really thought it went so very well. I signed up to do the invitations, party favor boxes, and a marital advice tree. And of course, knowing me I can't keep things simple, so I have a lot of late nights getting it all done, but it was worth it for her!

So because I was so excited by the party favor boxes, I will start off with those. I found the patterns for a three-tiered paper box cake that Stampin' Up! had shown in the demonstrator magazine and another version of the cake-shaped boxes that had a base and a lid. Well of course, I liked the three-tiered cake look, but the actual box that had a base and a lid. So I had to create a pattern for the base and lid for each layer of the cake which was based on the overall dimensions that Stampin' Up! did. Like I said, I can never keep things easy! So anyway so Bazzill Basics paper in Pomegranate Splash made up teh base and Basic Grey Bittersweet raspberry cream made up the lids. I scalloped all of the sides of the lid to make it a little prettier.

I knew I wanted to put flowers on somehow and I had seen a couple tutorials for making paper roses, so I gave a couple a try. Of course, my friends (hey girls!) all picked the more time consuming one...I picked it to, but that meant a lot of cutting and gluing for many nights! Anyway, the paper roses in a shimmer white cardstock (tutorial HERE that I used) looked beautiful and added a touch of elegance to it. Then I found to keep the boxes together nicely, I did have to tie a ribbon around each layer...was hoping to avoid this at first, but I think I like the look now.


The invitation was a CASE of a bunch of bride silhouette cards that I had found on Splitcoast. Seriously, I love that site so much when you are in need of ideas...always helps me out! I hand drew a template for the silhouette and then cut out all of them by hand. I embossed the top portion (the bodice) of the dress with the Cuttlebug Textile embossing folder and put a ribbon around the "waist". Then added a couple of punch out (and crumbled) flowers with a sparkle white brad. The "You're Invited" was printed on the cardstock prior to cutting out the silhouette. I loved how these turned out and then I realized that not everyone got that it was a bride silhouette on the front...maybe I should have drew my silhouette differently or something! I am really not sure if anyone got it without me telling them.

Then the last project for the shower was a marital advice tree. We had everyone write a piece of advice for the couple on a card and hang it on a tree I put together. Then when their present was opened, I read off the piece of advice they gave the bride. I thought it was a nice touch. Anyway, the "tree" was a couple of branches that I hot glued together to make a fuller "tree" and then my husband cut some holes in some wood to help me stabilize it in the planter. I spray painted it a solid brown and then added some gold sparkle paint to it to jazz it up a smidge. I wanted to leave it very plain so that if she wanted she could keep it and decorate for each season or holiday or something. The cards were actually kept simple...amazing, I actually kept something simple!

Well there you have it! What do you think? Let me know if there are any questions or anything! Thanks for checking out my kind of engineering!


Thursday, January 14, 2010

Pondering

Pondering what you might ask? Well I will assume that you did...I made some what I thought were cool necklaces for my family members (the ladies of course) for Christmas and my husband is encouraging me to try and actually sell them. Now mind you I have never sold anything I have made, so I truly have no idea if anything I make is even worthy to be sold (and the publishing rejections don't help boost my confidence!). So I am looking for some honest feedback...should I or shouldn't I? Would anybody really buy them?

Anyway, let me at least show you what I am talking about. I used Jen Del Muro's Pizza box template to create a box for my necklaces that I gave out. I created a little insert for the inside that actually held the necklace in place. So first up is the box...can you tell I am stalling out of fear either way of what you might think?! I was making a lot of these, so I kept it as simple as possible. Stamped the snowflake in Night of Navy ink and matted it to Pale Plum. I attached a little bit of Night of Navy sticking out underneath so I could put the recipents name on the box. The Brocade Blue panel is embossed with the Cuttlebug Snowflakes embossing folder. For teh sides of the box, I just put a strip of Pale Plum so it wasn't plain. I topped off the snowflake with a rhinestone sticker in the center.


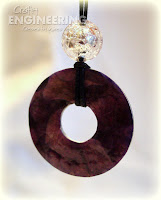
This is the box open revealing the necklace inside. The Pale Plum is the insert that I created to hold the necklace in place...sort of like a real jewelry box. The necklace is a washer necklace with a cotton cording and a metal bead. A close-up of the necklace shows I used a crackle finish to the surface to give it some more interest.


So what do you think? Just in case you needed to see more to make a decision, here are the others I made as well and me wearing one so you can see what they look like on:


I have ideas for variations of these, so I think I could do a variety...and I have even thought about getting a metal stamping set to stamp names/sentiments on the back side. So anybody want to buy one? Do I have something that is sale worthy? Seriously I need some honest feedback to know if I should go to the level of making a bunch and putting them up on Etsy or even building a website to sell them from...then even the thought of local stores...ahhh I don't know what to do! Like I said...pondering...

Thanks for checking out my kind of engineering!

Wednesday, August 26, 2009

Pendant Ornament

So I didn't plan my days very well while the kids are gone. I was so excited to get the house clean and actually live in a clean house for a little while, that I did that yesterday and saved my yardwork for today. Well guess what...today it is raining! I saw the forecast ahead of time and it said scattered showers, so I figured I would be ok. Looking pretty rainy out there...maybe it will clear up this afternoon so I can get a little bit done outside. I definitely have other stuff to keep me busy, so no worries!

This is my final non-winning Spellbinder Pendant Project Contest entry. I will admit that it is a little plain, but I thought it was cool nonetheless. This is made up of 4 Fleur-de-Lis Pendants scored down the middle and adhered back to back of each other. The same was done for the center part in Real Red using the smaller Fleur-de-Lis Pendant. I uesd some silver cord down the middle to hold the Real Red middle pendant and to give a loop at the top to actually hang the ornament. Then I used some self-adhesive Red Rhinestones to "bling"it up a bit. Fairly plain and simple, but getting the whole thing adhered together was a time-consuming process.


Finally got my scrapbook pages that I did last weekend off of my camera, so I will be posting those soon. Until then, have a great Wednesday and thanks for checking out my kind of engineering!

The Engineering Details
Stamps - None; Paper - Bashful Blue, Real Red; Ink - None; Accessories - Silver cord (unknown), self-adhesive Red Rhinestones (Darice), Mono Multi Glue (Tombow)

Thursday, June 18, 2009

Simple Father's Day


My local customers have already seen this as I have a class for it on Friday night! But I thought I would share here as well. It is a simple photo holder that I altered and a matching card. I simply took a photo holder from JoAnns (2 for $5 bins), popped off the embellishments they had glued on, sanded it down, and adhered some DSP to the sides. This is using the To the Nines DSP from Stampin' Up!. Then I used some chipboard and corduroy button (why have I lived so long without these...they are awesome!) to decorate one side of it. Pretty simple, but I think with a pic of the kids, will make a nice decoration on his desk at work (or at home!).

For the matching card, I just took strips of the same DSP, the punched out chipboard star, and a corduroy brad to get a complete card. Like I said, very simple, but it works!

Sorry not much else to say today...feeling kind of yucky...not a cold, just my body adjusting to post-breastfeeding life (yup, my baby girl is officially weaned!)...way too much information! Sorry about that!

The Engineering Details
Stamps - Everyday Flexible Phrases; Paper - To the Nines DSP, Sahara Sand, Chocolate Chip; Ink - Always Artichoke, Chocolate Chip; Accessories - On Board Essentials Chipboard, Chocolate Chip Corduroy Buttons and Brads, Chocolate Chip Taffeta Ribbon

Saturday, January 3, 2009

And the Winner Is......

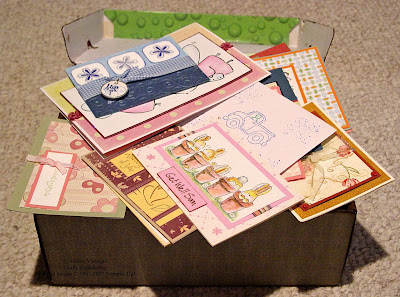
Well I am gong to make you wait just a minute to find out who the winner of the Blog Candy for a Cause II is....if you really can't wait, it is at the end of this post! First I want to express my sincerest gratitude to everyone that said a prayer, sent me a card, and/or donated blog candy. The lid to the box will hardly stay on due to the amount of cards that fill it...and I thought I got a big box too! Cards that wish Maureen and Ronny strength and comfort. Cards that wish healing for baby Francesca. Cards that simply let them know they are in someone's prayers. And as I give them this box of "love", I pray that it brings them peace and comfort during their time of struggle and healing and love for baby Francesca. So thank you all for helping me say prayers for them and helping me lift their spirits. I cannot find the right words to express how truly grateful I am!

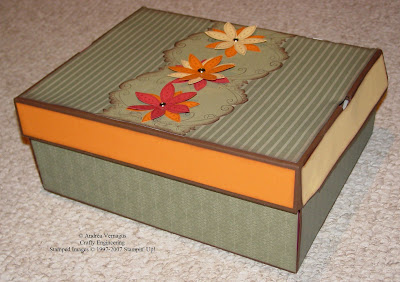
This box was created as a keepsake for Francesca Maria Bucci (FMB) to hold all of the amazing and heartfelt cards that were created for her and her family. Maureen, without knowing if she was having a boy or a girl, decided to paint the room a pale green with black & white accents. So I went with the black & white theme and added accents of certainly celery and pretty in pink. I am so pleased with the result! I just hope the box reflects even half of the beauty that is contained inside it!


This was a large paper mache box from JoAnn's. I painted it black inside and out. Then I glued on the beautiful black & white patterned paper by Me & My Big Ideas (bought it at JoAnn's as well) to the sides, top and inside bottom. I adhered a pretty light green flower trim (again from JoAnn's) to the sides of the lid and added some pink rhinestones to the centers of the flowers. I did seal a lot of the box with Modge Podge so that it "weathers" well for Francesca.

For the lid of the box I wanted her name or something on it. I ended up with her initials out of Chipboard cutouts (from the SU! Lots of Letters chipboard). I painted them black and sealed them. Then I adhered white behind for the letters and layered it on a scallop square (Nestabilities) of Certainly Celery. Some pink rhinestones finished them off. They are raised up over top of the black embossed paper with the white strip and more of the flower trim. The saying and the flower from Verve Stamps Beautiful You set completed the box...see the details below.

Lastly, I made a card from me to go with all of your cards. I decided to coordinate it with the box, using the same colors, flower, and accents. From the same Beautiful You set, I chose the saying "There are no small Miracles". I think that might say it all!


I added a little Cotton Candy stickles to the flower this time, but I kept most of the other design elements the same. I just love how this flower looks with the patterned paper...it just coordinates so very well! And you gotta love getting a chance to use Christmas presents (I got the Swiss Dots embossing folder and the complete set of square Nestabilities!).


O.k. I won't make you wait any longer...oh actually I will. I wanted to share some interesting information from this RAK request. I received 107 cards (don't worry any stragglers will get to them!) from literally all over the world. The cards came from all over the United States, Canada, Puerto Rico, South Africa, and Australia! I had 40 bloggers post about my RAK request which helped me spread the word. And all of that comes down to one winner. After printing out everyone's name, cutting them out, and allowing my son to pick the winner...the winner is:

Wendy Byrd from Elizabeth, NC

Congratulations Wendy!! Email me your mailing address and I will get you the parts of the blog candy I have in my possession and I will share your address with the donators of the other parts to have them send you the rest. I hope you enjoy the loot!!!
And in case you need a reminder, I took a new picture of the much larger blog candy and listed all 42 items...crazy considering it started out with my measly 6 items!


1) IKEA Bygel Large Storage Basket, 2) Small container of adhesive backed blue rhinestones, 3)Glass Jar, 4) Fake Dew Drops, 5) Studio G Clear Acrylic Mini Alphabet Stamp set, 6) Scrappy Cat Clear Acrylic Baby Girl Stamp Set, 7) Papertrey Ink - Holiday Treats Stamp Set, 8) Signed Whimsical Autumn Stamp Set, 9) Tinkering Ink - Haberdasher Petite Patterned paper pad, 10) Our Craft Lounge - Tree-mendous Love Stamp Set, 11) SU! - Sleigh Full of Toys Stamp Set, 12),
Bottle of Prima Flowers, 13) Close to My Heart - Heartthrob stamp set, 14) SU! - Punches Three Stamp Set, 15) Autumn Leaves - 2 Clear Stamp sets, 16) Stampendous - Hey There Cupcake (gently used), 17) Heidi Swap - Forever Clear Stamp Set, 18) BoBunny - Aloha Acrylic Stamp Set, 19) Pink Paislee - Vintage Pop Clear Stamp Set, 20) Making Memories - Funky Vintage Ruby Collection 6x6 paper pack, 21) Studio G Clear Stamp Set, 22) SU! - $50 Gift Certificate redeemable through me, 23) Scor-pal with Case, 24) Close to My Heart - From the Heart stamp set, 25) Serendipity Kits - Papercraft kit, 26) Treehouse Stamps - $25 Gift Certificate, 27) Whimsy Stamps - Penguin and Seal Stamp, 28) JustRite Curlz Monogram Stamper Kit , 29) SU! - Shapes and Shadows Stamp Set, 30) Roll of ribbon from Michaels, 31)Studio G - Crystal Glitter Glue, 32) Studio G - Green Glitter Glue, 33) SU! - World Over stamp set (retired), 34) SU! - Event Full stamp set (retired), 35) Inkadinkadoo Brenda Walton stamp set - Somerset Expressions, 36) The Robin's Nest Dew Drops, 37) Fired Brick Distress Ink, 38)
Small photo album, 39) Darice Finishing Accents Rhinstone stickers, 40) Blumenthal Lansing Company - Button Sensations, 41) Inkadinkadoo Humingbird Stamp, 42) SU! - 6x6 Pattern Paper Pack
Whew! Not sure what this loot is valued at, but I am guessing well over a couple hundred dollars!! Thank you again to the generous folks that donated to my blog candy!

Carolyn King (My Blog By Cammie), Cambria Turnbow (Stamp a Little Love Baby and Our Craft Lounge), Stephanie Benedict, Nicole Anderson (Anderson Arts), Mary Vogel (Life and Creating), Jane Bosi (Jane's Addiction), Julie Crossley (Scrapbook Store at Your Door), Joanne Basile (Stamped by Hand), Debbie Stelton (Dolce Deb Designs), Katie Cotton (Paper Makeup), Milissa Howes (Serendipity Kits), Ashley Bowen (Treehouse Stamps), Denise Lynn (Whimsy Stamps), Monique Matthews (Heavenly Creations by Monique), Cindy Walker, Anita Autore (Cards and Coffee), Alexandra Hobson (California Stampin), Stephanie Sheridan, Mikki Madden (Mik Inks)
Please visit their websites and blogs and thank them for contributing so generously!
I plan to take pictures of all of the wonderful cards and will get a link out to all of you so you can view them in one place....probably later this week. Thanks again!!!


Monday, April 14, 2008

A Gift for My Hostess, My Friend


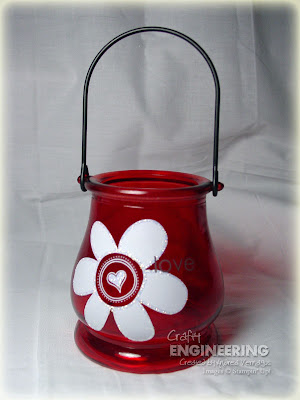
My workshop over the past weekend was for a dear friend of mine, so I wanted to give her a small hostess gift that I thought she would really like. I don’t do the extravagant hostess gifts that I have seen some other demos do…I have a hard time finding the time or the money, but I like to give them either some product that I know they will use or a homemade gift that they would like. I went the homemade gift route with this one. I had no idea what I was going to make until I stopped at Target the weekend before. There in the $1 Spot were these adorable little glass tea light lanterns. They had red and clear that I remember. My friend loves red (we both have the exact same red couch…I still claim I bought mine first, but we honestly found it at the same time since we were furniture browsing together) and she has it throughout the house in various places. So of course I chose the red lantern.

I am still getting used to the rub-ons, but I knew I wanted to try them on the glass lantern. So I applied the large white flower from Love & Happiness Rub-on collection that was part of SAB this year. Well, even though I thought I was being careful, it did not come out centered. So I added the little LOVE quote in Chocolate Chip Rub-on to the one side of the flower. That definitely helped even it out…so yes, of course, I meant to and had that planned all along! Then I added some Diamond Stickles around the edges of the flower just to dress it up a little.

I think she really liked it, so I was pleased! Then she gave me a present…how sweet is she?! A box of sugar-free chocolate! Ahh the perfect gift for the gestational diabetic! Even though I still have to eat it sparingly, I love having an option at the end of a meal to have a piece of chocolate! Well that is all for now…I am tired once again. Am I really going to be tired for the next 2 months?!? I don’t remember quite having this extent of 3rd trimester tiredness with my first pregnancy, but I am struggling to get through days without a nap right now…not real convenient especially since I work all day! Oh well! Have a great week!

Friday, February 8, 2008

Valentine Gifts

In addition to the Valentine’s Day cards for the kids at my son’s daycare, I wanted to make some little gifts to give to the girls that care for my son…he loves them so much and they are so wonderful to him! I have seen all over in blogging land, the Target $1 mailboxes that are out for Valentine’s Day. So I headed over and picked up a bunch and also hit Jo-Ann’s to find some Valentine’s Day patterned paper.

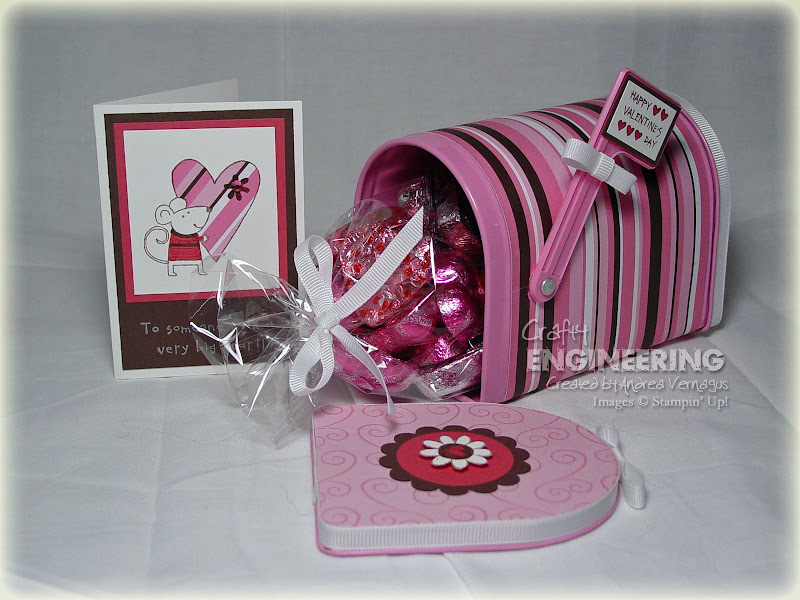
The mailboxes are really cute and very easy to cover. I used a 4” x 12” strip of patterned paper to cover the main body of the mailbox and I adhered it using sticky tape. My only tricky part was to punch a hole for the flag…I read before that a ½” circle punch works great for that, but alas I do not have one. So I used a ¼” circle punch and just tried to “make” a ½” circle. Not the prettiest, but I think it worked with out being noticeable. Then just traced the lids of the mailbox onto another sheet of patterned paper and adhered that using Modge Podge…although I think the Tombow Liquid Metal or Multi-purpose Adhesive would work better (but I don’t have any) because the paper could be easily peeled from the lid…just hoping it isn’t handled too much! Then I just decorated the edges of the lids with ribbon again adhered with sticky tape. The little bows were created via inspiration from Nichole Heady’s blog and her instructions here. It makes a nice clean inline bow for a strip of ribbon. I added a little extra decoration with some of the images from the Happy Heart Day stamp set, but I didn’t want to overwhelm the mailbox so I kept it simple.


Then, the best part…I filled it with chocolate and a matching little card. I used the mini note cards from Stampin’ Up! that I realized fit perfectly in the little mailbox. The image in the card is again from the Happy Heart Day set and I paper pieced the heart using the striped paper. Colored the shirt of the mouse and the flower on the heart with Rose red and Chocolate Chip markers. A little Rhinestone sticker (Icons Stickers by Me & My Big Ideas available at Jo-Anns) finished it off! Again kept them simple, but I thought it turned out cute. I hope they like them!

I made a second set with a little bit less girly colors to give to my husband and son. Similar matching card to finish it off...with candy of course!


The Engineering Details
Stamps – Happy Heart Day; Ink – Chocolate Chip, Rose Red Marker, Chocolate Chip Marker; Cardstock – Pink Striped (DCWV From Jo-Anns), Pink Swirl (Sandylion Sticker Designs From Jo-Anns), Rose Red, Chocolate Chip, Whisper White; Accessories – Scallop circle punch, 1-3/8” circle punch, white ¼” grosgrain ribbon, Target $1 Spot mailbox; Supplies – sticky tape, Modge Podge, scissors


Monday, January 14, 2008

Stamping on the Walls

So as you know I am expecting a second child in June. My husband and I decided that we would give our son a new room (all boy style) and leave the original gender neutral current room for the baby. It is funny though how my son’s current room, even though before he was born it felt fine for a girl or a boy, has taken on a boy feel to it…guess because he has been in there for almost 3 years now! Anyway, my little man is very into transportation vehicles of any kind and at one time he told me he wanted a blue room…although that changed on the day you asked. So I went about trying to figure what I wanted to do in there and found some great foam stamps at Michael’s. There was a bus, car, pickup truck, train, cement truck, and an airplane. My mom, the sewing goddess, and I set out to pick out material for a quilt that she would make incorporating these great shapes. I then took the colors from the quilt to get the colors for the room. So what do you think??


Oh and the cool “All Boy Blvd” sign on the wall is technically a rub-on (gotta love those rub-ons!) from Uppercase Living. My sister had a party and this is what I got…just fits perfectly in his room! It was super easy to put on the wall…I will admit though I was very nervous!!

Here are some close-ups of the stamping that I did. The stamping went really well. The images came out a little splotchy due to the slight texture on the wall. I wanted a slightly more solid look to the images though, so I had to fill in some patches by hand…the most time consuming part!


And finally, here is a preview of the beautiful quilt my wonderful mother is working on! I am still amazed at how great the vehicles turned out…cant wait to see the finished project!!


Now we just have to move my son’s bed and stuff in there and he has a brand spanking new “All Boy” room!

Wednesday, November 14, 2007

I am alive!!

Hello all! Has it really been 2 weeks since I lasted posted! So sorry! It has just been one of those months and I feel like I have hardly had time to do anything. Feeling so busy and tired kind of steals my mojo for stamping...I know so sad, right?? I have been working on a couple of things...my Christmas cards unfortunately are not one of them. I have been working on a special class for a Photo Explosion Box. A fun gift idea that gives the wonderful gift of pictures in a unique way. My design is kind of in process though right now, but my current customers should be receiving an invitation to attend this special class.

The other project I finally completed was to decorate the box that I put all of the amazing RAK's in for the Dunn Family. I wanted to give them a pretty box along with the heartfelt greetings. It turned out fairly well...probably needs some more decoration, but I wanted to get it done to send to them. They should be receiving it in the next week or so. Thank you again to all of you for helping me send them a little love, support, and prayers!!
Oh and don't forget to check out Splitcoast Stampers for a view of all of the RAK's! Follow this link...Cards posted on SCS


Sunday, August 12, 2007

A Birthday Gift

My neice had a birthday in July and she is getting to an age where buying gifts for her is becoming difficult. You know, the time when you can't buy them the fun toys anymore becuase they are starting to outgrow them. Back in February, I went to one of her gymnastics meets (unbelievable how flexible this girl is!) and took a bunch of pictures of her. So I thought I would frame some of th good ones for her. Anyway, I totally didn't even intend on stamping the mat, but all of the sudden in dawned on me that would be cool. So here it is! Pretty simple and totally pink! I was pretty happy with how it turned out and she really liked it. Check out the hold in the bottom picture...probably one of the reasons she got 1st place in her age group for the balance beam at that meet!

Engineering Details


Stamp Sets: Polka Dots & Paisley

Cardstock: Rose Red, Whisper White

Inks: Rose Red, Regal Rose Marker, Rose Red Marker, Versamark

Accessories: Silver Brads, Silver Embossing Powder

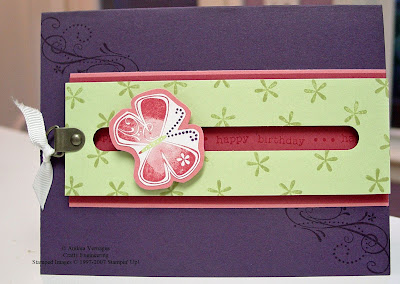
To go with her gift, I made a really cool card! I made a Spinner card and it is so fun! The butterfly spins as you tilt the card side to side. It is irresistable to even adults once they see what it does! Oh and this was made with the new Priceless set...I totally love this set! When I got it for some reason I wasn't sure I totally liked it but it seemed to be of the style that seems popular right now. But now that I have used it, I have fallen in love with it! So you may be seeing more of it here. If you would like to try a spinner card, you find directions at SplitCoast Stampers (awesome site by the way) here.


The Engineering Details

Stamp Sets: Priceless, Everyday Flexible Phrases

Cardstock: Elegant Eggplant, Regal Rose, Rose Red, Gable Green

Inks: Elegant Eggplant, Regal Rose, Rose Red, Gable Green (markers of all as well)

Accessories: HodgePodge Hardware - Pewter, White Grosgrain Ribbon, Dimensionals, Pennies

Related Posts with Thumbnails