

Showing posts with label Party Ideas. Show all posts

Sunday, February 23, 2014

A St. Patty's Day Birthday


Ok.  Do I remember how to do this? It has been. Quite. Awhile!  Apparently I have been missing this here blog, because I keep thinking "Man, I should post that".  Kind of a crazy thought since it has been almost two years since I have posted anything.

But time to come back.  Right?!  So let me come back with something that fits with March coming up soon.

Last year, my son requested a St. Patrick's Day Birthday Party since his birthday is around St. Patty's Day.  We made it a more "family" type of party and had a true blast.  Kids got fun and games and adults got Irish beer.  Good all around!

As you can see in the pic of my son and daughter, we had hats (from Oriental Trading) and beads to wear.

We did a lot of decorating with rainbows.
 

For food, we ordered pizza but then I also made fruit and veggie rainbows.


We had the kids play a couple of games.  We started with "Gold, Gold, Who's Got the Gold?".  You can read the rules of the game HERE.  Another game was to "Shoot the Shamrocks" with nerf guns.  I had to cut out a lot of shamrocks!  We also had them go on a gold coin hunt.  We hid chocolate gold coins throughout our house with numbers on them.  Then each kid was assigned a number and had to find their numbered coins.  Of course they need a bucket to collect their coins, so I spray painted some tin buckets and created a rainbow handle from pipe cleaners.

For a small additional party favor, I saw the idea to make licorice rainbows with Rolo candies as the pot of gold.  I found it on Pinterest, but this is the original source for the idea.

Finally the cake was the part I was most giddy about!  The outer decorations were ok, but the inside of the cake was the best part!!
 

Just look at those colors in the cake!  Just makes me smile whenever I see how pretty it was!

So since it has been almost a two whole years since I was on here, I should probably fill you all in a bit.  During that time we had a big change to our family...we added a kid!  My daughter, Oliann, was born in December of 2012 and is now 14 months old! Amazing how much can change in two years!

So here is my THREE kids (and final!) last summer:

And here is a bit more updated of the little one.  

Well hopefully I won't be such a stranger around here...but hey, I have three kids now...so now promises! Thanks for checking out my kind of engineering!

Friday, April 13, 2012

Board Game Theme Party Cake

This is the last of my Board Game Theme Party posts....hope I haven't bored you!  I was just pretty excited about all that went into it and wanted to share every piece.  If you missed the first 3 posts, click the following links to check them out: Board Game Theme Party, Life-Size Candyland, Goodie Bags & Birthday Clue.


So this is the cake that I made for my son's Board Game Theme party.  I tried to incorporate things from the party to tie it together.  So the top of the cake has the Twister board, the pawn shape that I put on their t-shirts, and scrabble tiles (that were on the invitation) that spelled out my son's name.  Then I made the Candyland path around the side of the cake.


This cake made me want to go out and buy my cake decorating bags and identical tips as there was a lot of different colors (7 in case you were curious).  Even though it took awhile because of the switching of colors, I love how it turned out.  To make decorating easier, I wanted to try and do all of one color so I wasn't switching colors the entire time, so I drew the design on the cake with a toothpick so I knew exactly where all of the red went, etc.  


Well I hope that I might have given someone, somewhere some ideas for a Board Game Theme party or whatever.  Thanks for checking out my kind of engineering!

Thursday, April 12, 2012

Board Game Theme Party: Goodie Bags and Birthday Clue

So I have already covered some of my son's Board Game Theme Party, so if you missed them, mkae sure you check out: Board Game Theme Party and Life-Size Candyland.  I will save the cake as a separate post...not that it was anything crazy...just want to keep cakes to their own posts.  


So for the goodie bags for the kids, I went ultra simple (mainly because my craft stuff was still in boxes!) with just white bags and taping the "Clue" card that had each of their pictures on it...more on that below.  Inside the bag was a travel game from a dollar store, the pawn t-shirts that I made for them (which we put on most of the kids when they arrived), and a bag of "Treats from their Trip through Candyland".  I had ginger snap cookies from the Gingerbread Tree, Candy Canes for the Peppermint Forest, Gumdrops from Gumdrop Mountains, Lollipop from Lollipop Woods, and a chocolate bar from the Chocolate Swamp.  It was a fun way to add treats to the bag and still keep with my Board Game theme.


So at the party we played the Life-Size Candyland game that I created, Twister, and a Birthday version of the game Clue.  All of the kids at the party were the characters, the locations were rooms in my house, and instead of weapons,  we used birthday decorations.  So our story was someone stole party decorations from a room...they had to figure out who, where, and what.  So I created the "detective notebook" like they have in Clue and the individual cards for each character, room, and decoration.  


My plan was for them to play it like the game of Clue...they have to meet up with someone in one of the rooms, make a guess, and see if the other person could prove them wrong with the cards in their hands.  Biggest problem was that with 13 kids, they only got 2 cards each.  That made it very difficult to "prove someone wrong" because they were not very likely to guess what was in the other person's hands.  


The other problem we ran into was that only about 2-3 of the kids had actually played Clue, so the concept of the game was difficult.  So in the end we had the kids all in one room and just had them walk around and look at each other's cards.  Even with our very modified version, the kids seemed to have fun.  


Well that is everything but the cake which I will post a little later.  Thanks for checking out my kind of engineering!

Sunday, April 1, 2012

Board Game Theme Party: Life-size Candyland

This is the second post for my son's Board Game Theme party.  I totally blame this idea on Pinterest.  See I saw the "pin" of someone creating giant lollipops and repinned it for a future date.  Well it stuck with me and I decided to run with it.  So I created a life-size version of the game Candyland in my basement.  

I taped down sheets of construction paper to create the Candyland path and included all of the special spots, Rainbow Trail, and Gumdrop Path.  Then I tried to decorate each of the different areas of Candyland.  

I created the Gingerbread Tree from a roll of kraft paper and crumpled green tissue paper.  I used the tree on the actual game for reference.  I don't usually think I am good at drawing, but I was pretty pleased how well my tree turned out.  

My parents actually had light-up candy canes for outdoor Christmas decorations, so we borrowed those and stuck them in pots filled with dirt to make the Peppermint Forest.  They were in a perfect spot in the basement because they lit up a darker area.

For the Gumdrop Mountains, I used pots again to create my gumdrops.  I covered them with kraft paper, painted them (my kids helped), and then added a "sugar" sprinkle.  The "sugar" sprinkle was made by taking two styrofoam balls and rubbing them together.  Rubbing the balls together pretty much disintegrates the balls into tiny styrofoam flakes.  So I sprayed the gumdrops with a spray adhesive and then sprinkle the styrofoam flakes over them.  

The lollipops for the Lollipop Woods were created using a rolled up white poster board for the "stick", a balloon, and clear cellophane.  Like I said this was taken from an idea I saw on Pinterest.  We had difficulty getting them to stand up, so we weighted the bottoms with a bag full of pebbles (or sand) and then taping them to the floor.  It worked pretty well!

The peanuts in Peanut Acres on the other hand were a little shaky, but they got the point across.  I taped two balloons together and then wrapped them with crinkled kraft paper. 

The chocolate bars in the Chocolate Swamp were just boxes covered in kraft paper (this stuff can be found at dollar stores!) and painted to look like a chocolate bar.  Then for the finale, I had my Mom whom actually is an artist paint a castle on a large sheet of paper to be our Candy Castle.   

When the kids actually played the game, I ran around and gave them a card from the actual Candyland game so they could move spaces.  The kids had a blast and kept wanting to play it!  The hardest part was knowing by the end of the party that the whole thing would most likely be destroyed...and it was.  We let them go play it while kids finished eating and while waiting for parents to come...yup that was the end of it.  I was kind of sad simply because I wanted to play it too!  

Thanks f0r checking out my kind of engineering!


Board Game Theme Party

UPDATE:  I made the files I used for creating my Board Game Theme Party Invitations available (for a small fee) for download at the following link.  It will include blank versions of the invitation (one with reference to a birthday and one without), Candyland Goodie Bag Tags (seen HERE), and the file I used to make the T-shirts.  I hope this makes it easier to get the files as I am not very good about answering email requests!


****************************************************


My son recently celebrated his 7th birthday.  We limit the kids to a big party every other year which worked out even more perfectly that they fall on opposite years between my two kids.  Then on the "off" years we either do just a family thing or a couple of friends type of celebration.  Well this year was a "big" party for him.  It took us awhile to come up with a theme, but we finally agreed on making it a Board Game theme...you know like Clue, Sorry, Scrabble, Candyland, etc.  He has always loved board games and our overflowing game closet shows it...in the new house we actually have a single game closet which is exciting, but it still needs shelves so that they aren't stacked all on top of each other!  

So since my entire craft room is still in boxes, I had to make the invitation entirely on the computer, but I think it turned out quite nicely.  I tried to incorporate different game titles and the pawn shapes that would become recurrent during the party.

For some decorations, I made Connect 4 tokens and then had my husband hang them from an empty curtain rod...one benefit to just moving into the house!  It turned out very cute but unfortunately didn't last long.  It was hanging right where the kids all ate and I am pretty sure they helped bring parts of it down!  

I managed to find a picture of every kid coming to the party (you could always ask their parents for it) that I needed for a game I had planned...more on that later...so I decided to make a Guess Who game/decoration.  

The Guess Who boards were simply a blue poster board with the pictures of everyone at the party printed on regular copy paper and taped to the backside of the poster board.  I made two "boards" so it could actually be played like Guess Who.  Not sure any of the kids played it at the actual party, but my son enjoyed it afterwards!

During the party, we had a few games ready to play as everyone arrived.  Then I split the kids into two groups (I had 13 kids total) and one group played a double mat Twister (just put two mats next to each other) and the other group played a life-size Candyland game I created in my basement.  I will have a separate post on that one!  Then when each group finished, we switched.  After a pizza and fruit lunch, we then had the kids play a birthday version of Clue that I created.  Probably have to do a separate post on that one too.

One other special thing I did as part of their goodie bags (you guessed it...a separate post on that one too...if I included everything this post would be super long!), I made them all t-shirts with their own color pawn on it and a saying, "Life is a game.  Enjoy playing it!".  When each kid arrived at the party, we had them put a t-shirt on (well almost all of them did) so that they became a "pawn" in our games.  I always make them get together for a group shot using cake and ice cream as an incentive!  

So I have a few more posts on the subject of this Board Game party, so I hope you stick with me.  Until then, thanks for checking out my kind of engineering!

Monday, June 1, 2009

Flower Birthday


Well I will warn you that this post may make you faint from all of the adorable cuteness I am going to show you...ok that is just my not-so-humble biased opinion!  I will try and put the actual crafty stuff up front so if you really don't want to see the cuteness, you can skip it...but really, why would you when I am talking extreme cuteness!  

So two weekends ago (wow has it already been that long!) we celebrated my daughter's 1st birthday.  I have been admiring the Women of Life set from Papertrey Ink for awhile, so I decided to get it and make by daughter's birthday around it.   So first up is the invitation.  Pretty sure that I did not use a sketch challenge for this, but honestly I use them so much, I am not sure!  The color combo (Rose Red, So Saffron, Certainly Celery) was what I put together to get a spring feel to the invite.  I scalloped the bottom strip of Certainly Celery to give it a grass feel for the flowers.  I popped up one of the flowers (actually made it bigger than the others) and added a "1" to it.  I then printed the inside with all of the party details...btw, anyone have any recommendations of printers that will easily print on cardstock?  I have to print mine a half of a page at a time and even then I still get jams!  

The Engineering Details
Stamps - Women of Life (Papertrey Ink), Dot Alphabet (bought at WalMart); Paper - Rose Red, So Saffron, Certainly Celery, Basic White (Papertrey Ink); Ink - Rose Red, So Saffron, Certainly Celery, Basic Black; Accessories - Swiss Dots Cuttlebug Embossing Folder, Scallop Edge Punch, So Saffron 5/8" Grosgrain ribbon, dimensionals


I recently created the thank you card that I will eventually be sending out...I want to include my daughter's 1 year pictures which have yet to be 
taken (huge GASP from anyone that knows me...I cannot believe I am this late either...I am so the type that gets these pictures taken as close to the actual birthday as I can).  Stuck with the same color combo and elements, but just went with the one large flower with "Thank you" over it.  For this one I did use a Mojo Monday Sketch Challenge for the the layout:  MOJO88.  I created a little background paper with the extra leaf stamp in the Women of Life set on the Certainly Celery behind the flower.  

The Engineering Details
Stamps - Women of Life (Papertrey Ink), Noteworthy (retired); Paper - Rose Red, So Saffron, Certainly Celery, Basic White (Papertrey Ink); Ink - Rose Red, So Saffron, Certainly Celery, Basic Black; Accessories - Swiss Dots Cuttlebug Embossing Folder, Scallop Edge Punch,Certainly Celery 5/8" Poly-twill ribbon, Circle and Scallop Circle Nestabilities, Ticket Corner Punch, dimensionals


For the actual party, we had about 14 kids or so ranging in ages from 6 months to 13 years old.  So I tried to come up with a craft that all of them could potentially enjoy (well except for the babies...they just don't have that coordination thing down yet!).  

I had them paint small clay pots and then go through the activity of planting a flower in their pot.  I later tied a ribbon and a name tag to their pots.  My Mom helped me pre-paint the 4 babies pots since they were not going to be painting.

It turned out good and I think the kids all had fun with it...now I just hope that all of the flowers survive...mainly the two for my kids...I so do not have a green thumb!! 
O.k. so now on to the cake for the party...don't worry the extreme cuteness is yet to come!  I really do love to decorate my kids cakes and I love it even more when it coordinates with the invitation or theme of the party.  For Adi's cake, I tried to use the invitation as my inspiration.  It turned out pretty much like I envisioned it...the flowers on the side of the cake were a bit of a challenge and they could definitely be better.  I used a really large tip for them and I could get a really pretty flower if I was doing it vertically, but for some reason trying it horizontally just 
did not want to work real well.  Oh well, this is probably where practice makes perfect right?!  


The color red on the cake was the only other issue I had...I really wanted it to be the color Rose Red like the invite, but after a whole bottle of one color and some additions of other colors, I just could not figure out how to get there...felt like I needed a color degree or something to know what drop of color would get me Rose Red from the color I had.  It was definitely pinky-red, but just not quite the right shade...something only I noticed I am sure!  The side view of the cake shows the not-so-great flowers that went around the whole cake.


Now you can see the extreme cuteness that is my adorable daughter...again in my not-so-humble biased opinion.  So the first picture shows her with her cake...I love the look on her face...kind of a look of concern (like what is happening) and kind of a look of disbelief (you are setting that in front of me?!).  She didn't blow the candle out and I did not leave the whole cake in front of her in case you were curious!  We cut off a piece of the cake and let her go to town.  


She quickly went to this (frosting anyone?):


And this:


And this (yes she actually did touch my camera...she was quicker than I thought she would be!):


Ok pick yourself up off of the floor after fainting from the extreme cuteness so I can leave you with some extreme sweetness.  Happy Birthday once again to my sweet Adilane Rose!  Thanks for stopping by my engineering world!

Tuesday, March 18, 2008

A Birthday Weekend

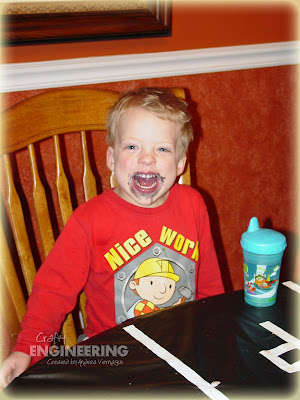
We celebrated my son’s 3rd birthday over the weekend. Still cannot believe that he is 3 already! I am constantly amazed at how much he has grown and learned in those 3 short years. He is a sweet boy that loves to giggle, jump, wrestle, snuggle (at times), and even tease (I think my husband’s and my sarcasm is rubbing off on him already!). Not that we have not had any challenges (sleeping or lack there of is one that we struggle with right now which figures because he was a good sleeping baby), but he is a joyful child full of fun and love! I just want to kiss him a bunch whenever I see him…usually getting the response of “Stop Momma” but then leaning in for more. I could talk about him all day!

For his big Number 3 celebration, I chose to go with a car theme. He loves Hot Wheels cars (actually recognizes the logo and looks for it on the bottom of cars), but since I don’t have Hot Wheels stamps and of course I need to make the invitations, I went with more of a general car theme. I posted the invitation I created already here. So I set out to decorate for his party to match the theme.
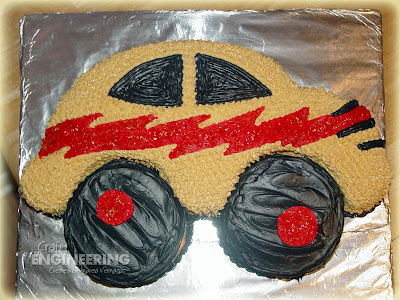
First I knew exactly what the cake had to be and yes (standing very proud right now) I made it myself! It matches the car used on the invitations from Stampin’ Up!’s retired set By Land. What do you think??? I baked the cakes one night and gave myself two nights to frost it…the drop stars taking up most if not all of the second night. They are time consuming, but they gave it a nice finished look! I cut the main car body out of a 9x13 sheet cake and made the wheels with a 5” round cake pan I got at a local cake supply store. I even found sparkle flakes (edible of course) at the cake supply store to keep my zigzag sparkly like on the invitation! When I finished it, I woke my husband from a peaceful slumber to show him…he didn’t give me the enthusiastic response I hoped for (more of a sleepy monotone “wow, that is great honey”), but he was asleep a second earlier…so what do I expect! (BTW – he gave me the enthusiastic response later the next day once he was awake)


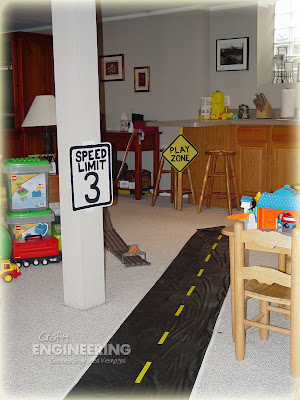
I came up with a fabulous decoration idea to go with the party…I believe I even called myself a genius as I told my husband about the idea. It turned out like I wanted it to, although I had a lot more “road” going throughout the house in my head. The 55 ft of tape, though, didn’t translate into as much as I thought it would, but it was effective and cute nonetheless. I had “road” upstairs (Ranch house) and downstairs (Family room area) and I made road signs and placed them at the eye level of a 3 year old! The road was made from landscape fabric and yellow & white electrical tape (the most expensive part of the decorations) from the home improvement store. The signs were made just with poster board and painted with acrylic paint. All of the wording and lines were free-handed in pencil first and then painted.


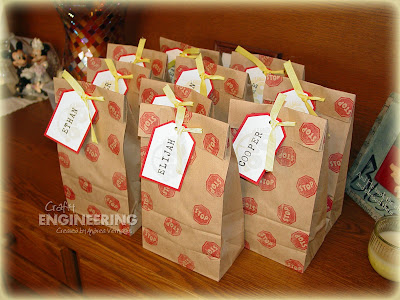
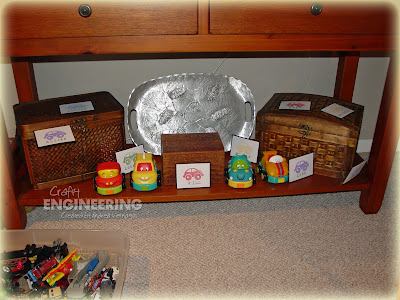
We had 10 kids total (including my son) so I made them each little gift bags which were filled with a Hot Wheel car (of course), Hot Wheels Fruit Snacks, and Hot Wheels Stickers. I kept the gift bags very simple, but stuck with the theme I started with on the invitation. I also created a little “Car Hunt” game in which every kid had to find 10 cards that had a car stamped on it with their names…2 each of 5 colors so that they could have a small “Memory” game to play later. Granted not all of them knew how to spell/read their names, but I think they had fun. Those that did recognize their own names displayed an extra amount of satisfaction in finding their cards…it was so cute! My son was in the latter group…he even had me go and hide his cards again so he could “find his name again”.

A couple of amazing moments during the party: 1) the quietness displayed by 10 kids (ages 4 and under) while they all ate pizza/cake at the same table, 2) my wonderful girlfriends for picking up the toys before they left (without me knowing!), and 3) the fact that we got a picture of all of the kids (remember ages 4 and under) on the couch…ahh the power of cake and ice cream!


So now after all of that, I plan to sit for a few days…my feet and back are still recovering!
Related Posts with Thumbnails