Showing posts with label family. Show all posts

Sunday, February 23, 2014

A St. Patty's Day Birthday


Ok.  Do I remember how to do this? It has been. Quite. Awhile!  Apparently I have been missing this here blog, because I keep thinking "Man, I should post that".  Kind of a crazy thought since it has been almost two years since I have posted anything.

But time to come back.  Right?!  So let me come back with something that fits with March coming up soon.

Last year, my son requested a St. Patrick's Day Birthday Party since his birthday is around St. Patty's Day.  We made it a more "family" type of party and had a true blast.  Kids got fun and games and adults got Irish beer.  Good all around!

As you can see in the pic of my son and daughter, we had hats (from Oriental Trading) and beads to wear.

We did a lot of decorating with rainbows.
 

For food, we ordered pizza but then I also made fruit and veggie rainbows.


We had the kids play a couple of games.  We started with "Gold, Gold, Who's Got the Gold?".  You can read the rules of the game HERE.  Another game was to "Shoot the Shamrocks" with nerf guns.  I had to cut out a lot of shamrocks!  We also had them go on a gold coin hunt.  We hid chocolate gold coins throughout our house with numbers on them.  Then each kid was assigned a number and had to find their numbered coins.  Of course they need a bucket to collect their coins, so I spray painted some tin buckets and created a rainbow handle from pipe cleaners.

For a small additional party favor, I saw the idea to make licorice rainbows with Rolo candies as the pot of gold.  I found it on Pinterest, but this is the original source for the idea.

Finally the cake was the part I was most giddy about!  The outer decorations were ok, but the inside of the cake was the best part!!
 

Just look at those colors in the cake!  Just makes me smile whenever I see how pretty it was!

So since it has been almost a two whole years since I was on here, I should probably fill you all in a bit.  During that time we had a big change to our family...we added a kid!  My daughter, Oliann, was born in December of 2012 and is now 14 months old! Amazing how much can change in two years!

So here is my THREE kids (and final!) last summer:

And here is a bit more updated of the little one.  

Well hopefully I won't be such a stranger around here...but hey, I have three kids now...so now promises! Thanks for checking out my kind of engineering!

Sunday, April 1, 2012

Board Game Theme Party

UPDATE:  I made the files I used for creating my Board Game Theme Party Invitations available (for a small fee) for download at the following link.  It will include blank versions of the invitation (one with reference to a birthday and one without), Candyland Goodie Bag Tags (seen HERE), and the file I used to make the T-shirts.  I hope this makes it easier to get the files as I am not very good about answering email requests!


****************************************************


My son recently celebrated his 7th birthday.  We limit the kids to a big party every other year which worked out even more perfectly that they fall on opposite years between my two kids.  Then on the "off" years we either do just a family thing or a couple of friends type of celebration.  Well this year was a "big" party for him.  It took us awhile to come up with a theme, but we finally agreed on making it a Board Game theme...you know like Clue, Sorry, Scrabble, Candyland, etc.  He has always loved board games and our overflowing game closet shows it...in the new house we actually have a single game closet which is exciting, but it still needs shelves so that they aren't stacked all on top of each other!  

So since my entire craft room is still in boxes, I had to make the invitation entirely on the computer, but I think it turned out quite nicely.  I tried to incorporate different game titles and the pawn shapes that would become recurrent during the party.

For some decorations, I made Connect 4 tokens and then had my husband hang them from an empty curtain rod...one benefit to just moving into the house!  It turned out very cute but unfortunately didn't last long.  It was hanging right where the kids all ate and I am pretty sure they helped bring parts of it down!  

I managed to find a picture of every kid coming to the party (you could always ask their parents for it) that I needed for a game I had planned...more on that later...so I decided to make a Guess Who game/decoration.  

The Guess Who boards were simply a blue poster board with the pictures of everyone at the party printed on regular copy paper and taped to the backside of the poster board.  I made two "boards" so it could actually be played like Guess Who.  Not sure any of the kids played it at the actual party, but my son enjoyed it afterwards!

During the party, we had a few games ready to play as everyone arrived.  Then I split the kids into two groups (I had 13 kids total) and one group played a double mat Twister (just put two mats next to each other) and the other group played a life-size Candyland game I created in my basement.  I will have a separate post on that one!  Then when each group finished, we switched.  After a pizza and fruit lunch, we then had the kids play a birthday version of Clue that I created.  Probably have to do a separate post on that one too.

One other special thing I did as part of their goodie bags (you guessed it...a separate post on that one too...if I included everything this post would be super long!), I made them all t-shirts with their own color pawn on it and a saying, "Life is a game.  Enjoy playing it!".  When each kid arrived at the party, we had them put a t-shirt on (well almost all of them did) so that they became a "pawn" in our games.  I always make them get together for a group shot using cake and ice cream as an incentive!  

So I have a few more posts on the subject of this Board Game party, so I hope you stick with me.  Until then, thanks for checking out my kind of engineering!

Friday, March 30, 2012

What's Been Going On

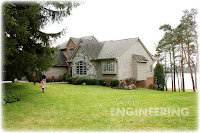
Chirp, chirp....are those crickets I hear on the ol' blog?  Wow it has been awhile since I have been on here!  The picture to the left gives an explanation for my absence...we moved into our new house!  


We moved in at the beginning of February and are still getting things set up.  Question for those that have moved...how soon till you feel completely moved in?  It is definitely a long process.  Thankfully the house was in great condition and most of the paint colors are perfect.  We did paint and tile the laundry room (pics of that to come) and we are beginning work on the office.  The house is a great fit for us and we feel blessed everyday living here!


Here are some pics of the inside and one showing the house:


The last picture is the office that we are beginning work on it.  That is where my crafting stuff will be...but right now it is still in boxes!  Not a lot of crafting going on right now!!

I will leave you with my favorite view...the view of a sunset from our back deck!

Thanks for checking out my kind of engineering!


Tuesday, November 1, 2011

Post Halloween

Happy Halloween!  Ok I meant to put this up yesterday, actually on Halloween, but didn't get around to it.  I hope everyone had a fun filled evening.  My kids had a blast, but my daughter is still tired today, so hopefully a nap will be in her near future! 


I had grand plans to make something super cute for my kids teachers for Halloween and ended up having to scale WAY back due to a 60 (not even kidding) or so item To Do List that needs to be completed before our vacation coming up!  So I went with some little Milk Carton containers with little bags of candy corn inside.  Nothing major, but it is the thought that counts right?!  


The stamp used is the Black Cat stamp from Hambo Stamps.  And now that I have pictures of my son in his costime, you see why I need to remember this stamp for whenever I make a Halloween 2011 scrapbook page...probably need to do Halloween 2008, 2009, and 2010 first though!  No time for specifics today, so just let me know if you are dying to know what I used.


My mother made the kids costumes and did an absolutely amazing job!  They were so stinkin' cute, I told my daughter when I dressed her up for her Halloween parade last week that I might die of cuteness on Halloween night when they are both dressed up.  So she proceeded to remind me that I was going to die on Halloween...always leaving off the "of cuteness" part!  Pretty funny but a little creepy at the same time! 


My only contribution to the kids costumes was to make kitty collars for them.  I love how they turned out...just decorated some chipboard and attached it to a d-ring I sewed onto a nylon strap.  Had to include a little bell too, because I just love when kitties had bells on their collars!  


Now onto November and all that comes with it...but first I need to get my To Do list done so I can enjoy our vacation!!  Thanks for checking out my kind of engineering!

Thursday, May 26, 2011

Totally Non-Stamping Related

So like the title says, this is totally non-stamping related.  But one picture I thought was pretty fun and the other I was pretty proud that I got.  So the first is this poor fly!  My son was about to get on the trampoline and came calling for me asking me what a bee looks like again.  I ask why, of course, and he says that there is a bug buzzing on the trampoline and he isn't sure if it is a bee or not.  I walk out there expecting to find a bee/fly dying on the surface of the trampoline and instead find a fly that somehow managed to get himself stuck in the trampoline netting.  I mean did he fly into in?  Did he not see the netting?  Or did he try to crawl through the opening and ate a bit too much pollen (or whatever it is that flies eat) that day that he got stuck?  So after I grabbed my camera and got a picture of him (which by the way, you can see the little hairs on him...pretty crazy), I helped him get out and he buzzed away happily.


My second photo to share is one that I was really excited about.  One, I finally got a decent picture of my son with his missing front tooth and two, I just love the water splashing around him but he is in focus.  So yay for me and my camera!  


Well that is all for me...just had to share my pics with ya...back to stamping stuff.  Thanks for checking out my kind of engineering!

Monday, May 23, 2011

A Mickey Mouse Clubhouse Birthday

 Wow, sorry that I have been a little non-existent on the blog here for the last couple of weeks.  I had my daughter's 3rd birthday over this last weekend and I had invitations, party favors, craft projects, and a cake to make for it...all at the last minute of course!  Seriously, I saved most of it till the week of for some reason....no idea why!  But now that it is over, I need to get back into some normal crafting...although I promised some graduation announcements for my nephew...so I better not procrastinate on those!!


So I thought I would share with you today all that I have been doing...all to make a Mickey Mouse Clubhouse Birthday Party as special as my sweet little girl!  This is a long post, so grab a cup of coffee (at least that is what I need right now!) and enjoy.  First I made the invitations.  Since I was running way later than I would prefer, I kept them very simple. Most of it was designed on the computer and then I added the stamped/embossed/colored Mickey Mouse on top.  Again nothing spectacular but I thought they turned out cute.


Then came the party favors.  See I follow Jessica Witty's blog (she is the amazing former Go-To Gal for Paper Crafts magazine whom I have actually chatted with via FB...my brush with fame! hehe!) and she did this adorable project during a Papertrey Ink release of a paper mache hot air balloon.  Well when I decided to do Mickey Mouse Clubhouse as the theme for my daughter's party, I immediately thought back to that project and how I could transform it into the Mickey Glove Balloon from the show.  Yah....fantastic idea...one I definitely should have started weeks before the party...one that I started the week of the party.  I blew up some latex gloves, taped down the pinky finger (Mickey only has 4 fingers), taped on a paper ring on the bottom, and paper mached it with tissue paper and gluey water.  Near the end I was sort of cursing Miss Jessica's name (really I still love her) as paper mache is a very time consuming process for 7 party favors!  After I paper mached them, I paint them white and added the black marks like Mickey's glove.  All of this would have been fine and dandy really until I decided to pop one of the "balloons" too early (i.e. before it was completely dry) and it imploded!  Mind you I only had exactly 7 gloves to work with!  Thankfully my husband was smart enough to think about blowing up a small regular balloon inside to get it to blow back up, we re-glued it, and let it dry for days...just to be sure!  Again all during the week of the party.


I then built a paper basket and glued it all together with some cookie pop sticks.  I printed all of the kids names out and attached them to the basket.  Then I filled the basket with the silly little trinket toys that kids love and parents hate!  My kids have loved them...they put animals and figures in the basket and fly them around.


Next up was the cake.  Of course I had to make the cake into the Mickey Mouse Clubhouse!  I did my typical research online when thinking up a cake...to see what others have done.  No sense in re-creating the wheel!  But alas, as I have often found, a lot of others use Fondant to create a lot of cool stuff.  I do not know how to use fondant nor do I like the taste of it.  So I took some of the ideas and came up with my cake.  The base is two 9 x 13 cakes and the Clubhouse body is a cake made in a bowl that was the roundest one I had.  The shoe, head and ears, and the slide are all made from Rice Krispie Treats.  This is where the challenge was.  One, the ears did not want to stay on the head.  Two, warmth makes the ears not want to stay on the head even more.  So there was 4 toothpicks in each ear holding them in place and I frosted quickly and threw them in the fridge so they wouldn't fall off...again!  I got a little smarter with the slide and stuck it in the freezer for a little bit before I tried to frost it.  


 I normally would have tried to smooth out all of my frosting, but due to the warmth / things falling off issue, I decided against it cuz I didn't want to mess with them anymore than I had to!  I kind of like the look though...kind of artsy looking...or am I just making myself feel better?!  The circles around the sides of the base were to mimic the circles on the invitation.  That Mickey Mouse head was heavy...didn't really think a big ball of Rice Krispie treats would be that heavy, but it was!  I had to walk very, very slowly when carrying the cake around because the head was kind of teetering on there a little bit.  I was so nervous it was going to fall off!  But all worked out, and my daughter loved it! 


I will leave you with my big 3 year old girl!  Just now noticed that she has a lovely snotty nose in this picture...ah well, kind of goes with the girl...and I do LOVE the girl!

Thursday, September 9, 2010

Our End of the Summer

So I have been meaning to write this post for awhile. We had such a busy last couple weeks of summer, I thought I would share the highlights. The rest of our summer before was fantastic as well filled with beach visits, camping, family, and friends. But these last few weeks were a great way to end our summer!

To start off our end of summer journey, my son, at the ripe old age of 5, took his First Communion. he had been crying nearly everytime he went up to Communion with my husband (I am always singing with the Praise Band) because he wanted to take it too. When we got a new Pastor at church we thought we could have the Pastor explain that First Communion happens at a defined age (I want to say 3rd grade, but I could be off on that)...instead the Pastor says if he is Baptized and wants to accept the gift of Communion, he is welcome to. Well that one threw us...not the way my church did it as a kid. I think the ELCA Lutheran church may have a different view than the Missouri Synod Lutheran church I grew up in...that or the Pastor has a differnt view. Either way, the Pastor was ok with it. We had my son talk with the Pastor one more time (just to make sure he knew what he was asking for) and we required him to learn the lord's Prayer prior to taking it. SUre enough the little guy learned the prayer in a month. So we got family together and celebrated him taking his First Communion!


Then we headed over to the West side of Michigan to visit a place south of Saint Joseph right on Lake Michigan. My entire family gets together for a trip once a year (beyond the various Holidays throughout the year) and I picked a place called Chalet on the Lake. It was wonderful! Right on beautiful Lake Michigan and a park filled with plenty to do. I gotta tell you...sunsets on Lake Michigan rival anywhere else I have been!


Then when we got back from our trip...I came home to a wonderful package! Since there recently was a big change in teh Paper Makeyp Stamps design team (which is when I was added), we decided to have a Secret Sister swap amongst as many of the team that could participate. This is what I recieved from my Big Sis, Tina Hale! Wasn't she just the sweetest?! Her cards were stunning and I loved the notepad. Then she was generous enough to get me a pad of Basic Grey paper and some beautful ribbon and twine. So sweet! Thank you again Tina!

The final trip of the summer was back to the West side of Michigan again up at Silver Lake. This area has so much to do as well...unfortunately the weather did not make things easy on us, but we tried not to let it stop us! We made it to Michigan's Adventure Amusement Park and had fun through torrential downpours...yeah we were pretty tired of being wet after that day, but we did manage to get about 3 hours at the end of the day without any rain. My husband enjoyed a morning riding his dirt bike on the dunes (only spot in Michigan that allows vehicles on the dunes) while the rest of us braved the major wind that day to see Little Sable Lighthouse. The next day was extremely chilly (especially when we packed more for summer), but we managed some dune jumping and a visit to a nearby petting farm...check out the picture that has a goat, zebra, and a camel all together! They also had a corn maze there in which we let the kids guide us...well not really but we tried to let them think they were guiding us! Then we finishe dthe trip to the Ludington North Breakwater Light in which Adi was allowed to climb to the top...she wasn't allowed to climb Little Sable, so she was super excited to be able to do this lighthouse!

Then we came back and had to get ready for my son's first day of Kindergarten! He was so excited to ride the school bus and had a great first day and week! My daughter was pretty impressed by the bus too because that is all she could talk about too..."Ewijah rode da bus", but she missed him too...always asking where he was. Cutest part was seeing how happy they were to see each other!

So that was my last few weeks of summer. Full of fun! Thanks for checking out my kind of engineering...or travel!
Related Posts with Thumbnails