Saturday, January 30, 2010

Masculine Stars

Whew it has been a cold week here! I hate it when it is just darn right bitter outside. So I will stay inside, play with the kiddos, and maybe even get some crafting done! I am looking forward to participating in my first Virtual Stamp Night (VSN) on SplitCoast tonight! I even have a friend coming over to play with me...how fun! I will admit though I am very nervous I am going to have a bunch of unfinished cards as you are suppose to finish them in 45 minutes...yeek! I usually take longer than that so we will see how I do. Check it out if you can!

Now onto the subject at hand! It is Sweet Stop time! That is right it is time for the Sweet Stop Sketch Challenge #41. I was in desperate need for a masculine card...actually over a week late for my brother-in-law's birthday...so I pulled out the Seeing Stars set from Verve Stamps. Note to self: Find and buy more masculine stamps....seriously I feel like I have absolutely none! So stars it is for now. I stamped and embossed the star on Basic Grey Ambrosia - Tangy pattern paper and cut it out. I adhered it to Whisper White cardstock and framed it with Bordering Blue cardstock that was distressed a little and sponged with Chocolate Chip ink. The base Ruby Red layer was stamped with the Sanded background stamp from Stampin' Up! The sentiment, from the Verve Stamps Starlight Starbright stamp set, was also embossed and layered on another piece of distress and sponged Bordering Blue cardstock. I added the pointer things (what are those called?) at the bottom of the star held in place by some star brads from Oriental Trading. Those same stars were added to the top corner of the card. Lastly was some black cord wrapped around twice and knotted on the side. I think I achieved a masculine card...always so hard!

So now go check out the other sugar babies beautiful creations: Ann, Audrey, Candace, Jodi, Julie, Nicole, Renata, and the Sugar Mama, Korin. Better yet, make a card with the sketch yourself and link to it on the Sweet Stop Sketch Challenge Blog! Have a great weekend and if my cards turn out somewhat decent from the VSN, I may post them! Thanks for checking out my kind of engineering!


The Engineering Details
Stamps - Seeing Stars, Starlight Starbright (Verve Stamps); Paper - Bordering Blue, Ruby Red, Basic Black, Whisper White cardstock (SU!), Ambrosia - Tangy pattern paper (Basic Grey); Ink - Versamark, Ruby Red, Chocolate Chip (SU!); Accessories - Pewter Hardware (SU!), Pewter Star Brads (Oriental Trading), black cord, black embossing powder, heat gun, dimensionals

Monday, January 25, 2010

Sweet Gymnastics

Well it is a cold start to the week here. Yesterday we had a day of warmer weather (not sure it quite reached 50 degrees), but it was enough to take the chill out of the air and melt all of the snow...made our second snowman finally topple over...he had been leaning since the second day we made him! But today...today the chill is definitely back and I feel I have to struggle to stay warm. It is only in the 20's, but I think it feels worse because of that warmer day. Makes me look forward to (hopefully) warmer weather when I take the kids to Florida to visit their grandparents that "winter" down there.

So I thought I would share another scrapbook page with y'all. My son started gymnastics a year and a half ago...still loves it, so we continue to sign him up...very curious to see how far he takes it or if he does at all...one of those times I would love a time machine just so I could see real quick into the future! Anyway, while at the scrapbook event that I made this page at, one of the vendors had gymnastics paper...and it wasn't all girl gymnasts pictures nor was it all pink and girly! So I bought some and used it here. It makes up the background for the page...love it! I once again used a sketch from PageMaps and I stuck to the sketch pretty close on this one. The stars are from the Verve Stamps set Seeing Stars and they were stamped and embossed on the colored cardstock and then cut-out by hand. The title was created with the Cricut Schoolbook (I think!) cartridge...the Cricut is my sister's so I don't have it to verify...and I hand drew the white lines with a white gel pen so that they would look like the stars. The journaling took a little bit due to the fact that you cut out each word, but I like the look. I am going to apologize in advance for my lack of remembering what kind of paper I use on my scrapbook pages! I usually can remember the patterned stuff, but a lot of the solid stuff I don't pay attention to...sorry!

Well off to try and stay warm and maybe do a little stamping! Thanks for checking out my kind of engineering!


The Engineering Details
Stamps - Seeing Stars (Verve Stamps); Paper - Yellow (unknown), Gymnastics (Reminisce), Baby Safari Boy Small Dots (Little Yellow Bicycle); Ink - Whisper White Craft (SU!); Accessories - Cricut Schoolbook Cartridge (Provo Craft), red rick-rack (JoAnn Essentials), white gel pen (Signo), White embossing powder (SU!), heat gun, dimensionals

Saturday, January 23, 2010

Cocoa's Warm Wishes

Can you believe it is already time for another Sweet Stop Sketch Challenge! Well it is and we are still so excited by the amount of participants that played with us last week! We were up to 51 when I last checked! Fantastic! Like before, I checked out all of the creations, but I apologize if I missed someone!

The current sketch, Sweet Stop Sketch Challenge #40, is a great one. Did anyone else have trouble with the sentiment only spin last week? It was nice to not have a restriction this week. So I decided to finally try a Digi stamp! This is my first time trying out the Digi stamps...and I am confident I need some more practice! Plus the Digi stamps tend to be ones that you have to color a lot and again I need some more practice! But, I gave it a go and it turned out ok. I used the Sweet n Sassy Digi stamp, Cocoa's Mittens. Isn't he just the sweetest mouse you have ever seen?! Totally wouldn't put a trap out for him...unless I was trying to keep him for a pet! I printed him out on watercolor paper (so excited that my printer was able to handle the watercolor paper...it has major issues with cardstock so I was nervous!) and then watercolored him. I actually tried a new method for me for watercoloring but using one of the aquabrushes and my ink pads...need some more practice, but it worked out. I just couldn't get the shading that I wanted...kept having too much water! I cut him out (even around the tail) and popped him up on a square. I punched out two arctic snowflakes of Very Vanilla and attached them to some squares with Red Rhinestone brads. The patterned paper is Stampin' Up! Merry Moments and I finished that off with a strip of red rick-rack.

So I hope you will play along again with the Sugar Babies this week! Check out all of the other beautiful creations by the other Sugar Babies: Ann, Audrey, Candace, Jodi, Julie, Nicole, Renata, and the Sugar Mama, Korin. Thanks for checking out my kind of engineering!


The Engineering Details
Stamps - Cocoa's Mittens Digi (Sweet n Sassy Stamps), So Many Sayings (retired SU!); Paper - Merry Moments DSP (SU!), Night of Navy, Very Vanilla, watercolor paper; Ink - Very Vanilla Craft, Night of Navy, Real Red, Close to Cocoa, Pretty in Pink; Accessories - Arctic Snowflake Punch (Martha Stewart), Red Rick-Rack (JoAnn Essentials), Circle Red Rhinestone Brads (SU!), Aqua Brush (H2GO), dimensionals
Friday, January 22, 2010

First Snowman

So remember me telling you about the 26 hour scrapbook event I went to last weekend! Well I am happy to report I was pretty productive, at least by my standards! I am by no means a quick scrapbooker, so one page can take around 3-4 hours to get just right. Seriously not sure what I am doing during that amount of time, but it is very typical for me! I went until around 3 am, slept till about 8 am, and then got back at it until around 7 pm! So not quite 26 hours, but close! Plus there is looking around at the stores that are there, eating, talking, eating, talking, etc.! So I will warn you that you will be seeing scrapbook pages here for a bit...a total of 5.

So let's begin with my first one! I assigned my girls sketches to work from...a couple did and a couple didn't, but I totally used them all. I LOVE sketches for scrapbooking, almost more than I do for cards! It is just a matter of figuring out what pictures have the right number for the sketch and have the "feel" of the sketch. My all time favorite site for scrapbooking sketches is PageMaps....simply fantastic...check it out! This one I played with the sketch a bit...I got the idea in my head that the journaling circle could be the head of a snowman since that was the theme for my page. And I just love it when my husband and son semi coordinate their outfits for the pictures...ok not really, but I love it when it works out randomly! The background was stamped randomly with a snowflake image in Real Red and then in Whisper White ink. The snowman edges were distressed to make him a bit more interesting and I obviously kept my title and journaling outside of his face!

By the way, thanks to all of you that commented on my Pondering post. I am thinking I will try selling them, but I need to actually make some then! So you can look for that in future posts...we shall see how that all works out! Thanks for checking out my kind of engineering!


The Engineering Details
Stamps - Snow Swirled; Paper - Whisper White, some color of Red (Bazzil), Handsome Hunter, some color of blue (sorry no idea...I don't keep very good track of my 12 x 12 paper), Basic Black, Pumpkin Pie; Ink - Handsome Hunter Marker; Accessories - Schoolbook Cricut Cartridge, Scallop Edge Punch (SU!), scissors, dimensionals

Saturday, January 16, 2010

Fun Is Good

As this is posted (and yes it is posted at 1 am) I am hopefully productively scrapbooking! Sounds weird to hope to be scrapbooking at 1 am, but I am attending a 26 Hour Scrapbooking Event with my girlfriends and my sister. Granted I am really not planning on staying up for 26 hours...I probably would if I didn't have 2 kids to them come home to...but I am hoping to be productive for a good portion of it! The girls all have the sketches I assigned for the event (5 single pages and 1 double page), so here is hoping to getting a lot done! And yes I assign them sketches...I am like a drill Sargent...they like it (I think!).

So it is Sweet Stop Sketch time and the Sweet Stop Sketch Challenge #39 has a spin to it...sentiment only! I will tell you right now this card was a labor of love...not sure if it was because it was late or my mind was on getting ready for scrapbooking or what, but this card took way too long! I know you are all looking at it going...it looks awfully simple, what took so long?! Honestly no idea! I had the bottom layers different and it just never felt right until I finally did this and then I said yeah that is what I want to do.


The sentiment is from the Beautiful You set from Verve Stamps...still love this set. I stamped it in
Basic Black, colored in the letters, cut and embossed it out circle Nestabilities, and then sponged over the sides with Apricot Appeal ink (before taking it out of the die). I did add some dimensional glaze over the letters...you can see that in the close-up shot...although don't look too close cuz' I know it isn't perfect! The patterned paper is a retired paper from Stampin' Up!...Rainbow Sherbert. Sorry for all of the retired paper, but I gotta use it some time! Well since the card is simple (kills me when I think how long it took me!) I think the rest is fairly self explanatory.

Make sure to check out the rest of the beautiful creations by the other Sugar Babies: Ann, Audrey, Candace, Jodi, Julie, Nicole, Renata, and the Sugar Mama, Korin! Thanks for checking out my kind of engineering!


The Engineering Details
Stamps - Beautiful You (Verve Stamps); Paper - Tempting Turquoise, Apricot Appeal, Whisper White, Rainbow Sherbert DSP (Stampin' Up!); Ink - Basic Black, Apricot Appeal, Tempting Turquoise Marker, Apricot Appeal Marker, Green Galore Marker, Gable Green Marker; Accessories - Black Brads (SU!), Circle Nestabilities, Square and Scallop Square Nestabilities, Glossy Accents (Ranger), Mat Pack, Paper Piercer, Sponge, dimensionals

Thursday, January 14, 2010

Pondering

Pondering what you might ask? Well I will assume that you did...I made some what I thought were cool necklaces for my family members (the ladies of course) for Christmas and my husband is encouraging me to try and actually sell them. Now mind you I have never sold anything I have made, so I truly have no idea if anything I make is even worthy to be sold (and the publishing rejections don't help boost my confidence!). So I am looking for some honest feedback...should I or shouldn't I? Would anybody really buy them?

Anyway, let me at least show you what I am talking about. I used Jen Del Muro's Pizza box template to create a box for my necklaces that I gave out. I created a little insert for the inside that actually held the necklace in place. So first up is the box...can you tell I am stalling out of fear either way of what you might think?! I was making a lot of these, so I kept it as simple as possible. Stamped the snowflake in Night of Navy ink and matted it to Pale Plum. I attached a little bit of Night of Navy sticking out underneath so I could put the recipents name on the box. The Brocade Blue panel is embossed with the Cuttlebug Snowflakes embossing folder. For teh sides of the box, I just put a strip of Pale Plum so it wasn't plain. I topped off the snowflake with a rhinestone sticker in the center.


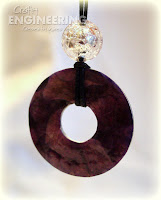
This is the box open revealing the necklace inside. The Pale Plum is the insert that I created to hold the necklace in place...sort of like a real jewelry box. The necklace is a washer necklace with a cotton cording and a metal bead. A close-up of the necklace shows I used a crackle finish to the surface to give it some more interest.


So what do you think? Just in case you needed to see more to make a decision, here are the others I made as well and me wearing one so you can see what they look like on:


I have ideas for variations of these, so I think I could do a variety...and I have even thought about getting a metal stamping set to stamp names/sentiments on the back side. So anybody want to buy one? Do I have something that is sale worthy? Seriously I need some honest feedback to know if I should go to the level of making a bunch and putting them up on Etsy or even building a website to sell them from...then even the thought of local stores...ahhh I don't know what to do! Like I said...pondering...

Thanks for checking out my kind of engineering!

Saturday, January 9, 2010

Thanks a Bunch

It is that time again! Did you join us last week? Hope so...I am trying to leave everyone a comment that participated, but I am a little behind, so sorry if I missed you! I kept my card for the Sweet Stop Sketch Challenge #38 on the simple side. I knew I wanted to use my Flower Fusion Felt Flowers from Stampin' Up!, so that pretty much dictated most of the colors. I threw in the Bashful Blue to offset all of the bright other colors. The image is from a retired SU! set, Love Ya Bunches...I liked how the flowers in the wheel barrel sort of match the shapes of the felt flowers. I colored the image with blender pens and ink pads and added a little Stickles to the birdie to make him extra special! The felt flowers were then each topped with a light blue rhinestone brad.

That is all for me...now go check out the other Sugar Babies' cards with the sketch and better yet, try the sketch yourself and link to it on the Sweet Stop Blog! Leave some love for my fellow sugar babies: Ann, Audrey, Candace, Jodi, Julie, Nicole, Renata, and the Sugar Mama, Korin

Thanks for checking out my kind of engineering!


The Engineering Details
Stamps - Love Ya Bunches (retired Stampin' Up!); Paper - Old Olive, Whisper White, Bashful Blue PP (retired Hostess pack); Ink - Basic Black, Pink Passion, Pumpkin Pie, Old Olive, Bashful Blue; Accessories - Flower Fusion Felt Flowers (Stampin' Up!), Ice Circle Rhinestone Brads (Stampin' Up!), Blender Pen, 1/16" Hole Punch, dimensionals


Friday, January 8, 2010

Rosy Decisions

I have made a decision...what decision might you ask. Well even if you didn't ask, I am gonna tell ya! That is what you get for reading my blog, my thoughts and my cards! Anyway, I have decided to walk away from Stampin' Up!. I still love the cardstock, colors, etc, but I simply am unable to maintain my demonstrator status with they way I currently do things (basically no workshops and classes once or twice a quarter). I by no means was making any real money with it (that wasn't the reason I started...just wanted to make money to spend on stuff I wanted so I wouldn't have to ask my husband every time I wanted to buy some stamping stuff!) and I told myself if I couldn't meet the quarterly minimum that I would give it up. Well I didn't make the minimum last quarter (2nd or 3rd time now, so I gave myself some leeway) and have decided that means it is time to walk away. So I will continue to create with Stampin' Up! products, but I am sure other products will quickly show up since I will feel no guilt in exploring...not that I ever really did! I am hoping to make a little extra money this last month that I can submit orders just so I can stock up on some stuff, so if anyone would like to place an order with me, I am offering FREE Shipping (that is in addition to the Sale-a-Bration promotion going on!). I plan on placing the orders all at once on January 20, so let me know by then!

Now onto the card at hand. I finally got my Mojo on again after quite a long draught...I missed my Mojo Sketches! Well I came back in time for a contest week, so this is my entry for the Mojo Monday Sketch Challenge #120. I broke out an old Stampin' Up! set, Stipple Rose. Hard to say it is a set when it is just one stamp, but you know what I mean. I stamped the rose on Watercolor Paper with Black Staz-on Ink. Then I watercolored with water and paintbrush (the old-fashion way) and ink pads. I incorporated both the Cameo Coral and Rose Red from the Raspberry Tart DSP into the rose so it is one of those multi-colored pretty roses. Then the tedious part of cutting it out (including the little ridges on the leaves!), but I love it layered on top of the patterned paper...just made the rose pop! I also added a layer of Crystal Effects to the rose to make it that more special.

As I mentioned before the patterned paper is the retired Raspberry Tart DSP and I used some Polka Dot Black satin ribbon for the ribbon portion...oh yeah it is the back side of the ribbon (that isn't printed on it). I didn't have any wide solid black ribbon and then I noticed that it was only printed on one side...not perfect but it certainly works! I gather the ends together with a little piece of 1/4" black grosgrain ribbon. Lastly are the little pearls...the ones I used are very old...something my husband's grandmother gave me. They came with little holders that are then like brads in clothes, but I have found gluing them on works great. Please don't look too closely at the gluing of the brads...my glue decided to come out in HUGE amounts and so there was way too much extra glue and it is a little unsightly up close...though I suppose by now telling you that, that you are going to look! Oh well!

Thanks for checking out my kind of engineering!


The Engineering Details
Stamps - Stipple Rose (retired Stampin' Up!); Paper - Cameo Coral, Basic Black, Raspberry Tart DSP (retired SU!), Watercolor Paper; Ink - Black Staz-on, Cameo Coral, Rose Red; Accessories - Circle and Scallop Circle Nestabilities, Crystal Effects, Scallop Edge Punch, Polka Dot Black Satin Ribbon (Offray), 1/4" Black Grosgrain ribbon (SU!), Half Pearl Embellishments (unknown), paintbrush/water, dimensionals

Saturday, January 2, 2010

Sweet Stop Time

Happy New Year to all of ya! I hope that you had a wonderful New Year's Eve. We had a fun party filled with 16 kids that were ages 6 and under and 18 adults! It was definitely a dose of birth control for anyone that is not used to that many crazy kids running around. But the party went well and I was very excited that my balloon drop worked for the kids. My idea for a dance party with a song for each decade didn't work out so well...I made the CD and had great songs, but the kids were not so into it...mainly the little boys. Although my son normally would join me for any dancing, he wouldn't last night because his friends did not want to...poor little thing succumbed to peer pressure.

So on to the topic at hand...this is my first week as a Sugar Baby for the Sweet Stop Sketch Challenge Blog! I am so excited for this to begin and I hope that you will join me each week! My card used a hostess set from Stampin' Up!, Asian Artistry. I stamped it in black ink and then colored it using a blender pen and ink pads. I used the grassy image from the set to create the strip of cardstock on the left side....I liked the subtleness that it gave to the side of the card. I created the circular part of the card with a bowl and cut it out by hand. I lined that then with White Gel Pen dots.

The only extras that I added were the cool ribbon (from WalMart of all places), the ticket corner punch to only three sides of the stamped image (makes the sentiment stand out a little bit more), and Stickles to the middle part of the flowers for a little added bling! So now check out the Sweet Stop blog for all of the details for Sweet Stop Sketch Challenge #37 and show us what you create with the sketch! Also check out the awesome cards by the other Sugar Babies and leave them some love: Ann, Audrey, Candace, Jodi, Julie, Nicole, Renata, and the Sugar Mama herself, Korin.

Thanks for checking out my kind of engineering!


The Engineering Details
Stamps - Asian Artistry (Stampin' Up!); Paper - Lavender Lace, Elegant Eggplant, Always Artichoke, Basic Black, Whisper White (Stampin' Up!); Ink - Basic Black, Always Artichoke, Lavender Lace, Elegant Eggplant; Accessories - Blender Pen, Ticket Corner Punch, White Gel Pen (Signo), French Block Black Satin Ribbon (Offray), Crystal Stickles (Ranger), dimensionals
Related Posts with Thumbnails