Wednesday, November 14, 2007

I am alive!!

Hello all! Has it really been 2 weeks since I lasted posted! So sorry! It has just been one of those months and I feel like I have hardly had time to do anything. Feeling so busy and tired kind of steals my mojo for stamping...I know so sad, right?? I have been working on a couple of things...my Christmas cards unfortunately are not one of them. I have been working on a special class for a Photo Explosion Box. A fun gift idea that gives the wonderful gift of pictures in a unique way. My design is kind of in process though right now, but my current customers should be receiving an invitation to attend this special class.

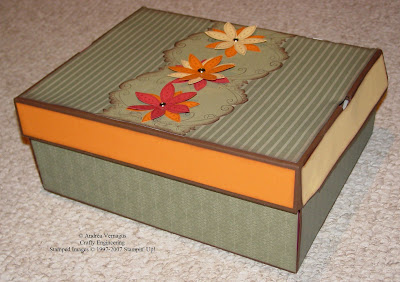
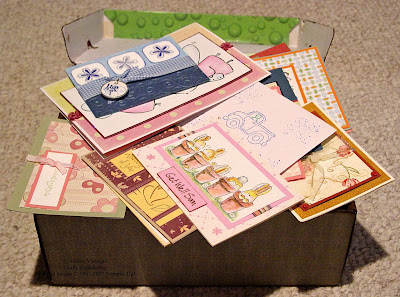
The other project I finally completed was to decorate the box that I put all of the amazing RAK's in for the Dunn Family. I wanted to give them a pretty box along with the heartfelt greetings. It turned out fairly well...probably needs some more decoration, but I wanted to get it done to send to them. They should be receiving it in the next week or so. Thank you again to all of you for helping me send them a little love, support, and prayers!!
Oh and don't forget to check out Splitcoast Stampers for a view of all of the RAK's! Follow this link...Cards posted on SCS


Sunday, October 28, 2007

A Family Christmas

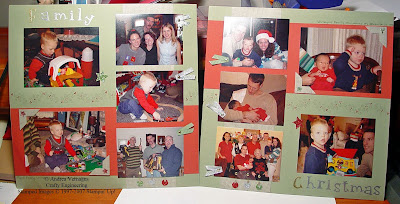
This will be a quick post. I wanted to put something out there, but sleep is calling my name. After having laryngitis this week with a VERY annoying cough, I simply feel I cannot catch up on my sleep. It probably doesn't help that our son is now getting up just about every night at 3 am or so since he moved into his "Big Boy" bed. Really hoping this phases out soon!! Anyway, this was the last scrapbook layout that I did at that scrapbooking weekend. I have a hard time with Christmas pages for some reason. I think because I feel like they always come out the same or something. This one turned out fairly well, although I will admit it is not my favorite. I ahd some sparkly embellishments that I wanted to use and a variety of pictures (with all different colors!).
Nothing major done here. The base page is Mellow Moss with Ruby Red and Sahara Sand Strips. I stamped the holly border in Mellow Moss ink above and below the strips of Ruby Red and colored in the berries with Ruby Red marker. I embossed the title in Gold and Silver embossing powder. Other that that I just found spots to add my sparkles and went with it. You can see each individual page below.
I got all of the Dunn Family RAK cards (Blog Candy for a Cause) into a box, but I want to decorate the box before I send it to them. Hopefully I get that done in the next couple of days. I will take a pic of it before I send it on so you can all see it! Later I will also post RAKs that people sent me in addition to sending me one for the Dunn Family! So sweet!!! Until then, have a great week!

The Engineering Details: Stamps - Itty Bitty Borders (Retired), Canvas, Quirky Alphabet Upper and Lower (Retired); Paper - Mellow Moss, Ruby Red, Sahara Sand; Ink - Mellow Moss, Sahara Sand, Versamark, Ruby Red Marker; Accessories - Silver Grosgrain Ribbon (retired), Moss Grosgrain ribbon, Sparkly ornaments and Stars by Jolee's, Gold brads, Silver and Gold Embossing powder; Supplies - Photo Corner Punch, Heat Gun, Glue Dots


Monday, October 22, 2007

Dunn Family Update and Blog Candy Winner

Hey everyone! Sorry for the absence from posting. I was busy getting ready for a workshop and processing all of the beautiful cards I have been getting for the Dunn Family. I have been completely overwhelmed by the amazing response for a family that you have only read about! The stamping community is truly amazing! As I continue to post all of the cards to SCS (I will post again once I have them all up so you can check them out!), I wanted to share with you a little bit about the response I have gotten. Around 80 people have sent cards, gifts, and prayers. The Dunn Family will be receiving cards and prayers from all over the United States, throughout Canada, England, and even Australia! The power of the Internet at its best! So thank you to all of you for taking the time to send me the cards...I am honored to box them all up and send them to Michael, Alissa, Isaiah, Isabella, and Madeline.

Speaking of the Dunn Family, I would love to share some good news with all of you. Michael and Alissa were able to bring Isabella and Madeline home!! Both girls were eating well enough that they got permission to take them home. The latest tests on the girls showed that the tumors have decreased in size...so the medicine is doing its job...more importantly, the Lord is laying his healing hand on these two baby girls! They are scheduled for their next round of chemotherapy for this coming weekend, I believe...in which they will be readmitted to the hospital while it is administered. So, thank the Lord for the blessing of having the family in one house together, but continue to pray for these two baby girls as they continue to fight the cancer inside of them. Continue to read their inspiring and heartfelt journal entries at http://www.caringbridge.org/visit/dunntwins.

Now for my Blog Candy for a Cause Winner! As everyone commented about posting about my RAK request on their own blogs, I added their names to a list in Excel. Then as I received the cards in the mail, I added the creator's name to my list. With a total of 163 entries, Random.org selected #110: Gabriella Arriaza (her blog is Confessions of a Stamper)!!! Gabriella, I will be contacting you to ensure I have your correct snail mail and you will be getting the great Blog Candy (which grew even more thanks to more donations...need to get a picture before I send it out). I hope that you like all of the goodies!

Once again...Thank you, Thank you for supporting my RAK request! I could not be more grateful!

Halloween - A Little Different


Happy Halloween...a little early! I love this Holiday...not the scary, spooky side, but the cute, fun side! Somehow though I never managed to get my decorations out this year...bad Mommie! Things got away from me and now it just seems not worth the effort. Oh well, I still love everyone else's decorations!

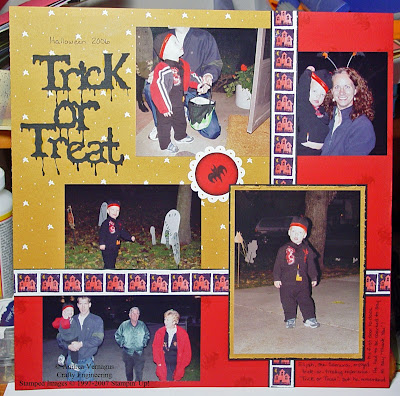
This was the page I did at that weekend scrapbooking event. This was last year's Halloween where Eli dressed up at a Samurai. Hard to see in the pictures, but the hat even had a long braid coming out the back. So cute! My husband and I bought it in Chinatown in July thinking we got a large size. But by the time Halloween got closer, I had to have my Mom fix the hat and jacket so they would fit! Worked out and he looked adorable if I do say so myself.

Since Eli's costume had that cool red dragon embroidered on it, I knew I had to bring the Red color into my layout. So I went with a little different color layout for Halloween. I made the main image of Eli my focal point and layered that image...the More Mustard layer was distressed using some scissors. I used strips of the House image from Bitty Boos Too colored using blender pen and Real Red ink & More Mustard Marker to go under the focal image and tie the other pictures into it.

I really like how it turned out and I love the fact that the alternate colors turned out so nicely.

The Engineering Details: Stamp Sets - Bitty Boos Too; Ink - Real Red, Basic Black, More Mustard Marker; Paper - Real Red, More Mustard, Basic Black, Whisper White, DP from Over the Moon Press; Accessories - "Trick-or-Treat" sentiment bought at Simple Pleasures Scrapbook Store, Scallop Circle Punch, 1-3/8" Circle Punch; Supplies - Blender Pen, Sponge

Sunday, October 14, 2007

Reminder to get your RAK cards in the mail & a Scrapbook page

Hey all! Just a quick reminder that I need you to get your Dunn Family RAK cards in the mail on Monday!!! I am hoping to have them all by 10/22 so that I can draw for the winner of the blog candy. So if you haven't sent it yet, go out and put it in the mailbox!! Thank you all again for your wonderful support.

Now for another one of my scrapbook pages I did a couple of weekends ago. I really do like how this one turned out. I got the idea for the hand drawn spiders from somewhere in the blog world...sorry I didn't bookmark it, so I don't know where I saw the idea.

Did you notice the pumpkins on the left...they are in stages of getting carved! Probably a small detail that no one but me will notice. Oh well!

I did the scalloped edge below the pictures using the corner rounder with the guard removed.

The saying is coming from a book that my son had gotten (well Grandma got it) from the library..."This is not a Pumpkin". I thought it was cute. And yes, Eli was attempting to eat the raw pumpkin seeds in the bowl! Silly boy!

The Engineering Details: Stamps - Carved & Candlelit, Itty Bitty Boos, Quirky Alphabet Upper & Lower, Alphabet from Wal-Mart; Paper - Summer Sun, Pumpkin Pie, Basic Black; Ink - Basic Black, Pumpkin Pie, Versamark, Pumpkin Pie Marker, Summer Sun Marker; Accessories - Only Orange Eyelets, Dimensionals, Halloween Ribbon from Jo-Ann's; Supplies - Corner Rounder, Crop-A-Dile, Black embossing powder, heat gun

Thursday, October 11, 2007

Picking the Perfect Pumpkin!

Two posts in a day! Crazy I know! I have been wanting to post some of the scrapbook pages that I did over the weekend. My friend and I had a great and productive day and a half of scrapbooking.

I really love how this page turned out! It definitely is one of my favorites that I have made. Actually I am pretty excited by all of the pages I did, but this one in particular (you will see the others a little later). They had a little layout contest near the end of the scrapbooking event...best double page layout and best single page layout. I won the Best Single Page layout with this one! If I would have used non-retired stamps, I probably would feel compelled to submit this to a magazine...can you tell I really like how this turned out!

Anyway, I do not have a lot of patterned paper (gasp! for all of you paper people out there), so I created my own with the pumpkin. Stamped it in Night of Navy and then colored in the pumpkins with Watercolor pencils and blender pens. Then I lightly sponged Creamy Caramel over the white spaces. I then attached it to the Old Olive and Certainly Celery layers and "sewed" the hemp twine along the edges. I only have a couple Alphabet sets...need to get a new one...and I am actually learning to like my handwriting.

The Engineering Details: Stamps - Little Layers II (retired), Quirky Alphabet upper and lowercase (retired); Paper - Creamy Caramel, Certainly Celery, Old Olive, Whisper White, Night of Navy Pumpkin Pie; Ink - Pumpkin Pie, Night of Navy, Old Olive Marker, Pumpkin Pie Marker; Accessories - Hemp Twine; Supplies - Large Tag Punch, Photo Corner Punch, 1/16" Circle Punch

A Mojo Sketch Challenge (#6) & A Happy Anniversary

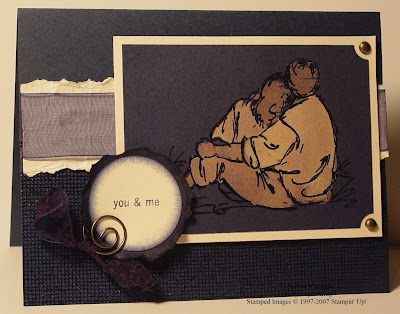
Well, my wonderful husband and I have hit our 9th wedding anniversary! I say "hit" because we haven't had a chance to celebrate yet. He actually had to travel to California for work on our anniversary. But since we never celebrate on the actual day of anything, no biggie!

I used Julee's Mojo Monday Sketch Challenge that she posts on her blog Poetic Artistry. Julee also is the designer behind the Verve Visual stamps, which by the way I love the two just released! I am trying to figure out if I can get one or both!!

Anyway, I used the couple in the Summer by the Sea...embossed them in Crystal Clear and then bleached the image. I love bleaching these sketch images! I also embossed the canvas background on the bottom part of the card. The You & Me saying comes from the hostess stamp set "So Many Sayings"...which I am becoming very tempted to unmount and cut it so all of the sayings are separate. I like the addition of the Hodgepodge Hardware and the melted organdy ribbon tied to the spiral clip. Ever done that before? It is real easy...just heat the tied ribbon and watch it curl! Nothing too crazy, but I like it.

The Engineering Details: Stamps - Summer by the Sea, Canvas, So Many Sayings; Paper - Night of Navy, Very Vanilla; Ink - Versamark, Night of Navy, Night of Navy Marker; Accessories - Navy Wide Organdy Ribbon, Hodgepodge Hardware-Pewter, Crystal Clear Embossing Powder; Supplies - Ticket Corner Punch, 1-3/8" Circle Punch, 1/16" Circle Punch, Sponge, Heat Gun

Tuesday, October 9, 2007

My Dunn Family RAK

Well I am completely humbled by the amazing response I have gotten from so many people. The RAK (Random Act of Kindness) cards that I have been getting have been beautiful and I seriously cannot wait to give Michael and Alissa all of these cards! To give you an idea, today my mailbox was full of 18 cards! I think what actually gets me more, are all of the notes and comments saying what an angel I am for doing this. Honestly, YOU all are the angels. You are all sending cards to me to give to a family you have never even met! Words simply cannot even describe my gratitude!

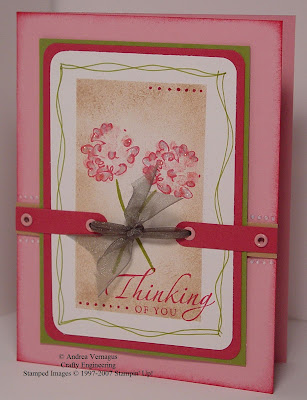
I had a busy scrapbooking weekend...Friday night and all day Saturday...I will post the pages I made later. One actually won best single page layout...that is always exciting! Anyway, I was finally able to make my RAK card for the Dunn family. I decided to go with pink for the girls and a flower for each of them. I stamped the tops of the flowers in versamark and dusted Pretty in Pink pastels over top to make them somewhat soft. Then I stamped the outline image over top with Rose Red. I reverse masked the image (in other words, I masked around the image instead of the image itself) and sponged Creamy Caramel over the image. I doodled around the image with Old Olive Marker, layered it, and add some Diamond Stickles to the flowers. The rest of it is pretty self-explanatory.

Be sure to check out the updates to the Blog Candy for a Cause post. Some more "candy" was added and a couple others are offering candy at their blogs too! I put the updates in different colors so that they are easily spotted. Keep those RAK cards coming! Thank you to all that have already sent them. I plan to take some time this weekend to post any that are not already there to SCS. I just want everyone to see the beautiful cards that have been made in honor of two sweet baby girls! I think you will find the response amazing...I know that I have!

Wednesday, October 3, 2007

Holiday Glitz Promotion

Make your holiday cards glitzy this year with a little help from the Stampin' Up! Holiday Glitz card kit. With our precut card stock and Designer Series paper, festive zigzag ribbon, and Rhinestone brads, spreading handmade holiday cheer has never been this easy!
Each Holiday Glitz card kit makes 15 handmade cards and includes:

Precut card stock and Designer Series paper (15)
Whisper White Envelopes (15)
Rhinestone brads (15)
Real Red zigzag ribbon (15)
Full-color instruction sheet (1)

There are two ways to take advantage of this fantastic kit while supplies last:
1) Purchase one of holiday stamp sets (below) and get the Holiday Glitz card kit for the special price of $24.95
2) Purchase the Holiday Glitz card kit for $28.95 with no additional purchase required.

Qualifying stamp sets include:
Snowfall - $23.95
The Snowflake Spot - $20.95
Big on Christmas - $18.95
Love & Joy* - $23.95
* Holiday Mini Collection 2007
If you would like to take advantage of this offer, just contact me!

Tuesday, October 2, 2007

Blog Candy for a Cause

Well I am new to the blogging world (since July…is that still new?) and I have seen lots of Blog candy out there, so I hope this wets the appetite a little in comparison to the others out there. Instead of just having everyone leave comments to get an entry for the blog candy, I have decided to ask you for something in return…a RAK (Random Act of Kindness) card for some special people.

Recently, my family’s lives have been touched by the plight of some friends of friends (but I am claiming them as our friends now too!). Michael and Alissa Dunn and their son Isaiah were blessed with beautiful twin baby girls on July 4, 2007. The pregnancy went fantastic and the twins were full term without any issues. Madeline Ora and Isabella Grace were wonderful additions to the family. Around the end of August, Michael and Alissa noticed that Maddie’s abdomen was a little swollen and firm, but she was acting completely normal. A few days later at the girl’s 2 month check-up, the pediatrician took one look at Maddie’s abdomen and sent them to the hospital for x-rays. A CAT scan shortly after revealed that Maddie had a large cancerous tumor called neuroblastoma Stage 4S. To give you an idea, this tumor has grown to about the size of a softball in her tiny body.

Once checked-in at Children’s Hospital in Detroit, Michigan, the doctors quickly decided to take a look at identical twin Bella. Unfortunately, Bella was also diagnosed with neuroblastoma. According to their doctors, this is only the 9th reported case of twins have neuroblastoma at the same time. Both girls have undergone one round of chemotherapy and are beginning their second. You can see pictures and read their story from their own words at their website: http://www.caringbridge.org/visit/dunntwins.

So as I hold my son a littler tighter and we pray together for the Lord to lay his healing hand on the ouchies in Maddie’s and Bella’s bellies, I thought it might be nice to let them know that prayers are being said all over the country and maybe the world for these two little girls and their family. As I read the journal entries on their website, I am amazed by the strength and faith that Michael, Alissa, and their families have shown.

So I put together a special blog candy in which to get an entry, you need to mail me a RAK card for Maddie & Bella and/or for the family, that I will then place in a shoebox (hopefully I fill it!) and mail to them. So if you have the time, please make a card, sign it with your best wishes, post a picture of it to SCS (if you are able) with keyword bcfac07 so all can see it, and mail it to me. You can get an extra 2 entries if you advertise this Blog Candy for a Cause on your own blog…just make sure to leave me a comment so I can come visit the blog.

Update: In addition to the blog candy that I have put together, Anita from Praierie Papier Ponderer is offering to now include the Ronald McDonald House Charity stamp set from Stampin' Up! With the purchase of every one of these sets, Stampin' Up! donates $2 to the RMHC. This is actually quite fitting, since Michael and Alissa are staying at a Ronald McDonald House by the hospital! Thank you, thank you, thank you, Anita for being so generous!!!! And be sure to check out Anita's blog!!

Update: Once you have sent the card to me, stop by Inkerdoodles and Ink-A-Design and leave Lisa and Carolynn a comment telling them you sent it (and link to a picture of it if possible). They are going to draw for some extra blog candy in addition to what I am offering! Triple candy for a good deed...can't get much better than that!

Update: Well the generosity continues! Mary Elliott of Everyday Elliott is throwing in a set of blender pens (3) and an unopened Cranberry Crisp Classic Ink Pad to my blog candy! So now the candy just got a little sweeter. Thanks Mary!


I would like all cards to be in the mail to me by October 15! It doesn't have to actually be at my house by the 15th...sorry if I caused some confusion. So get Crafty!!

Thank you all for helping me pray and hopefully lift the spirits of the Dunn Family!

Note: If you don’t normally take pictures of your cards or don’t post them to SCS, let me know and I will take a picture of the card when I receive it and post it to SCS.


Mail cards to:
Andrea Vernagus
Blog Candy for a Cause
2797 Warwick Dr.
Bloomfield, MI 48304

Cards posted on SCS

Monday, October 1, 2007

Customer Blog Candy Winner!!


I have to apologize to my customers on the delay of this! I meant to do this a few weeks ago, but preparations for the Stamp Camp got in the way.

Anyway, I offered up to my customers through my email newsletter an incentive to come and check out my blog. If they left me a comment, they got an entry into my Customer Blog Candy and if they subscribed to my blog, they got a 2nd entry!

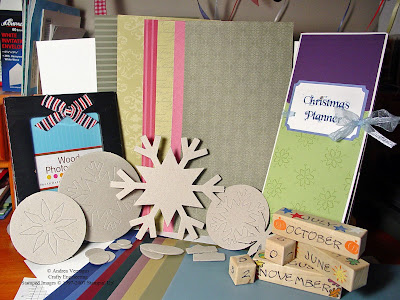
So the winner is Janine B.!!! The winner was picked by random.org after I assigned all of the entries a number. Janine, I will be sending you what you see in the picture: 6x6 sheets of Wintergreen Designer Series Paper, a variety of ribbon pieces, sampling of silver wire, and Only Orange & Chocolate Chip Stampin' Write Markers. I hope you like it and get creative with it!

Thanks to all for commenting on my blog and subscribing...it is good to know that I may not be talking just to myself!!

By the way, I am about to announce a Blog Candy opportunity for all! Just figuring the last details out, so I hope everyone comes back to participate!!

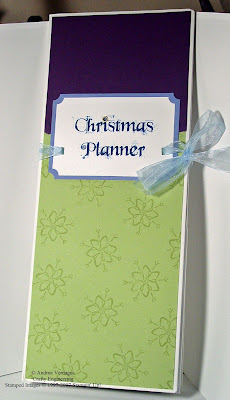
A Christmas Planner

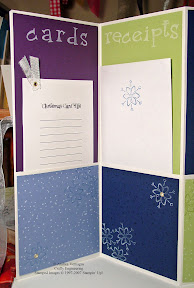
I wanted to show off the gifts that I gave my Stamp Camp attendees. I was pretty proud of them, even though they took a bit longer than I expected!

I wish I could take credit for these great planners, but alas I CASEd the idea from a variety of sources. Deb from Blue Moon Stamping made a planner (I think one of the first ones) for a more general purpose, while Jan from Stamp, Paper, Scissors and Shannon from Stamp Till You Cramp made Holiday ones. I picked up stuff from all and created my version. The titles I used are Cards, Receipts, Gifts, and Misc.

Basically take a plain white folder and open it up. Fold the left and ride sides into the center and crease tightly. Reverse the middle fold and you have yourself a little book with pockets.

I only have so much patterned paper, so I used the retired snowflake from Little Layers II to decorate 4 different colors of cardstock along with one of the backgrounds from Itty Bitty Backgrounds. These were then accented with gold brads. Nothing fancy, but I like how it turned out....this is probably where having patterned paper would make things faster! Oh well!
I grabbed a cool font from Simply the Best Fonts website (free!) and made a couple of lists and a little calendar to include in my Christmas Planner. I create mine in Excel to make sure it was formatted the way I wanted it, but the same could be made in Word or something.
Want to know how to get one of these for yourself?? Stay tuned in the next few days! I am going to be announcing a special blog candy that will hopefully uplift some special people during a hard time.
The Engineering Details: Stamps - Little Layers II, Itty Bitty Backgrounds, Quirky Alphabet Lower; Cardstock - Elegant Eggplant, Night of Navy, Certainly Celery, Brocade Blue, Whisper White; Ink - Elegant Eggplant, Night of Navy, Certainly Celery, Brocade Blue, Whisper White Craft; Accessories - Gold Eyelets, Light Blue Wide Organdy Ribbon (Joann's), Sparkly White ribbon (no idea where it is from); Supplies - White folder, envelope, Crop-A-Dile

Sunday, September 30, 2007

Stamp Camp Fun & Food Recipes

Well, first I should apologize for being so absent from the blogging world. I really have been stamping...tried submitting stuff to a magazine (no results, probably have to get used to that one), getting ready for my Stamp Camp, and making the gifts for my stamp camp attendees. I plan to show you the gifts I made for the girls that came over, but I haven't had a chance to take any pictures yet. Plus I am working on figuring out a blog candy thing (by the way, I haven't forgotten about my promised blog candy that I have for one lucky customer of mine...that will be out this week, I promise!) and one of those gifts might be one of the things as part of the candy. So please stay tuned this week for my upcoming blog candy announcement and how to participate!!!

Anyway, along with the fabulous projects (shown below) that the girls did at my Stamp Camp on Saturday, they seem to think that I made some fabulous food as well! I think just about everyone asked for the recipes...so instead of trying to write it out 6 times, I told them that I would post them here. I have a picture of the Caramel Apple Salad, but it doesn't look very appetizing....but believe me it is!!! My husband and I can't get enough of this stuff! The Broccoli Ham Ring is a nice lunch meal for guests...it looks like it took a lot of time, but it is oh so easy. So enjoy!

Caramel Apple Salad
Ingredients: 4-6 Snickers Candy Bars (frozen), 2-6 Granny Smith apples, chopped, 1 (8 oz) container of Cool Whip, 1 (3.5 oz) package of dry instant vanilla pudding
1) Smash frozen candy bars in wrappers with a hammer
2) Mix all ingredients together.
Serves 6 - 8 people
Note: For those at the stamp camp, I used 6 candy bars and 6 apples
Broccoli Ham Ring
Ingredients: 2 tubes (8 oz) refrigerated crescent roll dough, 1-1/2 cups (6 oz) shredded swiss cheese, 1/4 lb fully cooked diced ham (about 1/2 cup), 2-1/4 cups chopped fresh broccoli, 2 Tbsp Dijon Mustard, 1 tsp lemon juice
1) Unroll crescent roll dough and place triangles on a 12" pizza pan (or pizza stone like I use), forming a ring with the pointed ends facing the outer edge of the pan and wider ends overlapping.
2) Lightly press wide ends together.
3) Combine the remaining ingredients; spoon over wide ends of rolls.
4) Fold points over filling and tuck under wide ends (filling will be visible)
5) Bake at 375 degrees for 20-25 minutes or until golden brown.
Serves 6-8

*******************************************************
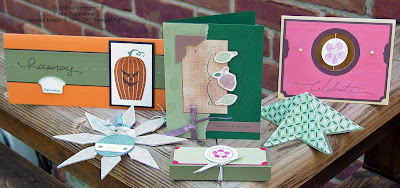
And here are the up-close pictures of the Stamp Camp projects...got any questions, just leave me a comment and I will let you know! I am missing pictures of the nugget box, so I will have to add that pic later.
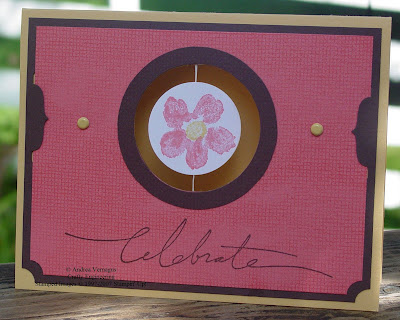
Celebrate Suspension Card
Dotted Autumn Faux Linen Card

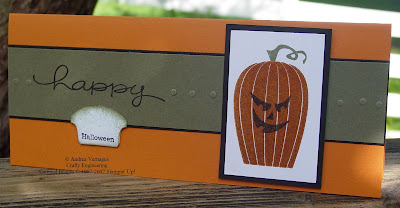
Scratch n' Sniff Halloween Card (smells like cinnamon)
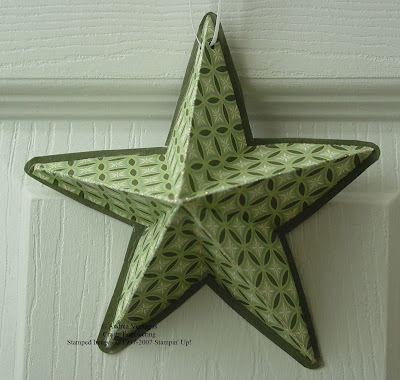
5-Point Folded Star Ornament
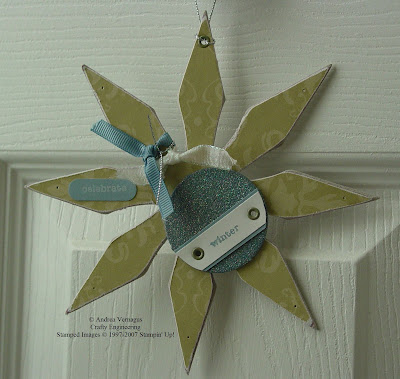
Chipboard Ornament
Sunday, September 16, 2007

Weekend Sketch Challenge #19 (and #18)

Well I actually completed one of Beate's Weekend Sketch Challenges over the weekend! I know, I am kind of impressed myself! I didn't do anything too crazy with the card. I did cheat a little though....after seeing one of Beate's examples, I stole the idea for the ribbon and the hodgepodge hardware (hope that is o.k. Beate!). For some reason the pictures that I took today don't look the greatest...actually as I typed that I realized what it was. When I saved the picture after putting my name on it, I have it on compressing the file a lot...blah! Oh well, no time right now to fix. Updated: I reposted the picture...so mch better! Anyway, only "special" thing done here was masking of the flowers as I stamped the bouquet of them. Oh and I used my scissors to distress the edges of the Elegant Eggplant cardstock.


The Engineering Details

Stamps: Heartfelt Thanks, Word by Word, Canvas
Inks: Ruby Red, Really Rust, Elegant Eggplant, Apricot Appeal, Old Olive
Cardstock: Old Olive, Elegant Eggplant, Really Rust, Ruby Red, Naturals Ivory
Accessories: Apricot Appeal Grosgrain ribbon, Hodgepdoge Hardware - Pewter, Hemp Twine, dimensionals


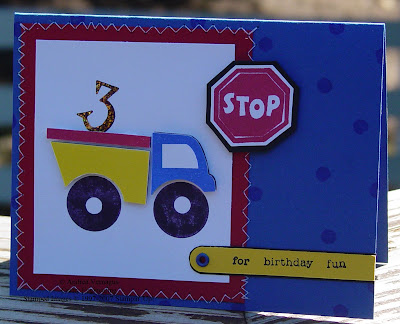
I did this for last weekend's sketch challenge (#18), but I just finished it this morning! Oh well, better late than never? Obviously it is for a wonderful little boy turning 3! Again I made a mistake in compressing the file too much, so the picture is sucky...sorry about that! Updated: I reposted this one as well...ahhh, much better! Not sure you can tell from the picture, but the sections of the truck are popped up....makes the truck stand out a bit. I actually used an eraser to "stamp" the blue polka dots on the background. My finishing touches are sewing around the edges and adding a little sparkle to the #3.


The Engineering Details

Stamps: By Land, Everyday Flexible Phrases, Quirky Numbers (Retired)
Inks: Basic Black, Real Red, Brilliant Blue, Yoyo Yellow
Cardstock: Brilliant Blue, Real Red, Yoyo Yellow, Basic Black, Whisper White
Acceories: Brilliant Blue Eyelet, dimensionals, Word Window Punch, Sewing Machine, Icicle Stickles, Eraser

Sunday, September 2, 2007

Weekend Sketch Challenge #17

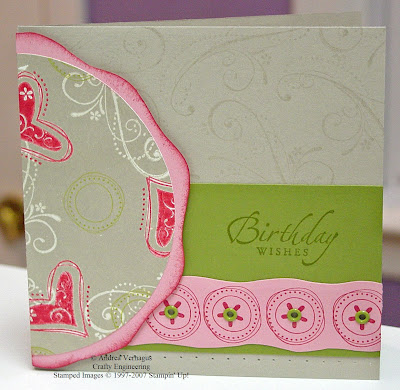
Here is another of Beate's Weekend Sketch Challenges. She did a circle again...which I tend not to do well with. But I think I managed this time better than last time.
I combined this sketch challenge with a technique challenge on Splitcoast Stampers. The technique challenge was to do a double resist or basically combined Emboss Resist and Versamark Resist.

Emboss Resist: stamp with versamark on glossy paper and emboss with clear embossing powder. When you apply the ink with a sponge or brayer, the embossed images with resist the ink. I always rub a tissue over top to get any ink left on the embossed images.

Versamark Resist: stamp with versamark on glossy paper. Then using a sponge or brayer, apply ink to the paper. The versamarked images will resist the ink and leave a faint image. This technique has also been called 'ghosting'.

To combine the two techniques, you stamp the images you want to clear emboss and emboss. Then stamp the images you want to be 'softer' in versamark before you brayer on any ink! Then brayer on the ink. You have to do the clear embossed images FIRST. If you try to do the other images first (the ones for versamark resist), when you sprinkle on the embossing powder for the emboss resist images, your embossing powder will stick to ALL the images.

Oh I guess I got a hat trick on this one...this also falls in line for the Color Challenge on splitcoaststampers as well!

Anyway, since Priceless is one of my new favorites, I used it. I embossed the heart image with Rose Red ink (cheater way...yup, again...don't have the color craft ink...what a surprise!) on Glossy white cardstock. Then I versamarked the Swirly pattern and brayered Sahara Sand over top. I then added the Old Olive circles. I cut around the Pretty in Pink Circle freehand, along with the strip of Pretty in Pink. I knew I wanted something on the base Sahara Sand cardstock, so I stamped the swirly after stamping off first....made it more faded and subtle. The rest of the card is pretty self-explanatory, but if there are any questions, let me know!

The Engineering Details
Stamps: Priceless, Sincere Salutations
Inks: Sahara Sand, Old Olive, Rose Red, Versamark
Paper: Sahara Sand, Old Olive, Pretty in Pink
Accessories: Brayer, Paper Piercer, Crystal Clear Embossing Powder, Sponge, Old Olive Eyelets, Crop-A-Dile (to set the eyelets...oh so silently!), Scissors

A Frenzy of a Fall Promotion

Stampin' Up! has just announced a great promotion to celebrate the coming of Fall! Spend $30 in regular priced merchandise and qualify to purchase one of each of the six promotional stamp sets at 30 percent off! The sets that you can get discounted are:

105355 - pg. 26 - Bitty Boos Too - $12.57
109284 - pg. 29 - Haunting Halloween - $13.27
107383 - pg. 30 - Thoroughly Thankful - $16.07
109373 - pg. 108 - Autumn Fest - $16.77
109421 - pg. 91 - Elementary Essentials - $19.57
110366 - pg. 17 (Winter Mini) - Stem Silhouettes - $22.37

So don't miss out on this chance to get some great sets at a discount!!! Contact me with your order!

A Get Well Sketch Challenge

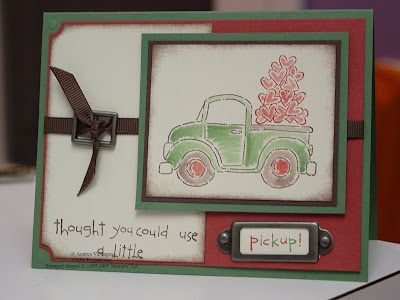
I did this one a few days ago and didn't get a chance to share it. This is from a sketch challenge at i{heart}2stamp. Jen del Muro has a great blog with lots of great samples and ideas. She also features a guest designer once a month.

Anyway, back to the challenge. Jen posted a card sketch on her blog....not sure how often she does it, but they are usually pretty good. If you would like to see the sketch this card was based on, click here.

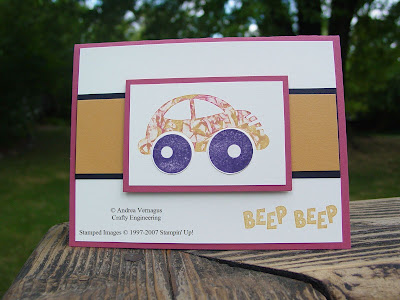
I turned the sketch on its side mainly because my truck image didn't fit the other way. I needed a get well card for my husband's Uncle, so I knew I wanted to use the little saying on the card. I used ink from my ink pads and a blender pen to color in the truck. Since I didn't use a waterproof ink for the truck, I tried to stay away from the edges, hence the odd coloring I did. Although I think I kinda like it! Putting the saying on there didn't quite go as well as I had hoped. The extra vanilla piece on the side was added to cover up my first attempt! In the end it turned out pretty good...not my best, but I'm happy.

The Engineering Details
Stamps: Loads of Love
Ink: Garden Green, Ruby Red, Chocolate Chip (classic inks and markers)
Paper: Garden Green, Ruby Red, Chocolate Chip, Very Vanilla
Accessories: Chocolate grosgrain ribbon (this size retired...so sad), Hodgepodge Hardware - Pewter, sponge, ticket corner punch, Crop-A-Dile (to put the embossed brads in the two corners...did you notice them?)

Tuesday, August 28, 2007

Weekend Sketch Challenge (#16)


I finally got to try out Beate's Weekend Sketch Challenge. I missed last week...kind of bummed too because it looked like a good one. I needed a Baby Shower card for a friend of mine, so I knew which set I wanted to use....so sad it retired (and yes I think it has been over a year). But the image of the Mom and baby just hits me right in the heart, you know. So what better image for a Mom-to-be?

The one technique that I love, love, LOVE, to do with these sketches type of sets is bleaching. Just emboss the image with Versamark and Crystal Clear Embossing powder and then dip a synthetic paintbrush in bleach and sweep it in the desired areas. The more bleach the whiter it gets or the more color is removed. I tend to only dip once and do a different area at a time so that the resulting color varies some throughout the image.

This sketch challenge was a tough one for me. Not really sure what it is, but I am not overly pleased with the card...its missing some layers or something. But alas it was getting late last night and the 5:20 am wake-up was looming a little too close for comfort, so I stopped and called it quits. I think the circles were throwing me off. I don't do much with circles....the engineer in me likes straight edges or something. Plus, since I don' have the cool scallop circle punch that is all of the rage right now (which makes me want one!), I tried to make do with a pair of scallop scissors. Well these scissors are the really cheap ones...I mean really cheap. In fact, so cheap they barely cut the cardstock! So I kind went with it and let the scallops look a little distressed. Sort of worked. Oh well, lots of excuses on this one. Maybe next time!

The Engineering Details

Stamps: Sketches (Retired), Priceless (the little flower), Wonderful Words

Inks: Versamark, Very Vanilla Craft, Elegant Eggplant

Cardstock: Certainly Celery, Elegant Eggplant, Very Vanilla

Other: Crystal Clear Embossing Powder, Sponge, Bleach, Synthetic Brush, Scallop Scissors (non SU! - brand unknown), Certainly Celery Grosgrain Ribbon

Sunday, August 26, 2007

Stamp Camp - September '07

Well I am a couple of days later than I planned on getting this picture out to you! Oh well, I was overcome by actually getting things done this weekend. It was the first weekend in a very long time that my husband and I were both at home. So with babysitters already scheduled, my Mom and Dad, we got an evening out....yeah!

Anyway on to the topic at hand. Here are the hopefully considered fabulous stamp camp projects for my Stamp Camp on Saturday, September 29 (10 am - 2 pm). So for anyone in the Southeastern Michigan area, drop me a line to sign up! There are 3 cards: Scratch n' Sniff, Faux Linen, and Suspension Card and 3 other projects: folded star ornament, chipboard snowflake ornament, and a nugget gift box. Once I hold the stamp camp, I will post pictures of each of the projects individually for those unable to make it. Hopefully I got a pretty good variety for ya' all to make (and I didn't make anything too time consuming...sometimes I don't realize how time consuming a project can be as I am in the design process!). Cost, as usual, will be $15 which includes all supplies, lunch, door prize, and a small gift from me! Hope to fill my house with many stampers!


Tuesday, August 21, 2007

Our Weekend Adventure

When I started this bloggin' thing, my plan was to post a new card or scrapbook page at least once a week and maybe a tutorial once a month. Well, I am going to be a little late this week. If you check out the cutie on the left and you will see why I have a delay. We went camping all weekend and visited Thomas the Tank Engine at Huckleberry Railroad in Flint, MI. My son, Elijah, had such a great time. I think he was simply amazed that their was such a large version of Thomas!

While we were there, we got to go on a small ferris wheel. It was kind of funny...Eli saw the ferris wheel and ran right to it. This is the first time he has ever seen a ferris wheel, so we were surprised that he really wanted to go on it. But he wanted to go even after we explained that we couldn't get off until the ride was done. So we went on and he loved it! So cute! The picture of the two of us was while we were on the ferris wheel. Eli was so infatuated by the temporary tattoo of Thomas on his arm!

Anyway, I am working on getting my stamp camp projects together...I will be posting them here by Friday! Plus I have to do a baby card by Sunday. So once I get this stuff done I will post so fabulous creations! :P

Tuesday, August 14, 2007

Weekend Sketch Challenge


This is my first time doing a sketch challenge. I decided to do a Beate Sketch Challenge...she, Beate Johns (an amazing artist and stamper)posts the sketches on her blog on Fridays. Beate is a Stampin' Up! Demonstrator too, so she always has great samples using SU! supplies. She always has some cool sketches, so I decided to give it a shot. This is Beate's Weekend Sketch Challenge #14.

I needed a wedding card, so I tried to go somewhat elegant. I, again, didn't have a Bravo Burgundy Craft Ink pad (pretty typical since I only have a few), so I did it the cheater way. First ink your stamp in Versamark and then without stamping the image, ink it with desired Classic ink color. Then stamp the image and emboss like normal. Works pretty well. I had a hard time figuring out what to do with the Hodgepodge Hardware squiggly clip, but I finally managed to tie a bow around it. I knew I wanted something else there besides just the bow and I like how it turned out. I realized though that I need the next circle punch up from what I have...I had to cut the Bravo Burgundy circle by hand. What do ya think! Only problem is the card is going to my co-worker, a boy...not many girls in engineering, so he probably will look right past the beauty of my creation. Oh well!!

The Engineering Details

Stamp Sets: Heartfelt Thanks, Wonderful Words

Inks: Sage Shadow, Bravo Burgundy, Rose Red, Versamark

Cardstock: Sage Shadow, Rose Red, Bravo Burgundy, Whisper White

Accessories: Hodgepodge Hardware - Pewter, Burgundy Grosgrain Ribbon, 1-3/8 Circle Punch, 1/16" Circle Punch, Dimensionals, Glue Dots (to hold ribbon on)

Sunday, August 12, 2007

Choose Your Family Promotion

Have you ever, and I mean ever, thought about becoming a Stampin' Up! demonstrator? If you have, NOW is the time to join!

Between Grandma Louise (who drips with sweetness) and your oh-so-suave brother, Vic, you know that in life you can't choose your own family. But at Stampin' Up!, we've found a way to bend the rules so you can!

Purchase the Starter Kit between August 10 and September 30, and you'll get to pick the family of your choice-color family, that is-of Classic Stampin' Pads® FREE. That's a $57.95 value! And we've designed our exclusive coordinating color families (including our In Color collection) so that every color fits in. After all, it's all in the family!

If you would like to know more, please contact me! I would love to have you in my family!

A Birthday Gift

My neice had a birthday in July and she is getting to an age where buying gifts for her is becoming difficult. You know, the time when you can't buy them the fun toys anymore becuase they are starting to outgrow them. Back in February, I went to one of her gymnastics meets (unbelievable how flexible this girl is!) and took a bunch of pictures of her. So I thought I would frame some of th good ones for her. Anyway, I totally didn't even intend on stamping the mat, but all of the sudden in dawned on me that would be cool. So here it is! Pretty simple and totally pink! I was pretty happy with how it turned out and she really liked it. Check out the hold in the bottom picture...probably one of the reasons she got 1st place in her age group for the balance beam at that meet!

Engineering Details


Stamp Sets: Polka Dots & Paisley

Cardstock: Rose Red, Whisper White

Inks: Rose Red, Regal Rose Marker, Rose Red Marker, Versamark

Accessories: Silver Brads, Silver Embossing Powder

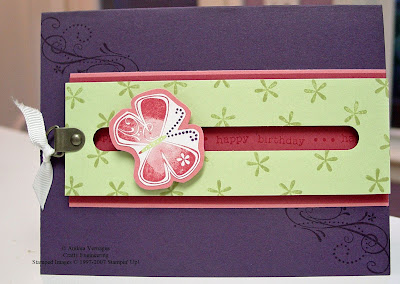
To go with her gift, I made a really cool card! I made a Spinner card and it is so fun! The butterfly spins as you tilt the card side to side. It is irresistable to even adults once they see what it does! Oh and this was made with the new Priceless set...I totally love this set! When I got it for some reason I wasn't sure I totally liked it but it seemed to be of the style that seems popular right now. But now that I have used it, I have fallen in love with it! So you may be seeing more of it here. If you would like to try a spinner card, you find directions at SplitCoast Stampers (awesome site by the way) here.


The Engineering Details

Stamp Sets: Priceless, Everyday Flexible Phrases

Cardstock: Elegant Eggplant, Regal Rose, Rose Red, Gable Green

Inks: Elegant Eggplant, Regal Rose, Rose Red, Gable Green (markers of all as well)

Accessories: HodgePodge Hardware - Pewter, White Grosgrain Ribbon, Dimensionals, Pennies

Monday, August 6, 2007

A Photo Book Fit for a Dad

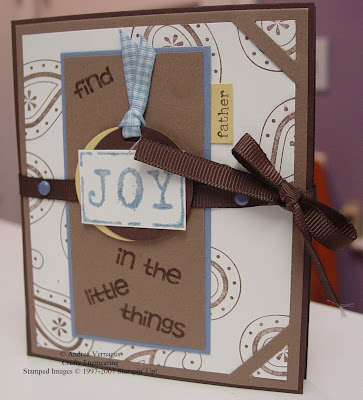
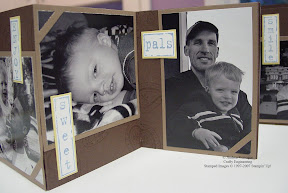
Why is it that stamping something for men is so difficult! I struggled with this one for a long time. I had a few customers that requested that I put together a photo book for a Father's Day Gift. Obviously I am not very timely about showing it, but I just got started with this blogging thing just recently. Anyway, I had many iterations of this photo book and I am pretty happy with the end result. I had a stamp camp in June for people to make this book.

The first two photos are the front and back of the book. The front is stamped and embellished and I inked up my son's hand to get a hand print on the back. He walked around with a brown palm for a bit, but he was fine! The Joy on the front was embossed. We actually did it the cheap way (without a craft pad). Since I don't have a lot of Craft pads, we just inked the stamp with Versamark first and then ink it with the color of ink desired. Stamp the image and emboss like normal. Makes it easy to get nice colors for the embossing without owning all of the craft pads.
I had originally started the front without the Brocade Blue cardstock on the front, but found once it was added, that it finally felt complete.

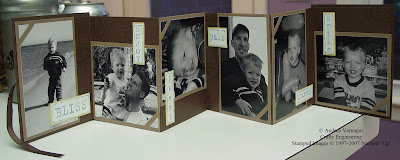
The pictures below show the inside of the photo book. It is an accordion fold book that is great because my husband can stand it up open on his desk at work. Who wouldn't want to have that cute little boy staring back at you all day?!

Since I did this book for a stamp camp, I have directions typed up, but I am not sure how to post documents yet....so just email me if you want the directions. Unfortunately, it does not include pictures, but it is a step-by-step type of directions.


Wednesday, August 1, 2007

One of my Favorites


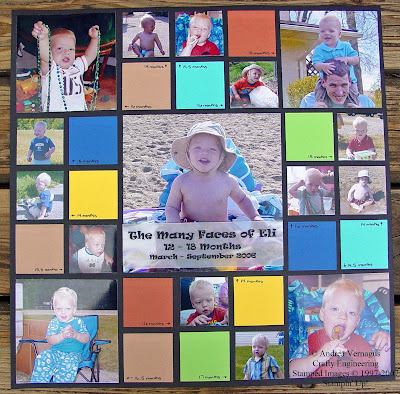
As I try and fill my galleries with stuff I have done, I thought I would talk about them as well. This is one of my favorite scrapbook page layouts...and it is so simple! You have probably noticed there is no stamping on the page...I felt anything would detract from the pictures on the page...and aren't they the cutest?! That is my little man, Elijah! I have done one of these pages for certain timeframes of his life: 0-3 months, 3-6 months, 6-9 months, 9-12 months, & 12-18 months. I plan to do 18-24 months and then one for every year: Age 2, Age 3, etc. The layout is great because you can move the squares around to give each page a slightly different feel. Plus the colors I use change each time based on the colors in the pictures. These are all pictures I treasure, but I didn't feel they warranted a whole scrapbook page on their own. Plus if I scrapbooked each of these pictures separately, he may never get this scrapbook. Bad enough it probably won't be done until he is 30! Not sure what will happen when a second kid comes along! Oh well, as long as I am having fun, right? No real Engineering Details on this one. All cardstock is Stampin' Up! I got the font from Simply the Best Fonts...one of the free font download sites I use. See the "Places to Visit" section for others I have found.

Stamping Studio vs. Area

O.k. I would post some pictures of my stamping area...well my side of our family room in our walk-out basement...but alas it is quite messy! I know shocker or shockers....the engineer has a messy, disorganized area. Wait scratch that...it isn't disorganized. I know where everything is in that mess! LOL! I do like some of my organizing, so if I do get it cleaned up, I will post some pictures of it. But to inspire you, and I mean majorly inspire you....actually make you so jealous you can hardly stand it, I wanted to share with you a link to another blogger's stamp room. Nichole Heady has possibly the most amazing stamp room I have seen! As that engineering side of me comes out and I see the pictures of her room, I want to reorganize my little area and make it half as beautiful as hers. Anyway, check it out: Nicole's Studio. Hope that you can be inspired as well. Now get organized!

Monday, July 30, 2007

A Scrappin' Good Time

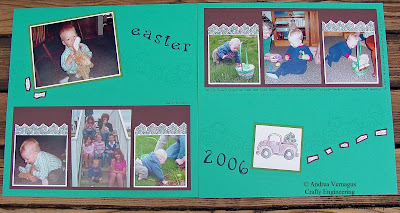
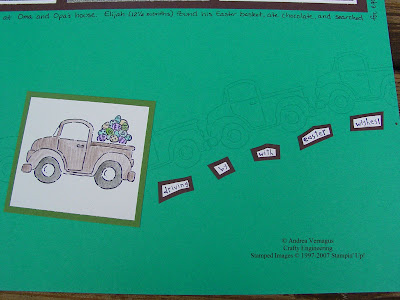
Like we do once a month, a few of my girlfriends got together a couple of weeks ago to scrapbook. We don't always get a lot done, but we have a great time anyway. I thought I would show off the double page spread I got done. I was pretty pleased with it, except for as always, I am not a huge fan of my handwriting! :) Oh well! The colors didn't come across the best, but I tried to adjust the picture to get the colors right. I really love the Loads of Love set and it wasn't until I was almost done that I realized I could formulate the "driving by with easter wishes" sentiment from the word stamps in the accessories set. Love it!


The Engineering Details


Stamp Sets: Loads of Love, Loads of Love Accessories, Quirky Alphabet (Retired)
Cardstock: Taken with Teal, Chocolate Chip, Garden Green, Whisper White
Ink: Basic Black, Versamark
Other: Stampin' Pastels, Blender Pen, Scissors


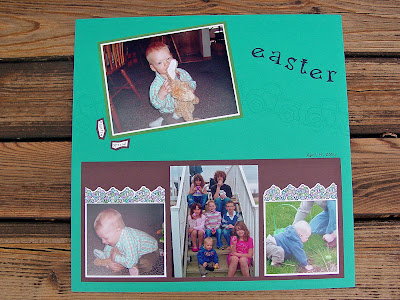
Here is a little bit more detail of the truck area and the sentiment. I am hoping to get more of my scrapbook creations uploaded...but alas time is not in my favor. Oh and one word of note...since these pages are part of my son's scrapbook (that he may get when he turns 30...that is if it is done), so I don't always stick to Stampin' Up! products only. Some embellishments and such are stuff I pick up in random places. I will try to note that in future posts.
Sunday, July 22, 2007

Recent Cards

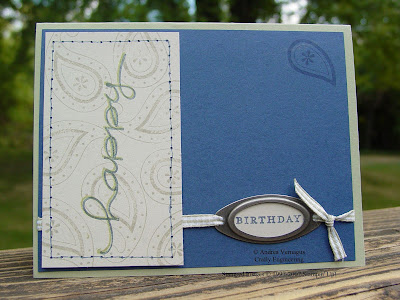
I had to make a few cards prior to the weekend due to a lot of family birthdays, anniversaries, etc. I made this one for my Dad...I always have the hardest time making male cards. It turned out pretty good. I used my sewing machine to punch the holes for the faux sewing around "Happy". I love the HodgePodge Hardware, but I do struggle finding the right spots for it, but I was pleased with how it turned out.

The Engineering Details

Stamp Sets: Happy Everything, Polka Dots & Paisley

Ink: Mellow Moss, Night of Navy, Sahara Sand

Paper: Mellow Moss, Night of Navy, Sahara Sand
Accessories: Pewter HodgePodge Hardware, Moss Gingham Ribbon
Supplies: Sewing Machine
Technique: Faux Sewing


~~~~~~~~~~~~~~~~~~~~~~

Then I also made this one for my Sister's birthday. I love, love, love these sketches sets! The color combination feels a little odd, but I like how it turned out. This set is actually on the Dormant List which means it is not shown in the current catalog but is still available for purchase. If you want to see the other sets on the Dormant List, check out the Link under my Stampin Links Section.

The Engineering Details
Stamp Sets: Summer by the Sea, Canvas
Ink: Basic Black
Paper: Creamy Caramel, Not Quite Navy, Cameo Coral, Very Vanilla
Accessories: Creamy Caramel Eyelets, Stampin' Pastels
Supplies: Blender Pen

How about seeing some cards?

Well this is my first real post regarding something I have made. I have not placed an order from the new SU! catalog and with the huge retired list, I only have a limited number of active stamp sets! I have a wish list now that is way too long that I have to prioritize. Anyway, I wanted to show a card I made for Thank you cards from my son's 2nd birthday (still can't believe he is 2 already!) that was back in March. It uses a swirl technique that was kinda fun to try. It uses current stamp sets (oh boogers...I used a retired wheel on it to get the swirl pattern...oh well)...okay almost all current stamp sets. Hope you like it!

The Engineering Details

Stamp Sets: By Land, Twinkle Wheel
Ink: Ruby Red, More Mustard, Basic Black
Paper: Ruby Red, More Mustard, Basic Black, Whisper White
Accessories: None

Tuesday, July 17, 2007

More About Me


For a significant chunk of my life, I lived in the engineering world (Mechanical Engineer to be exact), but now my kind of engineering is just a wee bit different. Now, I am a Stay-at-Home Mom to two wonderful (on most days) children and a wife to my amazing husband. My husband, Kevin, and I met in High School...yes, High School...and have been together ever since. We have two kids, Elijah and Adilane, and one fur-child, Alex. The kids bring us such joy and some frustrations (which I tend to talk about on my blog...my sort of therapy, I guess) and we couldn't be happier! In addition to my crafty side, I also get involved with my church's music ministry. I have done music with the Sunday School children, helped organize Christmas Programs, and sing weekly with the Praise Team band.

I was introduced to stamping in 1998 when a friend and I took a stamping class at a local craft store. From that I decided to make my Christmas cards (and have ever since), but I didn't really get obsessed until I joined Stampin' Up! I was a Hobby Demonstrator for a little over 7 years where I held stamp camps and classes in my home and did the occasional workshop. The best part about it was getting new stuff without my husband knowing...it was all for the business!! Once I got to a point of not being able to make the quarterly minimums with my current amount of effort, I decided to step away. Now I dabble with all sorts of stamps, paper, etc and keep my new purchases a little sparser...afterall my husband now can see how much I spend!

My style is fairly simple, organized, and usually symmetrical (the engineering side of me) . I sometimes break out of that mold to the amazement of myself. I love learning new techniques and finding new projects to make. While stamping cards is the biggest part of what I work on, I have found joy in scrapbooking a books for my children. They may not actually get their books until they are 30 or so (it will take me that long to finish it), but I will love every minute of it. Occasionally, I will make 3-D projects, altered items and the yearly birthday cakes...so I hope you find a little inspiration here in my kind of engineering!

By the way, if you like the little cartoon representing me, you can make your own at www.blessthischick.com. Have fun!
Related Posts with Thumbnails