Pages

Tuesday, June 30, 2009

Heartfelt Inspiration?

So I am sitting here in complete silence...besides the roar of my computer's fan which keeps reminding me that I need a new computer (they aren't suppose to sound like they are going to take off, right?!). My lovely Mother-in-law has taken both kids for the night...and my parents are taking them later this week for two nights. Ahh silence...it is a wonderful thing sometimes. Probably, though, by the end of the week, I will be looking for those voices again! But I will admit I am excited for Date night with the hubby tonight!!

So I honestly wasn't sure I should show this card...I am not entirely sure I like it. I like pieces of it, but I there is something about how it went together that I am having an issue with. t was very late when I made it, so I probably rushed it. I think there is too much middle space or something...maybe if it was a square card it would work better. Anyway, I thought I would post and maybe somebody can garner some inspiration from some element of it.

So this is a Get Well Soon card for my Mom. She is having cataract surgery on one eye today...this should get to her today and plus I need to remember to call. She was very nervous about this, but believe me when I say she NEEDED this...I swear she was barely able to see! I used Heartfelt Thanks (still sad it is retiring, but it won't leave my collection) and I actually came up with the layout on my own (may have been part of the problem...hehe). I broke out two of the new In Colors: Melon Mambo and Soft Suede. Did I mention that starting July 1, you can order from the new catalog! And the In Colors also come in markers for the first time!! Anyway, stamped the flower and then added some Sweet Pea Flower Soft on top. Call me crazy, but I actually picked the specs of dark green off of my flower...I didn't want that color included! The same flower was Versamark stamped on the piece of Melon Mambo cardstock. I went for a tailored bow with the Certainly Celery Poly-twill ribbon (SAB ribbon bundle) and lastly added some rhinestones. The more I look at it the more I think this layout could be good in a square form...maybe I will try it again sometime!

Well that is all for me...need to try and get something done during my kid-free time...but first an uninterrupted shower!!! Thanks for stopping by my engineering world!

The Engineering Details
Stamps - Heartfelt Thanks; Paper - Soft Suede Textured, Melon Mambo, Certainly Celery, Whisper White; Ink - Certainly Celery Marker, Soft Suede Marker, Melon Mambo Marker; Accessories - Certainly Celery Poly-Twill Ribbon, Circle Nestabilities (Spellbinders), Sweet Pea Flower Soft (Flower Soft), White Gel Pen, Scallop Edge Punch, Clear Self-Adhesive Rhinestones (Me & My Big Ideas), dimensionals

Sunday, June 28, 2009

Daisy Sunset

Well I hope everyone had a lovely weekend. We have had beautiful weather here in Michigan, maybe a tad warm, but great nonetheless. We took the kids for a bike ride to a local SummerFest that was going on in a nearby town, hit some garage sales in our neighborhood (my son loves to buy things!), visited some friends, and still managed some time to relax! Plus I got a little stamping time in...yeah me! Hoping for a little bit more tonight too!

So I needed a birthday card for a friend of mine and I still had not participated in this week's Mojo Monday Sketch #92, so I went to work. I have been browsing SCS for ideas for future stamp camps and classes (getting some great ideas from fellow demonstrators on SCS!) and found the brayered sky technique. I have seen this many times before and always wanted to try it, so I gave it a go! I went more for a setting sun than a moon at night, but i love how it turned out...plus a new color combo for me was born and I may have to use it again! The colors just went together for such a rich, vibrant look...but kind of soothing at the same time! I can't really say that I followed the sketch very well...I would say I was inspired by it! I think I have most of the elements, just kind of positioned differently.

I kept it pretty simple since I really wanted the sunset part to stand out. Probably could have added some embossing to the Ruby Red piece, but I like it on the simple side. Finally added a little Fire Rhinestones for a little bling.

I got my first order of new SU! stuff, so I am excited to get to using them. The new In Colors are awesome and I am so happy they are offering a marker set in the In Colors! Thanks for stopping by my engineering world!

The Engineering Details
Stamps - Upsy Daisy; Paper - Elegant Eggplant, Ruby Red, Summer Sun, Glossy White; Ink - Summer Sun, Ruby Red, Elegant Eggplant, Versamark; Accessories - Brayer, Circle Nestabilities, Sponges, Fire Circle Rhinestones, Scallop Edge Punch, Basic Black 1/4" Grosgrain ribbon, Black embossing Powder, Heat Gun, Dimensionals

Thursday, June 25, 2009

Workshop Cards

I haven't gotten to much stamping yet this week. I finally got my daughter's 1st birthday thank yous done and mailed out, so that felt good. I was waiting to send them until I had her 12 month pictures to include in them...well silly me never took the time to put them together prior. So when I finally got the pictures back, I still had to make them, write in them, and include the pictures. Oh well, all done now, so hopefully I can get some stamping in. I believe my SU! order is coming tomorrow, so maybe it will be with new stuff...yippee!!

So last week I tried my first Mystery Hostess Workshop. It didn't go over as well as I had hoped it would, but I have not given up on it completely...yet. I figure I will try it one more time. The good news was that I didn't need to buy my entire quarterly minimum to remain active...just some of it. Anyway, back to the subject at hand. These are the two Make-n-takes that I had the ladies do. The first one was mainly the puffy box in which the directions I found on SCS. A cute little box that wasn't too terribly difficult to make. We stamped a full 8.5 x 11 sheet of cardstock though, so I decided to cut up some of the leftover from the box to make a matching square card. I thought it turned out nice and I loved the color combo: Old Olive, Elegant Eggplant, and Cameo Coral.


The second card that they made was meant to teach them how to watercolor with SU! markers (a new found love of mine!). The ladies loved the technique of watercoloring! Too bad I am a sucky demonstrator sometimes and used a set that I believe has been retired since January! What was I thinking?! Seriously I feel like I missed the whole 2009 Spring/Summer Catalog. I totally thought the Summer by the Sea set was just on the Dormant list, but when one of the ladies actually was interested in buying it, I quickly found it nowhere and realized it must have retired prior to that catalog. Bad demonstrator, bad! Oh well...I love this set, so it will not leave my collection, but it does now have one of my bright dot stickers on it to remind me that it is indeed retired!

Both cards are very basic, so nothing much to say about them. Hoping to get the current Mojo sketch done this week...we will see. OH did I tell you....I WON! OK it was a random draw, but I still WON! Verve Stamps was doing a Guy themed Project Parade and all you had to do was link a guy themed project of your own. So I did and myself and another blogger (in a crazy coincidence I "met" her the day before) won a Verve Stamp Set. I love Verve Stamps so I am excited to choose the one I want. Thanks for stopping by my engineering world!

The Engineering Details - Puffy Box & Card
Stamps - Eastern Blooms, Upsy Daisy; Paper - Glossy White Cardstock, Cameo Coral, Elegant Eggplant, Old Olive; Ink - Cameo Coral, Elegant Eggplant, Old Olive, Whisper White Craft; Accessories - Old Olive grosgrain ribbon, dimensionals

The Engineering Details - Watercolor Boat Card
Stamps - Summer by the Sea; Paper - Watercolor Paper (Walmart), Close to Cocoa, Creamy Caramel, Ballet Blue, Ruby Red; Ink - Black Stazon, Close to Cocoa Marker, Creamy Caramel Marker, Ballet Blue Marker, Ruby Red Marker; Accessories - Watercolor paintbrush, Dimensionals, Paper Piercer, Mat Pack

Sunday, June 21, 2009

Let Freedom Ring


I separated this post from my last post...it felt weird putting a card with my Mini Dessert Burgers. So since I did all of my chit-chat in that post, I will get right to the card.

My brother is currently on a 365 day assignment in Qatar (did I spell that right?). While he is not on the front lines or immediate harm's way, he is still sacrificing for his country in my opinion and this is the closest he has been to the "action". He and his wife have to live apart for a year...this is considered a short assignment, so spouses are not allowed. That would just plain suck! Anyway, my son and I put together a care package for him filled with cookies, pictures, artwork, and just the utmost of fabulousness to send to him. This is the card that I included in the package. And would you believe, my brother even told me how much he liked the card and is displaying it on his desk! I felt extremely honored!

The paper, no idea the manufacturer, is from JoAnns...it is the cheap thin stuff, but I liked the print and colors. The stamped images are from the Studio G dollar acrylic stamp sets. I picked up like 3 of them the last time I was there! Everything is fairly basic here. I used the Splitcoast Stampers Sketch Challenge #229 for the layout. I must be getting tired because I cannot think of anything else to say. So with that, I will close...should probably get to work on my daughter's thank you cards...ugh!

The Engineering Details
Stamps - Studio G; Paper - Bravo Burgundy, Night of Navy, Very Vanilla, Patterned paper from JoAnns; Ink - Night of Navy, Very Vanilla Craft, Bravo Burgundy Marker, Night of Navy Marker; Accessories - Star brads (Oriental Trading), Burgundy Hemp twine (?), dimensionals

Father's Day Fun


How about some yummy burgers? What?! Do those leaves look a bit too bright green?! Well that would be because they are not hamburgers, but mini dessert burgers! I saw these on another blog and found the recipe HERE and decided that they would be a fun thing for my son and I to make for Father's Day. I despise coconut though (which is what the recipe called for to make lettuce), so we just used green frosting with a leaf tip. Eli just thought it was so funny that we were going to eat "burgers" for dessert! My husband was actually nervous to eat them because the burger, ketchup, and mustard look so real. The bigger picture gives you a better picture of the actual size of them...think vanilla wafer size...that is what makes up the "buns".


Well I hope all of you had a nice Father's Day...or at least were able to make those Dads feel special. My husband got treated very well today...I even mowed the lawn for him! He has been traveling all week and the lawn was getting crazy out of control, so he said he was going to mow it today...well I can't let him mow it on Father's Day...so I got out there and did it. I probably looked pretty funny because I am not used to driving the riding lawnmower...I was a bit jerky! The highlight of my husband's day was having the kids see his hockey game and he scored 2 goals (something he says that he hasn't done in awhile).

Now I will leave you with a cute pic I took of me and Eli...love that kid! I will have a card post in a bit. Thanks for stopping by my engineering world!


Thursday, June 18, 2009

Branch Out Father

Did Father's Day kind of creep up on you like it did to me! I feel so behind! I usually like to do something special for my husband from the kids, but I am running out of time! I have one idea that I have seen online that I plan to do, but man I feel really unprepared! Oh well. I did at least remember to get my Father's Day card out to my Dad in time though...in fact it may be a little early...yea me!

So this is my Dad's Father's Day Card. I used the current Mojo Monday Sketch Challenge #91 for this. I love the Branch Out set...something about that tree that just brings peace to my heart. I chose to pull out some of the patterned paper from the To the Nines Collection. The tree was stamped in Chocolate Chip ink on Sahara Sand cardstock and the leaves were generation stamped in Always Artichoke. To give the card a little extra pizzazz, I added the little birdhouse in Only Orange (not a color I use very often). I really like the bright color that the little bit of orange added to the feel of the card because the To the Nines DSP is a little subdued. Then of course to make that birdhouse a little more of a focal point, I added a nice white dot at the opening with my white gel pen and some Orange Peel Stickles. The distressed edges give it that manly feel even though it has sparkle and ribbon...well at least that is how I justified getting sparkle and ribbon on a guy card! :) The last thing I added was the orange and white striped brads that I happen to have on hand. They are K&Company brand bought awhile ago.
Well that is all for me...I need to get a little better prepared for my stamping event Friday night. Thanks for stopping by my engineering world!

The Engineering Details
Stamps - Branch Out, All Year Cheer II; Paper - To the Nines DSP, Sahara Sand, Chocolate Chip, Only Orange; Ink - Chocolate Chip, Always Artichoke, Only Orange; Accessories - Chocolate Chip Taffeta Ribbon, Orange Peel Stickles, White Gel Pen, Brads (K&Company), dimensionals
Simple Father's Day


My local customers have already seen this as I have a class for it on Friday night! But I thought I would share here as well. It is a simple photo holder that I altered and a matching card. I simply took a photo holder from JoAnns (2 for $5 bins), popped off the embellishments they had glued on, sanded it down, and adhered some DSP to the sides. This is using the To the Nines DSP from Stampin' Up!. Then I used some chipboard and corduroy button (why have I lived so long without these...they are awesome!) to decorate one side of it. Pretty simple, but I think with a pic of the kids, will make a nice decoration on his desk at work (or at home!).

For the matching card, I just took strips of the same DSP, the punched out chipboard star, and a corduroy brad to get a complete card. Like I said, very simple, but it works!

Sorry not much else to say today...feeling kind of yucky...not a cold, just my body adjusting to post-breastfeeding life (yup, my baby girl is officially weaned!)...way too much information! Sorry about that!

The Engineering Details
Stamps - Everyday Flexible Phrases; Paper - To the Nines DSP, Sahara Sand, Chocolate Chip; Ink - Always Artichoke, Chocolate Chip; Accessories - On Board Essentials Chipboard, Chocolate Chip Corduroy Buttons and Brads, Chocolate Chip Taffeta Ribbon

Friday, June 12, 2009

Butterfly Sympathy

This will be a quick post.  I am trying to get packing for a weekend camping trip and I have barely started yet.  We were dealing with a death in the family and had all of that stuff to deal with this week, so packing got put to the wayside!  Oh well...busy day today.  

I needed a sympathy card for my husband's Aunt...it was her husband (my husband's Uncle) that passed away, so I decided to face the Mojo Monday Sketch #90 head-on...this one intimidated me a little bit.  Probably because it is not something I would probably ever put together on my own!  But that is what sketch challenges are all about.  

I found the sentiment in the Verve Stamps Beautiful You set to be fitting.  I don't think it was what was intended for the sentiment, but it struck a cord with me that it seemed fitting for a death...the caterpillar being our physical bodies here on earth and the morphing into a butterfly being what could be viewed as our death, but really being our reunion with God in heaven.  Like I said, not sure that is what was meant by it, but I liked the thought.


I used the DSP Parisian Breeze from Stampin' Up!...I like the Specialty Designer Paper.  This was my first time using it...it is heavier weight and has a nice texture to it!  The butterfly was taken from an old retired set, Botanicals.  I finished that butterfly off with some Crystal Effects just to make it pop a little bit more.

Well not sure there is much else to say...have a great weekend!  Off to pack!


The Engineering Details
Stamps - Beautiful You (Verve Stamps), Botanicals; Paper - Parisian Breeze DSP, Chocolate Chip, Baja Breeze, Whisper White; Ink - Chocolate Chip, Baja Breeze; Accessories - Circle and Scallop Circle Nestabilities, Chocolate Chip Taffeta Ribbon, Ticket Corner Punch, Crystal Effects, dimensionals

Friday, June 5, 2009

Fishy Mojo

Finally got around to trying my hand at the current Mojo Monday Sketch Challenge (it's a contest week!), MOJO89, but I got a small stamp camp project done (show that later).  I can get a lot of "crafty" things done when my husband is out of town, but I stay up WAY too late!  Oh well.

So I recently took advantage of the buy 3 get one free paper deal that SU! had last month and actually have some patterned paper on hand.  So knowing that I was making a card for a birthday boy, I chose the Rainbow Sherbert DSP and pulled out an oldie, but goodie:  Fishy Friends.  I stamped him in Basic Black and then colored him with a blender pen and ink pads in colors from the Rainbow Sherbert collection.  Knowing that it is a contest week at the Mojo Monday blog, I wanted to make my fishy a little extra special, so I cut extra fins for him and attached them so they are coming out of the paper (see the detail shot) and added some sparkle...fish sparkle right?  I love how he is 3-dimensional!  


My bigger challenge came for the embellishment aspect of the sketch.  I don't have anything that goes with the fish, besides more fish, so I found this polka-dot circle in a Blooms and Stalks set by Sassafras Lass and thought that might work.  I stamped it in Apricot Appeal (added stickles, of course), layered it on a circle of Gable Green and then on a larger circle of Green Galore.  My final addition was to add the circle of triangle turquoise eyelets (way long ago retired from SU!), which made my day since I don't use them very often!  Oh and the sentiment is from the Very Punny set that was an SAB set a couple years ago. 

Most likely all of this was way over the top for a 5 year old, but his Mom will appreciate it!  Thanks for stopping by my engineering world!

The Engineering Details
Stamps - Fishy Friends, Very Punny, Blooms N' Stalks (Sassafras Lass); Paper - Rainbow Sherbert DSP, Gable Green, Green Galore, Tempting Turquoise, Whisper White; Ink - Gable Green, Green Galore, Tempting Turquoise, Apricot Appeal, Basic Black; Accessories - Apricot Appeal grosgrain ribbon, Tempting Turquoise Triangle Eyelets, 3/4" Circle Punch, 1-1/4" Circle Punch, Crop-a-Dile, Diamond Stickles, dimensionals

Tuesday, June 2, 2009

Birthday Fairy


So I cheated a little for my daughter's birthday...if you missed all of the creations (cards and cake) and the pictures of my sweet Adilane check out this POST.  Anyway, I created this card for her...but I created it a few days after her party and about 1 week past her birthday!  I wanted her to have a card from us for keepsake purposes, but I ran out of time before her birthday and party to make it.  Oh well, she will never know right?!

I used the Birthday Lauren fairy from Paper Makeup Stamps...have I expressed how much I love these fairies!  Anyway, I stamped her on watercolor paper with black Stazon ink and watercolored her using SU! markers and a watercolor brush.  Once she was all dry, I added some Diamond Stickles and Cotton Candy Stickles to give her wings and the present a little sparkle...a fairy has to sparkle in my opinion!  The color combo is the same that I used for her birthday party invitation and thank you cards.  The layout is based on a layout provided during the last Verve Stamps Release found HERE.  I really like how the one rounded corner of the main image just added that extra something...can't really explain it, but I like it!  

Since the watercolor paper I have (any suggestions out there for some...I haven't tried SU!'s yet...mine is just some I got at JoAnns) is not really white, I used a strip of it (instead of regular white cardstock) under my strip of Rose Red cardstock.  The sentiment comes from the Women of Life set by Papertrey Ink.  The only other thing special I did was apply some of the Cotton Candy Stickles to my 3 Rose Red brads.

That all for me for now.  I am hoping to try the current Mojo Sketch tonight and then also get a class/workshop prepared.  I am dangerously close to hitting pending status as a demonstrator, so I think I may try holding a Mystery Hostess Workshop at my house later this month, but I need to come up with some stuff for that.  Have any of you done this type of workshop?  I may also add a small project (that they would have to pay for) in addition to regular workshop make-n-takes.  Here's hoping I meet my sales requirement before the end of the month!

Thanks for stopping by my engineering world!

The Engineering Details
Stamps - Birthday Lauren (Paper Makeup Stamps), Women of Life (Papertrey Ink); Paper - So Saffron, Rose Red, Certainly Celery, Watercolor Paper; Ink - Black Stazon, Rose Red, Certainly Celery, Rose Red Marker, So Saffron Marker; Accessories - Rose Red Brads, Diamond Stickles, Cotton Candy Stickles, Scallop Edge Punch, Corner Rounder Punch, Paint Brush, dimensionals

Monday, June 1, 2009

Flower Birthday


Well I will warn you that this post may make you faint from all of the adorable cuteness I am going to show you...ok that is just my not-so-humble biased opinion!  I will try and put the actual crafty stuff up front so if you really don't want to see the cuteness, you can skip it...but really, why would you when I am talking extreme cuteness!  

So two weekends ago (wow has it already been that long!) we celebrated my daughter's 1st birthday.  I have been admiring the Women of Life set from Papertrey Ink for awhile, so I decided to get it and make by daughter's birthday around it.   So first up is the invitation.  Pretty sure that I did not use a sketch challenge for this, but honestly I use them so much, I am not sure!  The color combo (Rose Red, So Saffron, Certainly Celery) was what I put together to get a spring feel to the invite.  I scalloped the bottom strip of Certainly Celery to give it a grass feel for the flowers.  I popped up one of the flowers (actually made it bigger than the others) and added a "1" to it.  I then printed the inside with all of the party details...btw, anyone have any recommendations of printers that will easily print on cardstock?  I have to print mine a half of a page at a time and even then I still get jams!  

The Engineering Details
Stamps - Women of Life (Papertrey Ink), Dot Alphabet (bought at WalMart); Paper - Rose Red, So Saffron, Certainly Celery, Basic White (Papertrey Ink); Ink - Rose Red, So Saffron, Certainly Celery, Basic Black; Accessories - Swiss Dots Cuttlebug Embossing Folder, Scallop Edge Punch, So Saffron 5/8" Grosgrain ribbon, dimensionals


I recently created the thank you card that I will eventually be sending out...I want to include my daughter's 1 year pictures which have yet to be 
taken (huge GASP from anyone that knows me...I cannot believe I am this late either...I am so the type that gets these pictures taken as close to the actual birthday as I can).  Stuck with the same color combo and elements, but just went with the one large flower with "Thank you" over it.  For this one I did use a Mojo Monday Sketch Challenge for the the layout:  MOJO88.  I created a little background paper with the extra leaf stamp in the Women of Life set on the Certainly Celery behind the flower.  

The Engineering Details
Stamps - Women of Life (Papertrey Ink), Noteworthy (retired); Paper - Rose Red, So Saffron, Certainly Celery, Basic White (Papertrey Ink); Ink - Rose Red, So Saffron, Certainly Celery, Basic Black; Accessories - Swiss Dots Cuttlebug Embossing Folder, Scallop Edge Punch,Certainly Celery 5/8" Poly-twill ribbon, Circle and Scallop Circle Nestabilities, Ticket Corner Punch, dimensionals


For the actual party, we had about 14 kids or so ranging in ages from 6 months to 13 years old.  So I tried to come up with a craft that all of them could potentially enjoy (well except for the babies...they just don't have that coordination thing down yet!).  

I had them paint small clay pots and then go through the activity of planting a flower in their pot.  I later tied a ribbon and a name tag to their pots.  My Mom helped me pre-paint the 4 babies pots since they were not going to be painting.

It turned out good and I think the kids all had fun with it...now I just hope that all of the flowers survive...mainly the two for my kids...I so do not have a green thumb!! 
O.k. so now on to the cake for the party...don't worry the extreme cuteness is yet to come!  I really do love to decorate my kids cakes and I love it even more when it coordinates with the invitation or theme of the party.  For Adi's cake, I tried to use the invitation as my inspiration.  It turned out pretty much like I envisioned it...the flowers on the side of the cake were a bit of a challenge and they could definitely be better.  I used a really large tip for them and I could get a really pretty flower if I was doing it vertically, but for some reason trying it horizontally just 
did not want to work real well.  Oh well, this is probably where practice makes perfect right?!  


The color red on the cake was the only other issue I had...I really wanted it to be the color Rose Red like the invite, but after a whole bottle of one color and some additions of other colors, I just could not figure out how to get there...felt like I needed a color degree or something to know what drop of color would get me Rose Red from the color I had.  It was definitely pinky-red, but just not quite the right shade...something only I noticed I am sure!  The side view of the cake shows the not-so-great flowers that went around the whole cake.


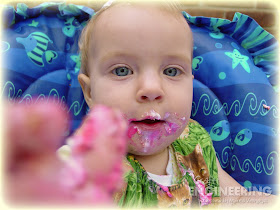
Now you can see the extreme cuteness that is my adorable daughter...again in my not-so-humble biased opinion.  So the first picture shows her with her cake...I love the look on her face...kind of a look of concern (like what is happening) and kind of a look of disbelief (you are setting that in front of me?!).  She didn't blow the candle out and I did not leave the whole cake in front of her in case you were curious!  We cut off a piece of the cake and let her go to town.  


She quickly went to this (frosting anyone?):


And this:


And this (yes she actually did touch my camera...she was quicker than I thought she would be!):


Ok pick yourself up off of the floor after fainting from the extreme cuteness so I can leave you with some extreme sweetness.  Happy Birthday once again to my sweet Adilane Rose!  Thanks for stopping by my engineering world!